

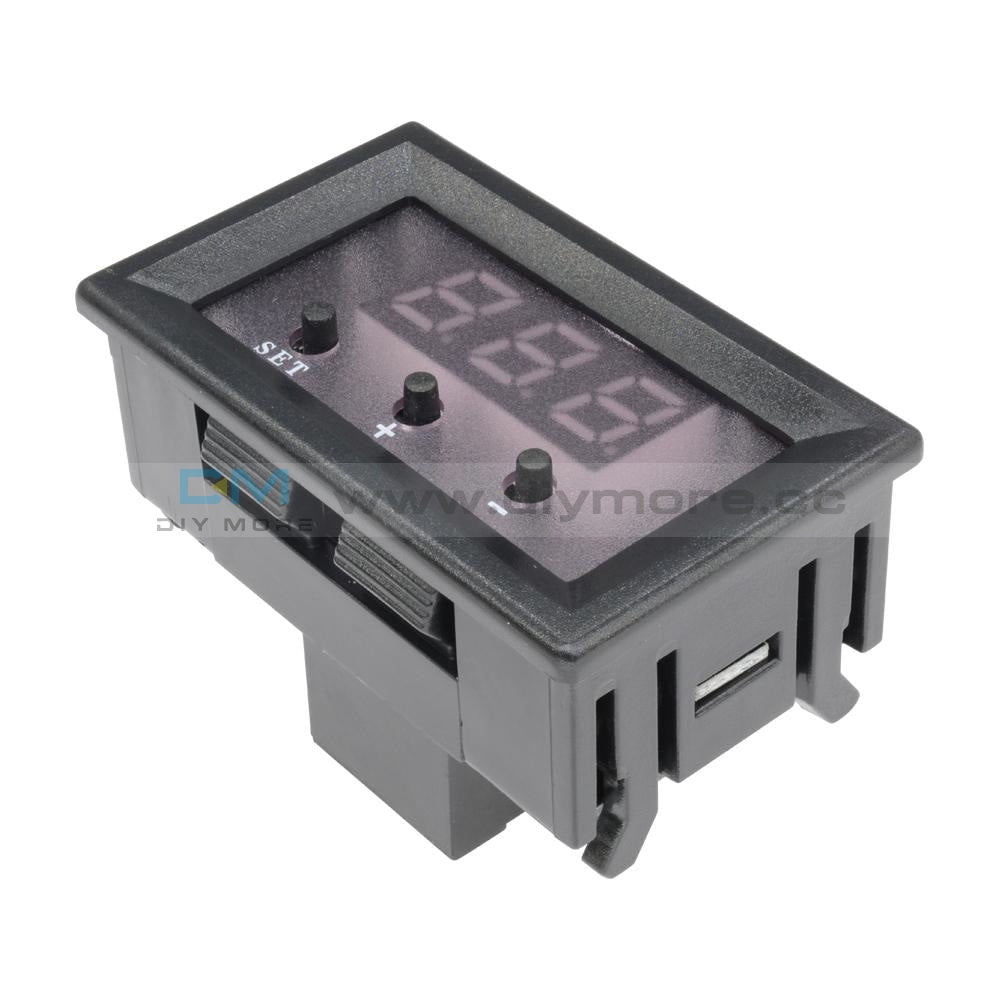
W1209 -50-110°C 12V Thermostat Digital Temperature Controller Switch Sensor

W1209 -50-110°C 12V Thermostat Digital Temperature Controller Switch Sensor
SKU:012697- guaranteeQuality checked
- Special gift cardsSpecial gift cards
- Free return Within 60 days
- Consultancy86-0755-85201155
- Wide temperature control range: -50 to 110℃(-58℉-230℉); High accuracy: 0.1℃.
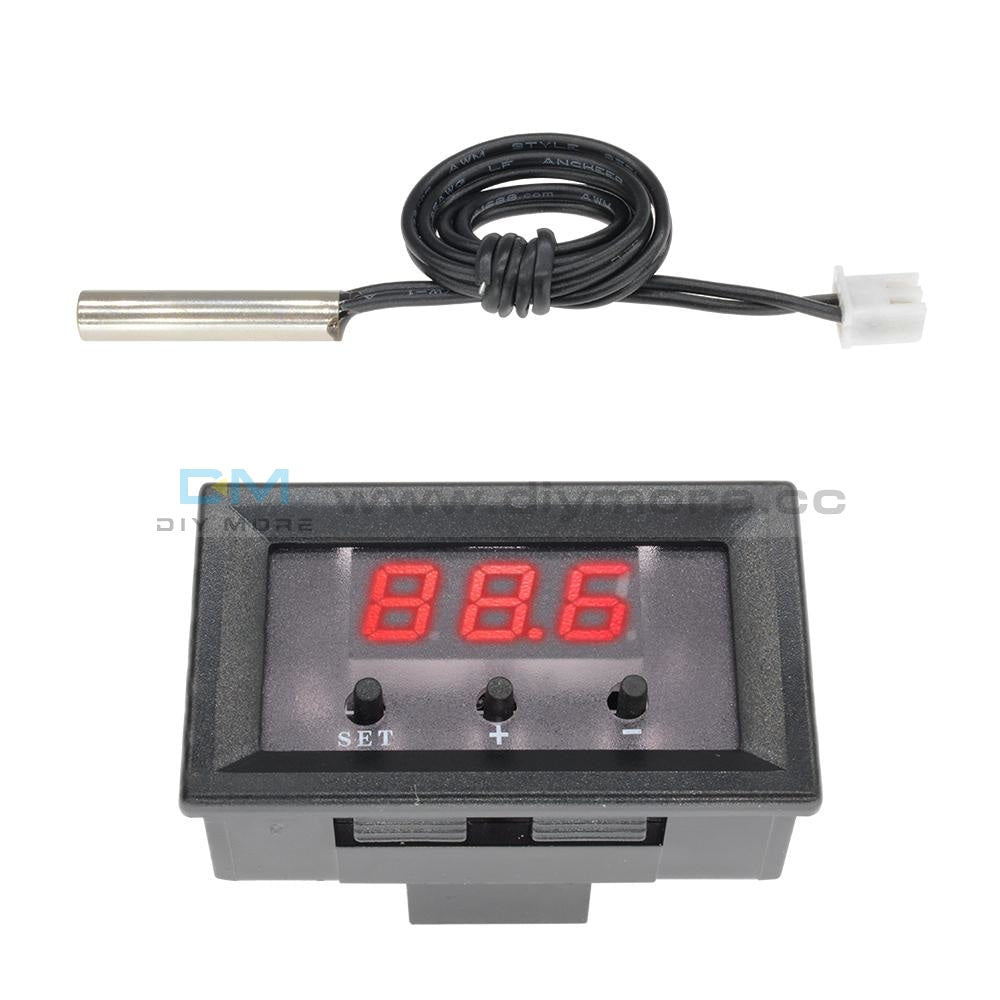
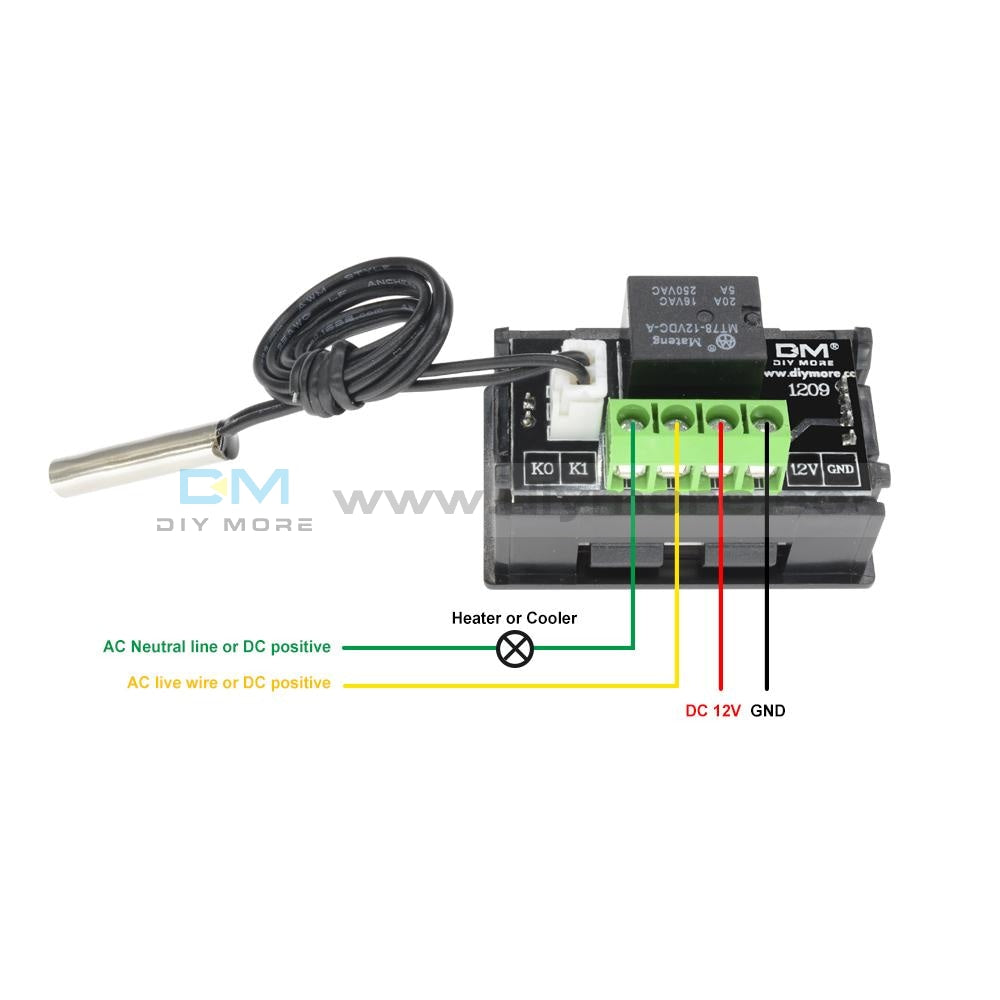
- With waterproof sensitive NTC (10K 0.5%) sensor probe as the measuring input.
- Digital LED Tubes: "LLL" indicates sensor open, "HHH" indicates overrange, the relay will be forcibly disconnected;
- Controller automatically performs the relay ON/OFF.
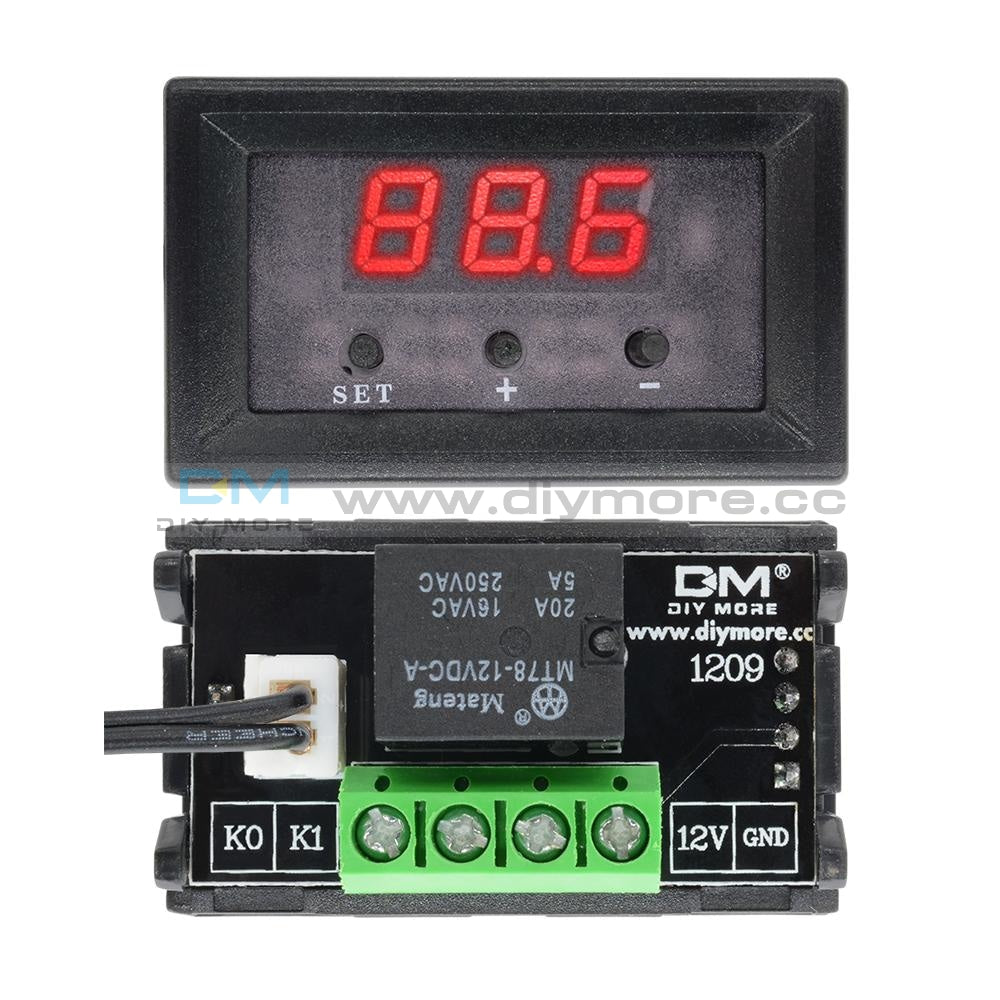
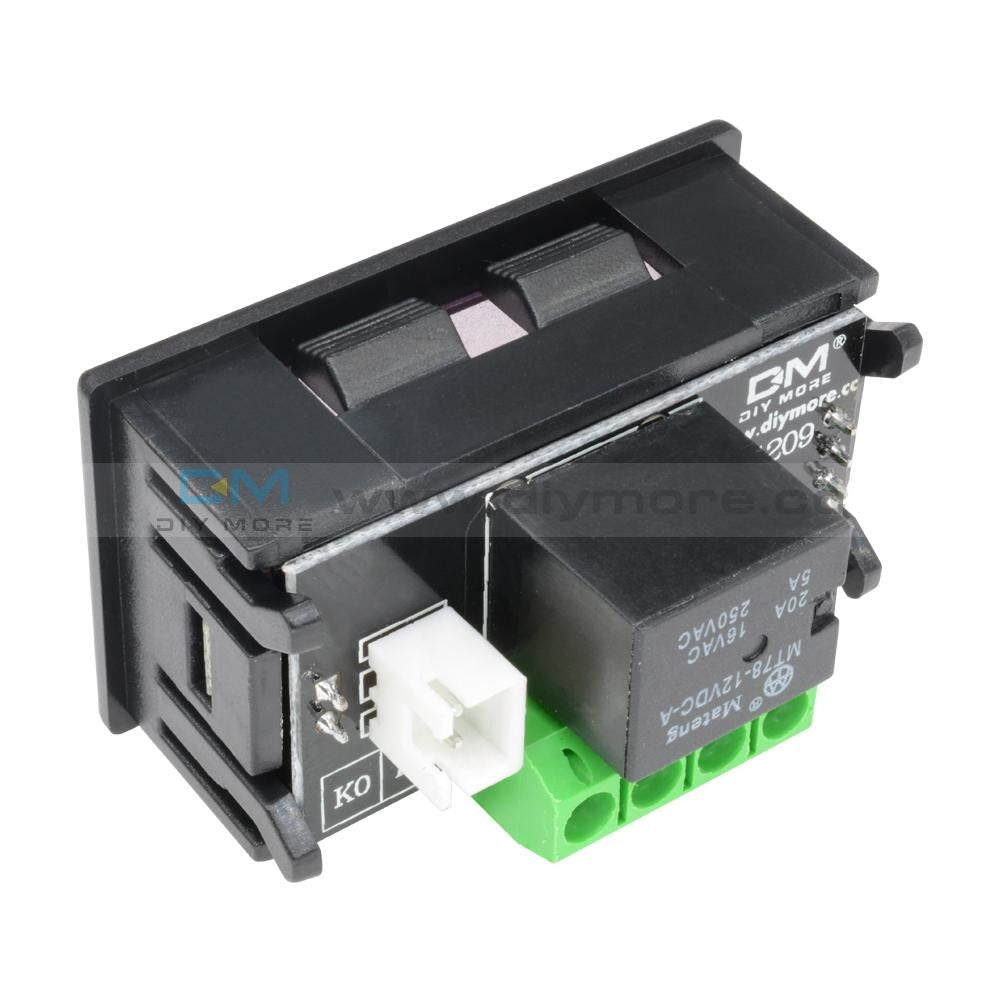
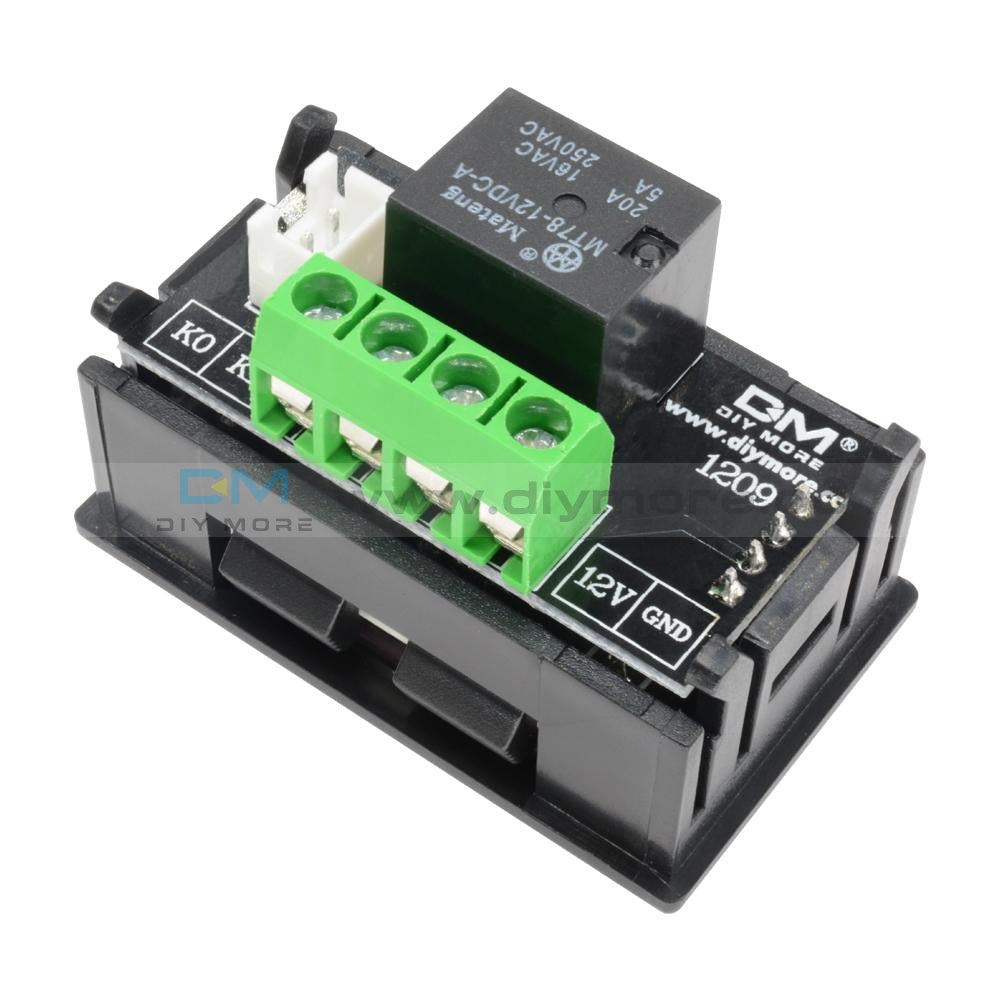
- Output: 1 relay output, 5A 250VAC, 20A 16VAC, meet a variety of high-power loads.
- Embedded central processor chip (MCU), smarter, lower power consumption,stable performance, good consistency, power-off setting automatic memory (MCU built-in EEPROM storage unit)
Specifications:
Control accuracy: 0.1 °C
Hysteresis accuracy: 0.1 °C
Refresh rate: 0.5 S
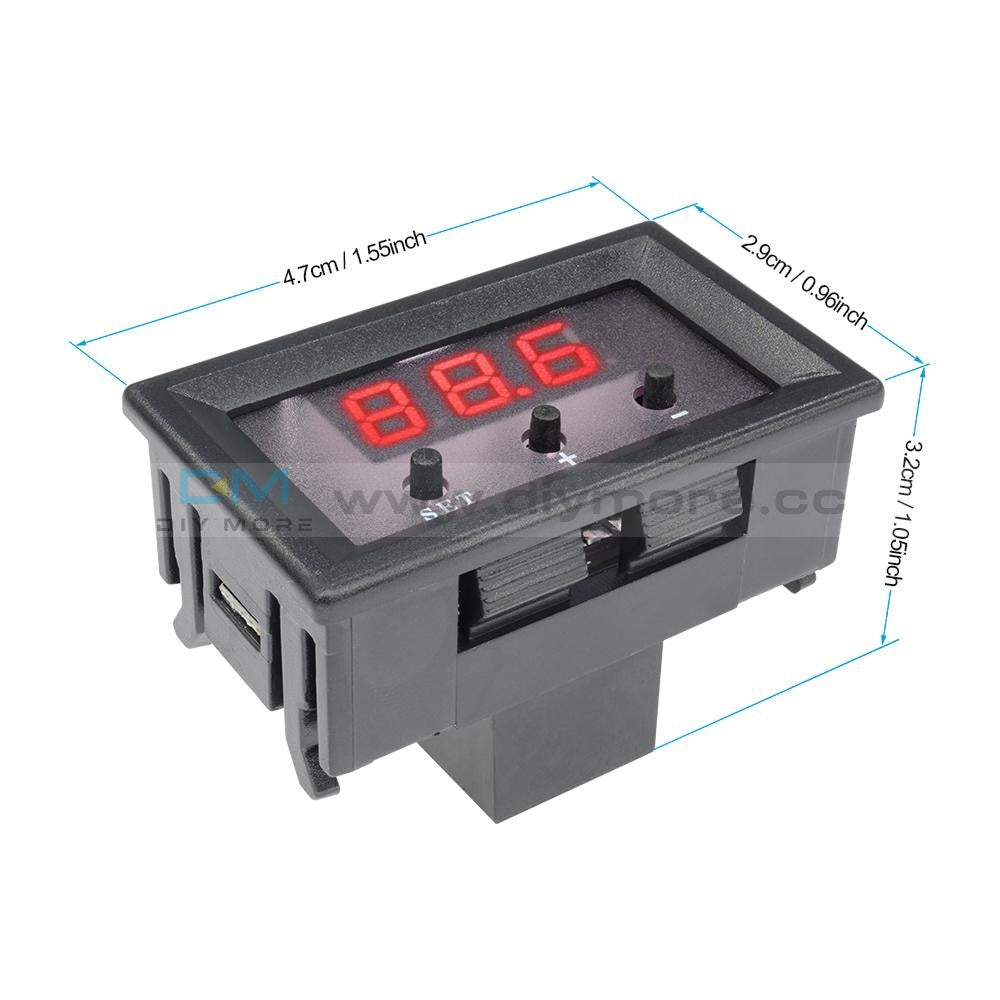
Display type: 0.28 inch three digital tube
Input power: DC 12V
Measurement input: NTC (10K 0.5%) Waterproof sensor Line length 300mm
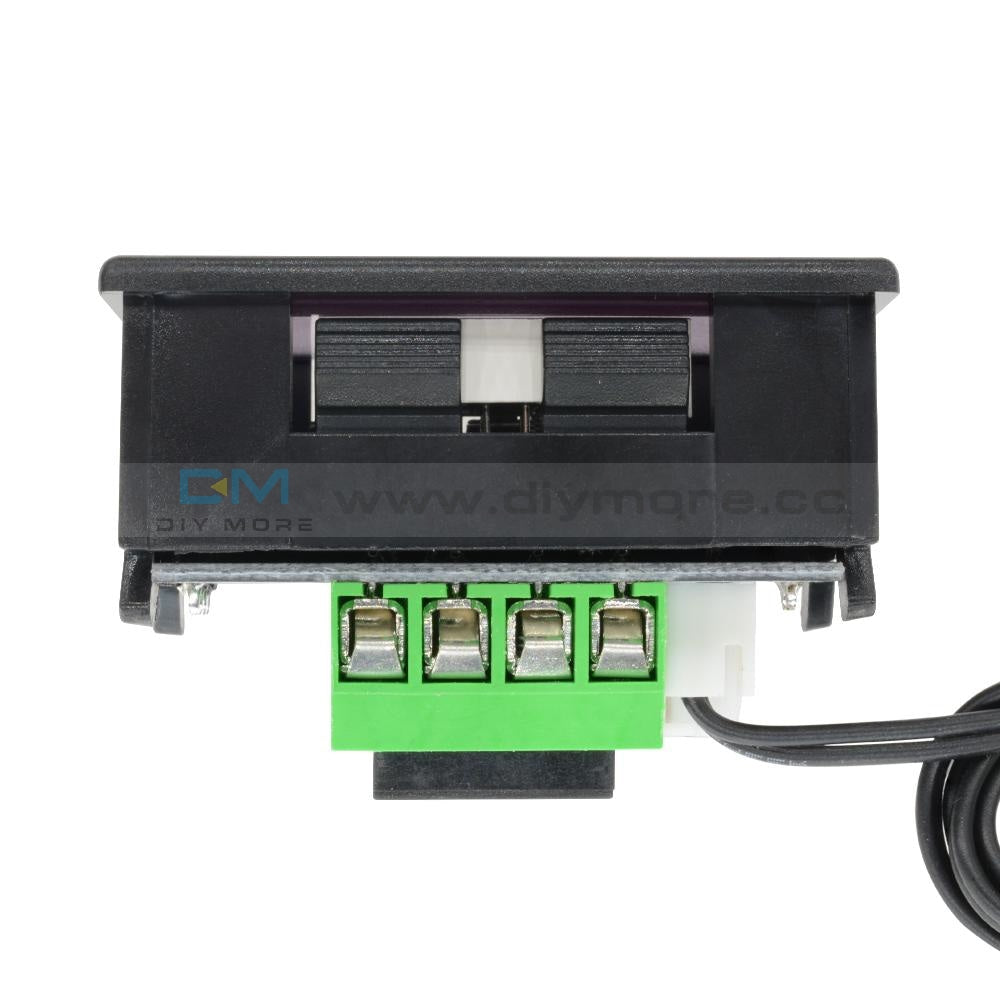
Output: 1 relay output, 5A 250VAC, 20A 16VAC
Environmental requirements: -10~60°C Humidity 20%-85%
Power consumption of the whole machine: quiescent current: ≤10MA Pull-in current: ≤65MA
Dimensions:1.87X0.73X1.24 inch.
Instructions:
Connect the power supply and equipment to supply power to the thermostat, which is displayed as measuring temperature.
Click the SET button, the display temperature will flash, press +- to set the desired temperature (press +- to quickly raise and lower).
After the setting is completed, click SET to confirm the return. At this time, the thermostat automatically performs the relay on/off according to the setting!
Indicator and digital tube status:
Indicator light: The yellow indicator light is always on, indicating that the relay is closed. Digital tube: Display LLL is the sensor open circuit, please connect the sensor according to the instructions.
If the HHH is out of the measurement range, the thermostat will force the relay to open.
Press and hold SET for 5 seconds to enter the main menu settings, press +- to switch P0...P5.
Press and hold SET for 5 seconds without the button action. The thermostat automatically confirms the return.
Control accuracy: 0.1 °C
Hysteresis accuracy: 0.1 °C
Refresh rate: 0.5 S
Display type: 0.28 inch three digital tube
Input power: DC 12V
Measurement input: NTC (10K 0.5%) Waterproof sensor Line length 300mm
Output: 1 relay output, 5A 250VAC, 20A 16VAC
Environmental requirements: -10~60°C Humidity 20%-85%
Size: 47.5*18.5*31.5mm
Power consumption of the whole machine: quiescent current: ≤10MA Pull-in current: ≤65MA
Instructions
Connect the power supply and equipment to supply power to the thermostat, which is displayed as measuring temperature.
Click the SET button, the display temperature will flash, press +- to set the desired temperature (press +- to quickly raise and lower).
After the setting is completed, click SET to confirm the return. At this time, the thermostat automatically performs the relay on/off according to the setting!
Indicator and digital tube status description
Indicator light: The yellow indicator light is always on, indicating that the relay is closed.
Digital tube: Display LLL is the sensor open circuit, please connect the sensor according to the instructions;
If the HHH is out of the measurement range, the thermostat will force the relay to open.
Press and hold SET for 5 seconds to enter the main menu settings, press +- to switch P0...P5.
Press and hold SET for 5 seconds without the button action. The thermostat automatically confirms the return.
P0 Cooling and heating mode (factory is cooling mode):
Press and hold SET for 5 seconds to display P0, press SET to set the working mode, press +- to switch [H is heating mode] [C is cooling mode] Click SET to return.
Long press SET or 5 seconds without key action The thermostat automatically confirms completion.
In the cooling mode: when the temperature measurement value ≥ temperature set point + hysteresis, the refrigeration relay is closed and the refrigerator is started; when the temperature measurement value is ≤ temperature set point, the refrigeration relay is disconnected and the refrigerator is closed.
In heating mode: When the temperature measurement value ≤ temperature set point - hysteresis, the heating relay pulls in and the heater starts; when the temperature measurement value ≥ temperature set point, the heating relay is turned off and the heater is turned off.
P1 hysteresis setting (factory value 2 ° C):
Press and hold SET for 5 seconds to display P0, press +- to switch to P1, press SET to set the difference back, press +- to set the difference to 0.1-15, press SET to return when finished, long press SET or 5 seconds without button The motion thermostat automatically confirms the completion.
In the cooling mode: when the temperature measurement value ≥ the set value + the return value, the relay is closed and the refrigerator is started; when the temperature measurement value is ≤ the set value, the relay is turned off and the refrigerator is turned off.
For example, the environment is 30 °C, the set value is 25 °C, and the hysteresis is set to 2 °C. After the power is turned on, the relay closes the refrigerator to start. When the cooling reaches the set value of 25 °C, the relay turns off the refrigerator and closes. The temperature has started to rise and the temperature has started to rise. When the temperature rises to 27 °C, the relay closes the refrigerator again, so the repeated cycle control temperature is not higher than 25 °C + 2 °C.
In heating mode: When the temperature measurement value ≤ set value - return difference, the relay is closed and the heater is started; when the temperature measurement value is ≥ set value, the relay is turned off and the heater is turned off.
For example, if the environment is 10 °C, the set value is 25 °C, and the hysteresis is set to 2 °C. After the power is turned on, the relay closes the heater to start. When it is heated to 25 °C, the relay turns off the heater and the heater is turned off. The on temperature begins to decrease. When it drops to the set value of 23 °C, the relay closes the heater to start again, so the repeated cycle control temperature is not lower than 25 °C - 2 °C.
P2 upper temperature setting upper limit (factory value 110 °C):
In order to avoid the danger of setting the temperature too high due to the misoperation of others, the thermostat has the highest setting upper limit function, which limits the setting range of the highest temperature set point controlled by the thermostat.
Press and hold SET for 5 seconds to display P0, press +- to switch to P2, press SET to set the upper limit, press +- to set the highest settable temperature, the maximum value is 110, press SET to return after finishing, press SET or 5 The second time without the button action thermostat automatically confirms the completion.
For example: set to 60 temperature set point can only be set to 60 ° C. If the temperature set point is to be expanded, the upper limit set value needs to be adjusted first.
P3 lowest temperature setting lower limit (factory value -50 °C):
In order to avoid the ice blockage caused by the misoperation of others, the temperature controller has the lowest setting upper and lower limit functions, which limits the setting range of the lowest temperature set point controlled by the thermostat.
Press and hold SET for 5 seconds to display P0, press +- to switch to P3, press SET to set the lower limit, press +- to set the lowest settable temperature, the lowest value is -50, press SET to return after finishing, press SET or The 5-second no-key action thermostat automatically confirms the completion.
For example: set to 2 temperature set point can only be set to 2 °C minimum. If the temperature set point is to be expanded lower, the lower limit set value needs to be adjusted first.
P4 temperature correction (factory value 0 °C):
When the measured temperature is deviated from the standard temperature or due to special needs of the user's hardware, this function can be used for correction. The corrected temperature = temperature before correction + correction value The valid range is -7.0~7.0.
Press and hold SET for 5 seconds to display P0, press +- to switch to P4, press SET to correct, press +- to set the correction value, press SET to return when finished, long press SET or 5 seconds without key action thermostat automatically confirm carry out.
For example, the normal display is 25 degrees; when the temperature is corrected to 0, it displays 25 degrees; when the temperature is corrected to 1.5, it shows 26.5 degrees; when the temperature is corrected to -1.5, it shows 23.5.
P5 Delay time (factory value 0 minutes):
When the refrigerator or heater is working with a delay, the delay function can be turned on to protect the life of the device. The delay function includes delay start and delay off.
Press and hold SET for 5 seconds to display P0, press +- to switch to P5, press SET to set the delay time unit is minute, press +- to set 0-10 minutes, press SET to return after finishing, long press SET or 5 seconds without Key action thermostat automatically confirms completion.
In the cooling mode: When the temperature measurement value ≥ temperature set point + hysteresis, the chiller will not start the cooling immediately, and it needs to run after the set delay time. When the temperature measurement value ≤ temperature set point, the refrigerator will not stop cooling immediately, and it needs to be turned off after running the set delay time.
In heating mode: When the temperature measurement value ≤ temperature set point - hysteresis, the heater will not start heating immediately, and it needs to run after the set delay time. When the temperature measurement value ≥ temperature set point, the heater will not stop heating immediately, and it needs to be turned off after running the set delay time.
For example, the setting delay in the cooling state is 1 minute. When the opening condition is met, the refrigerator starts to delay, and after 1 minute, the refrigerator is turned on; when the closing condition is met, the delay is started, and after 1 minute, the refrigerator stops cooling.
Package included:
1x Temperature control switch
Purchasing & Delivery
Before you make your purchase, it’s helpful to know the measurements of the area you plan to place the furniture. You should also measure any doorways and hallways through which the furniture will pass to get to its final destination.Picking up at the store
Shopify Shop requires that all products are properly inspected BEFORE you take it home to insure there are no surprises. Our team is happy to open all packages and will assist in the inspection process. We will then reseal packages for safe transport. We encourage all customers to bring furniture pads or blankets to protect the items during transport as well as rope or tie downs. Shopify Shop will not be responsible for damage that occurs after leaving the store or during transit. It is the purchaser’s responsibility to make sure the correct items are picked up and in good condition.Delivery
Customers are able to pick the next available delivery day that best fits their schedule. However, to route stops as efficiently as possible, Shopify Shop will provide the time frame. Customers will not be able to choose a time. You will be notified in advance of your scheduled time frame. Please make sure that a responsible adult (18 years or older) will be home at that time.In preparation for your delivery, please remove existing furniture, pictures, mirrors, accessories, etc. to prevent damages. Also insure that the area where you would like your furniture placed is clear of any old furniture and any other items that may obstruct the passageway of the delivery team. Shopify Shop will deliver, assemble, and set-up your new furniture purchase and remove all packing materials from your home. Our delivery crews are not permitted to move your existing furniture or other household items. Delivery personnel will attempt to deliver the purchased items in a safe and controlled manner but will not attempt to place furniture if they feel it will result in damage to the product or your home. Delivery personnel are unable to remove doors, hoist furniture or carry furniture up more than 3 flights of stairs. An elevator must be available for deliveries to the 4th floor and above.
Other Customers also buy:
-
 Translation missing: en.products.product.regular_price $5.99{"id":1805974306874,"title":"W1209 -50-110°C 12V Thermostat Digital Temperature Controller Switch Sensor","handle":"diymore-w1209-led-digital-mini-thermostat-temperature-controller-cooling-heating-temp-control-switch-sensor-module-board-12v-dc-50-110-c-with-one-channel-relay-and-ntc-waterproof-sensor-probe","description":"\u003cdiv\u003e\u003cstrong\u003eFeature:\u003c\/strong\u003e\u003c\/div\u003e\n\u003cul class=\"a-unordered-list a-vertical a-spacing-none\"\u003e\n\u003cli\u003e\u003cspan class=\"a-list-item\"\u003eWide temperature control range: -50 to 110℃(-58℉-230℉); High accuracy: 0.1℃.\u003c\/span\u003e\u003c\/li\u003e\n\u003cli\u003e\u003cspan class=\"a-list-item\"\u003eWith waterproof sensitive NTC (10K 0.5%) sensor probe as the measuring input.\u003c\/span\u003e\u003c\/li\u003e\n\u003cli\u003e\u003cspan class=\"a-list-item\"\u003eDigital LED Tubes: \"LLL\" indicates sensor open, \"HHH\" indicates overrange, the relay will be forcibly disconnected;\u003c\/span\u003e\u003c\/li\u003e\n\u003cli\u003e\u003cspan class=\"a-list-item\"\u003eController automatically performs the relay ON\/OFF.\u003c\/span\u003e\u003c\/li\u003e\n\u003cli\u003e\u003cspan class=\"a-list-item\"\u003eOutput: 1 relay output, 5A 250VAC, 20A 16VAC, meet a variety of high-power loads.\u003c\/span\u003e\u003c\/li\u003e\n\u003cli\u003e\u003cspan class=\"a-list-item\"\u003eEmbedded central processor chip (MCU), smarter, lower power consumption,stable performance, good consistency, power-off setting automatic memory (MCU built-in EEPROM storage unit)\u003c\/span\u003e\u003c\/li\u003e\n\u003c\/ul\u003e\n\u003cp\u003e\u003cspan class=\"a-list-item\"\u003e\u003cb\u003eSpecifications:\u003c\/b\u003e\u003cbr\u003e\u003cspan\u003eControl accuracy: 0.1 °C\u003c\/span\u003e\u003cbr\u003e\u003cspan\u003eHysteresis accuracy: 0.1 °C\u003c\/span\u003e\u003cbr\u003e\u003cspan\u003eRefresh rate: 0.5 S\u003c\/span\u003e\u003cbr\u003e\u003cspan\u003eDisplay type: 0.28 inch three digital tube\u003c\/span\u003e\u003cbr\u003e\u003cspan\u003eInput power: DC 12V\u003c\/span\u003e\u003cbr\u003e\u003cspan\u003eMeasurement input: NTC (10K 0.5%) Waterproof sensor Line length 300mm\u003c\/span\u003e\u003cbr\u003e\u003cspan\u003eOutput: 1 relay output, 5A 250VAC, 20A 16VAC\u003c\/span\u003e\u003cbr\u003e\u003cspan\u003eEnvironmental requirements: -10~60°C Humidity 20%-85%\u003c\/span\u003e\u003cbr\u003e\u003cspan\u003ePower consumption of the whole machine: quiescent current: ≤10MA Pull-in current: ≤65MA\u003c\/span\u003e\u003cbr\u003e\u003cspan\u003eDimensions:1.87X0.73X1.24 inch.\u003c\/span\u003e\u003cbr\u003e\u003cb\u003eInstructions:\u003c\/b\u003e\u003cbr\u003e\u003cspan\u003eConnect the power supply and equipment to supply power to the thermostat, which is displayed as measuring temperature.\u003c\/span\u003e\u003cbr\u003e\u003cspan\u003eClick the SET button, the display temperature will flash, press +- to set the desired temperature (press +- to quickly raise and lower).\u003c\/span\u003e\u003cbr\u003e\u003cspan\u003eAfter the setting is completed, click SET to confirm the return. At this time, the thermostat automatically performs the relay on\/off according to the setting!\u003c\/span\u003e\u003cbr\u003e\u003cbr\u003e\u003cb\u003eIndicator and digital tube status:\u003c\/b\u003e\u003cbr\u003e\u003cspan\u003eIndicator light: The yellow indicator light is always on, indicating that the relay is closed. Digital tube: Display LLL is the sensor open circuit, please connect the sensor according to the instructions.\u003c\/span\u003e\u003cbr\u003e\u003cspan\u003eIf the HHH is out of the measurement range, the thermostat will force the relay to open.\u003c\/span\u003e\u003cbr\u003e\u003cspan\u003ePress and hold SET for 5 seconds to enter the main menu settings, press +- to switch P0...P5.\u003c\/span\u003e\u003cbr\u003e\u003cspan\u003ePress and hold SET for 5 seconds without the button action. The thermostat automatically confirms the return.\u003c\/span\u003e\u003c\/span\u003e\u003c\/p\u003e\n\u003cp\u003e\u003cspan class=\"a-list-item\"\u003e\u003cspan\u003eControl accuracy: 0.1 °C\u003cbr\u003eHysteresis accuracy: 0.1 °C\u003cbr\u003eRefresh rate: 0.5 S\u003cbr\u003eDisplay type: 0.28 inch three digital tube\u003cbr\u003eInput power: DC 12V\u003cbr\u003eMeasurement input: NTC (10K 0.5%) Waterproof sensor Line length 300mm\u003cbr\u003eOutput: 1 relay output, 5A 250VAC, 20A 16VAC\u003cbr\u003eEnvironmental requirements: -10~60°C Humidity 20%-85%\u003cbr\u003eSize: 47.5*18.5*31.5mm\u003cbr\u003ePower consumption of the whole machine: quiescent current: ≤10MA Pull-in current: ≤65MA\u003cbr\u003e\u003cbr\u003e\u003cstrong\u003eInstructions\u003c\/strong\u003e\u003c\/span\u003e\u003c\/span\u003e\u003c\/p\u003e\n\u003cp\u003e\u003cspan class=\"a-list-item\"\u003e\u003cspan\u003e\u003cbr\u003eConnect the power supply and equipment to supply power to the thermostat, which is displayed as measuring temperature.\u003cbr\u003eClick the SET button, the display temperature will flash, press +- to set the desired temperature (press +- to quickly raise and lower).\u003cbr\u003eAfter the setting is completed, click SET to confirm the return. At this time, the thermostat automatically performs the relay on\/off according to the setting!\u003cbr\u003e\u003cbr\u003eIndicator and digital tube status description\u003cbr\u003eIndicator light: The yellow indicator light is always on, indicating that the relay is closed.\u003cbr\u003eDigital tube: Display LLL is the sensor open circuit, please connect the sensor according to the instructions;\u003cbr\u003eIf the HHH is out of the measurement range, the thermostat will force the relay to open.\u003cbr\u003ePress and hold SET for 5 seconds to enter the main menu settings, press +- to switch P0...P5.\u003cbr\u003ePress and hold SET for 5 seconds without the button action. The thermostat automatically confirms the return.\u003cbr\u003e\u003cbr\u003e\u003cstrong\u003eP0 Cooling and heating mode (factory is cooling mode):\u003c\/strong\u003e\u003c\/span\u003e\u003c\/span\u003e\u003c\/p\u003e\n\u003cp\u003e\u003cspan class=\"a-list-item\"\u003e\u003cspan\u003e\u003cbr\u003ePress and hold SET for 5 seconds to display P0, press SET to set the working mode, press +- to switch [H is heating mode] [C is cooling mode] Click SET to return.\u003cbr\u003eLong press SET or 5 seconds without key action The thermostat automatically confirms completion.\u003c\/span\u003e\u003c\/span\u003e\u003c\/p\u003e\n\u003cp\u003e\u003cspan class=\"a-list-item\"\u003e\u003cspan\u003eIn the cooling mode: when the temperature measurement value ≥ temperature set point + hysteresis, the refrigeration relay is closed and the refrigerator is started; when the temperature measurement value is ≤ temperature set point, the refrigeration relay is disconnected and the refrigerator is closed.\u003cbr\u003eIn heating mode: When the temperature measurement value ≤ temperature set point - hysteresis, the heating relay pulls in and the heater starts; when the temperature measurement value ≥ temperature set point, the heating relay is turned off and the heater is turned off.\u003cbr\u003e\u003c\/span\u003e\u003c\/span\u003e\u003c\/p\u003e\n\u003cp\u003e\u003cspan class=\"a-list-item\"\u003e\u003cspan\u003e\u003cstrong\u003eP1 hysteresis setting (factory value 2 ° C):\u003c\/strong\u003e\u003c\/span\u003e\u003c\/span\u003e\u003c\/p\u003e\n\u003cp\u003e\u003cspan class=\"a-list-item\"\u003e\u003cspan\u003e\u003cbr\u003ePress and hold SET for 5 seconds to display P0, press +- to switch to P1, press SET to set the difference back, press +- to set the difference to 0.1-15, press SET to return when finished, long press SET or 5 seconds without button The motion thermostat automatically confirms the completion.\u003cbr\u003e\u003cbr\u003eIn the cooling mode: when the temperature measurement value ≥ the set value + the return value, the relay is closed and the refrigerator is started; when the temperature measurement value is ≤ the set value, the relay is turned off and the refrigerator is turned off.\u003cbr\u003e\u003cbr\u003eFor example, the environment is 30 °C, the set value is 25 °C, and the hysteresis is set to 2 °C. After the power is turned on, the relay closes the refrigerator to start. When the cooling reaches the set value of 25 °C, the relay turns off the refrigerator and closes. The temperature has started to rise and the temperature has started to rise. When the temperature rises to 27 °C, the relay closes the refrigerator again, so the repeated cycle control temperature is not higher than 25 °C + 2 °C.\u003cbr\u003e\u003cbr\u003eIn heating mode: When the temperature measurement value ≤ set value - return difference, the relay is closed and the heater is started; when the temperature measurement value is ≥ set value, the relay is turned off and the heater is turned off.\u003cbr\u003e\u003cbr\u003eFor example, if the environment is 10 °C, the set value is 25 °C, and the hysteresis is set to 2 °C. After the power is turned on, the relay closes the heater to start. When it is heated to 25 °C, the relay turns off the heater and the heater is turned off. The on temperature begins to decrease. When it drops to the set value of 23 °C, the relay closes the heater to start again, so the repeated cycle control temperature is not lower than 25 °C - 2 °C.\u003c\/span\u003e\u003c\/span\u003e\u003c\/p\u003e\n\u003cp\u003e\u003cspan class=\"a-list-item\"\u003e\u003cspan\u003e\u003cstrong\u003eP2 upper temperature setting upper limit (factory value 110 °C):\u003c\/strong\u003e\u003c\/span\u003e\u003c\/span\u003e\u003c\/p\u003e\n\u003cp\u003e\u003cspan class=\"a-list-item\"\u003e\u003cspan\u003e\u003cbr\u003eIn order to avoid the danger of setting the temperature too high due to the misoperation of others, the thermostat has the highest setting upper limit function, which limits the setting range of the highest temperature set point controlled by the thermostat.\u003cbr\u003e\u003cbr\u003ePress and hold SET for 5 seconds to display P0, press +- to switch to P2, press SET to set the upper limit, press +- to set the highest settable temperature, the maximum value is 110, press SET to return after finishing, press SET or 5 The second time without the button action thermostat automatically confirms the completion.\u003cbr\u003e\u003cbr\u003eFor example: set to 60 temperature set point can only be set to 60 ° C. If the temperature set point is to be expanded, the upper limit set value needs to be adjusted first.\u003cbr\u003e\u003cbr\u003e\u003cbr\u003e\u003cstrong\u003eP3 lowest temperature setting lower limit (factory value -50 °C):\u003c\/strong\u003e\u003cbr\u003e\u003cbr\u003eIn order to avoid the ice blockage caused by the misoperation of others, the temperature controller has the lowest setting upper and lower limit functions, which limits the setting range of the lowest temperature set point controlled by the thermostat.\u003cbr\u003e\u003cbr\u003ePress and hold SET for 5 seconds to display P0, press +- to switch to P3, press SET to set the lower limit, press +- to set the lowest settable temperature, the lowest value is -50, press SET to return after finishing, press SET or The 5-second no-key action thermostat automatically confirms the completion.\u003cbr\u003e\u003cbr\u003eFor example: set to 2 temperature set point can only be set to 2 °C minimum. If the temperature set point is to be expanded lower, the lower limit set value needs to be adjusted first.\u003c\/span\u003e\u003c\/span\u003e\u003c\/p\u003e\n\u003cp\u003e\u003cspan class=\"a-list-item\"\u003e\u003cspan\u003e\u003cstrong\u003eP4 temperature correction (factory value 0 °C):\u003c\/strong\u003e\u003cbr\u003e\u003cbr\u003eWhen the measured temperature is deviated from the standard temperature or due to special needs of the user's hardware, this function can be used for correction. The corrected temperature = temperature before correction + correction value The valid range is -7.0~7.0.\u003cbr\u003e\u003cbr\u003ePress and hold SET for 5 seconds to display P0, press +- to switch to P4, press SET to correct, press +- to set the correction value, press SET to return when finished, long press SET or 5 seconds without key action thermostat automatically confirm carry out.\u003cbr\u003e\u003cbr\u003eFor example, the normal display is 25 degrees; when the temperature is corrected to 0, it displays 25 degrees; when the temperature is corrected to 1.5, it shows 26.5 degrees; when the temperature is corrected to -1.5, it shows 23.5.\u003c\/span\u003e\u003c\/span\u003e\u003c\/p\u003e\n\u003cp\u003e\u003cspan class=\"a-list-item\"\u003e\u003cspan\u003e\u003cstrong\u003eP5 Delay time (factory value 0 minutes):\u003c\/strong\u003e\u003c\/span\u003e\u003c\/span\u003e\u003c\/p\u003e\n\u003cp\u003e\u003cspan class=\"a-list-item\"\u003e\u003cspan\u003e\u003cbr\u003eWhen the refrigerator or heater is working with a delay, the delay function can be turned on to protect the life of the device. The delay function includes delay start and delay off.\u003cbr\u003ePress and hold SET for 5 seconds to display P0, press +- to switch to P5, press SET to set the delay time unit is minute, press +- to set 0-10 minutes, press SET to return after finishing, long press SET or 5 seconds without Key action thermostat automatically confirms completion.\u003cbr\u003e\u003cbr\u003eIn the cooling mode: When the temperature measurement value ≥ temperature set point + hysteresis, the chiller will not start the cooling immediately, and it needs to run after the set delay time. When the temperature measurement value ≤ temperature set point, the refrigerator will not stop cooling immediately, and it needs to be turned off after running the set delay time.\u003cbr\u003e\u003cbr\u003eIn heating mode: When the temperature measurement value ≤ temperature set point - hysteresis, the heater will not start heating immediately, and it needs to run after the set delay time. When the temperature measurement value ≥ temperature set point, the heater will not stop heating immediately, and it needs to be turned off after running the set delay time.\u003cbr\u003e\u003cbr\u003e\u003cbr\u003eFor example, the setting delay in the cooling state is 1 minute. When the opening condition is met, the refrigerator starts to delay, and after 1 minute, the refrigerator is turned on; when the closing condition is met, the delay is started, and after 1 minute, the refrigerator stops cooling.\u003c\/span\u003e\u003c\/span\u003e\u003c\/p\u003e\n\u003cp\u003e\u003cspan class=\"a-list-item\"\u003e\u003cspan\u003e\u003cb\u003ePackage included:\u003c\/b\u003e\u003cbr\u003e1x Temperature control switch\u003c\/span\u003e\u003c\/span\u003e\u003c\/p\u003e","published_at":"2018-08-09T10:59:18+08:00","created_at":"2018-08-09T11:13:40+08:00","vendor":"diymore","type":"Thermostat","tags":["Display","Relay","STC 1000","STC1000"],"price":699,"price_min":699,"price_max":699,"available":true,"price_varies":false,"compare_at_price":null,"compare_at_price_min":0,"compare_at_price_max":0,"compare_at_price_varies":false,"variants":[{"id":17508649435194,"title":"Default Title","option1":"Default Title","option2":null,"option3":null,"sku":"012697","requires_shipping":true,"taxable":false,"featured_image":null,"available":true,"name":"W1209 -50-110°C 12V Thermostat Digital Temperature Controller Switch Sensor","public_title":null,"options":["Default Title"],"price":699,"weight":27,"compare_at_price":null,"inventory_management":null,"barcode":"","requires_selling_plan":false,"selling_plan_allocations":[],"quantity_rule":{"min":1,"max":null,"increment":1}}],"images":["\/\/www.diymore.cc\/cdn\/shop\/products\/012697_4_892.jpg?v=1588650891","\/\/www.diymore.cc\/cdn\/shop\/products\/012697_6_597.jpg?v=1588650891","\/\/www.diymore.cc\/cdn\/shop\/products\/012697_6_00adb3a7-8a71-4a4b-929c-6eb88ca0cf14_693.jpg?v=1588650891","\/\/www.diymore.cc\/cdn\/shop\/products\/012697_13_572.jpg?v=1588650891","\/\/www.diymore.cc\/cdn\/shop\/products\/012697_14_575.jpg?v=1588650891","\/\/www.diymore.cc\/cdn\/shop\/products\/012697_16_185.jpg?v=1588650891","\/\/www.diymore.cc\/cdn\/shop\/products\/012697_8_789.jpg?v=1588650891","\/\/www.diymore.cc\/cdn\/shop\/products\/012697_884.jpg?v=1588650891","\/\/www.diymore.cc\/cdn\/shop\/products\/012697_9_395.jpg?v=1588650891"],"featured_image":"\/\/www.diymore.cc\/cdn\/shop\/products\/012697_4_892.jpg?v=1588650891","options":["Title"],"media":[{"alt":"Diymore W1209 Led Digital Mini Thermostat Temperature Controller Cooling Heating Temp Control Switch","id":6678620635207,"position":1,"preview_image":{"aspect_ratio":1.0,"height":1000,"width":1000,"src":"\/\/www.diymore.cc\/cdn\/shop\/products\/012697_4_892.jpg?v=1588650891"},"aspect_ratio":1.0,"height":1000,"media_type":"image","src":"\/\/www.diymore.cc\/cdn\/shop\/products\/012697_4_892.jpg?v=1588650891","width":1000},{"alt":"Diymore W1209 Led Digital Mini Thermostat Temperature Controller Cooling Heating Temp Control Switch","id":6678621454407,"position":2,"preview_image":{"aspect_ratio":1.0,"height":1000,"width":1000,"src":"\/\/www.diymore.cc\/cdn\/shop\/products\/012697_6_597.jpg?v=1588650891"},"aspect_ratio":1.0,"height":1000,"media_type":"image","src":"\/\/www.diymore.cc\/cdn\/shop\/products\/012697_6_597.jpg?v=1588650891","width":1000},{"alt":"Diymore W1209 Led Digital Mini Thermostat Temperature Controller Cooling Heating Temp Control Switch","id":6678622208071,"position":3,"preview_image":{"aspect_ratio":1.0,"height":1000,"width":1000,"src":"\/\/www.diymore.cc\/cdn\/shop\/products\/012697_6_00adb3a7-8a71-4a4b-929c-6eb88ca0cf14_693.jpg?v=1588650891"},"aspect_ratio":1.0,"height":1000,"media_type":"image","src":"\/\/www.diymore.cc\/cdn\/shop\/products\/012697_6_00adb3a7-8a71-4a4b-929c-6eb88ca0cf14_693.jpg?v=1588650891","width":1000},{"alt":"Diymore W1209 Led Digital Mini Thermostat Temperature Controller Cooling Heating Temp Control Switch","id":6678622601287,"position":4,"preview_image":{"aspect_ratio":1.0,"height":1000,"width":1000,"src":"\/\/www.diymore.cc\/cdn\/shop\/products\/012697_13_572.jpg?v=1588650891"},"aspect_ratio":1.0,"height":1000,"media_type":"image","src":"\/\/www.diymore.cc\/cdn\/shop\/products\/012697_13_572.jpg?v=1588650891","width":1000},{"alt":"Diymore W1209 Led Digital Mini Thermostat Temperature Controller Cooling Heating Temp Control Switch","id":6678623191111,"position":5,"preview_image":{"aspect_ratio":1.0,"height":1000,"width":1000,"src":"\/\/www.diymore.cc\/cdn\/shop\/products\/012697_14_575.jpg?v=1588650891"},"aspect_ratio":1.0,"height":1000,"media_type":"image","src":"\/\/www.diymore.cc\/cdn\/shop\/products\/012697_14_575.jpg?v=1588650891","width":1000},{"alt":"Diymore W1209 Led Digital Mini Thermostat Temperature Controller Cooling Heating Temp Control Switch","id":6678623846471,"position":6,"preview_image":{"aspect_ratio":1.0,"height":1000,"width":1000,"src":"\/\/www.diymore.cc\/cdn\/shop\/products\/012697_16_185.jpg?v=1588650891"},"aspect_ratio":1.0,"height":1000,"media_type":"image","src":"\/\/www.diymore.cc\/cdn\/shop\/products\/012697_16_185.jpg?v=1588650891","width":1000},{"alt":"Diymore W1209 Led Digital Mini Thermostat Temperature Controller Cooling Heating Temp Control Switch","id":6678624469063,"position":7,"preview_image":{"aspect_ratio":1.0,"height":1000,"width":1000,"src":"\/\/www.diymore.cc\/cdn\/shop\/products\/012697_8_789.jpg?v=1588650891"},"aspect_ratio":1.0,"height":1000,"media_type":"image","src":"\/\/www.diymore.cc\/cdn\/shop\/products\/012697_8_789.jpg?v=1588650891","width":1000},{"alt":"Diymore W1209 Led Digital Mini Thermostat Temperature Controller Cooling Heating Temp Control Switch","id":6678625124423,"position":8,"preview_image":{"aspect_ratio":1.0,"height":1000,"width":1000,"src":"\/\/www.diymore.cc\/cdn\/shop\/products\/012697_884.jpg?v=1588650891"},"aspect_ratio":1.0,"height":1000,"media_type":"image","src":"\/\/www.diymore.cc\/cdn\/shop\/products\/012697_884.jpg?v=1588650891","width":1000},{"alt":"Diymore W1209 Led Digital Mini Thermostat Temperature Controller Cooling Heating Temp Control Switch","id":6678625812551,"position":9,"preview_image":{"aspect_ratio":1.0,"height":1000,"width":1000,"src":"\/\/www.diymore.cc\/cdn\/shop\/products\/012697_9_395.jpg?v=1588650891"},"aspect_ratio":1.0,"height":1000,"media_type":"image","src":"\/\/www.diymore.cc\/cdn\/shop\/products\/012697_9_395.jpg?v=1588650891","width":1000}],"requires_selling_plan":false,"selling_plan_groups":[],"content":"\u003cdiv\u003e\u003cstrong\u003eFeature:\u003c\/strong\u003e\u003c\/div\u003e\n\u003cul class=\"a-unordered-list a-vertical a-spacing-none\"\u003e\n\u003cli\u003e\u003cspan class=\"a-list-item\"\u003eWide temperature control range: -50 to 110℃(-58℉-230℉); High accuracy: 0.1℃.\u003c\/span\u003e\u003c\/li\u003e\n\u003cli\u003e\u003cspan class=\"a-list-item\"\u003eWith waterproof sensitive NTC (10K 0.5%) sensor probe as the measuring input.\u003c\/span\u003e\u003c\/li\u003e\n\u003cli\u003e\u003cspan class=\"a-list-item\"\u003eDigital LED Tubes: \"LLL\" indicates sensor open, \"HHH\" indicates overrange, the relay will be forcibly disconnected;\u003c\/span\u003e\u003c\/li\u003e\n\u003cli\u003e\u003cspan class=\"a-list-item\"\u003eController automatically performs the relay ON\/OFF.\u003c\/span\u003e\u003c\/li\u003e\n\u003cli\u003e\u003cspan class=\"a-list-item\"\u003eOutput: 1 relay output, 5A 250VAC, 20A 16VAC, meet a variety of high-power loads.\u003c\/span\u003e\u003c\/li\u003e\n\u003cli\u003e\u003cspan class=\"a-list-item\"\u003eEmbedded central processor chip (MCU), smarter, lower power consumption,stable performance, good consistency, power-off setting automatic memory (MCU built-in EEPROM storage unit)\u003c\/span\u003e\u003c\/li\u003e\n\u003c\/ul\u003e\n\u003cp\u003e\u003cspan class=\"a-list-item\"\u003e\u003cb\u003eSpecifications:\u003c\/b\u003e\u003cbr\u003e\u003cspan\u003eControl accuracy: 0.1 °C\u003c\/span\u003e\u003cbr\u003e\u003cspan\u003eHysteresis accuracy: 0.1 °C\u003c\/span\u003e\u003cbr\u003e\u003cspan\u003eRefresh rate: 0.5 S\u003c\/span\u003e\u003cbr\u003e\u003cspan\u003eDisplay type: 0.28 inch three digital tube\u003c\/span\u003e\u003cbr\u003e\u003cspan\u003eInput power: DC 12V\u003c\/span\u003e\u003cbr\u003e\u003cspan\u003eMeasurement input: NTC (10K 0.5%) Waterproof sensor Line length 300mm\u003c\/span\u003e\u003cbr\u003e\u003cspan\u003eOutput: 1 relay output, 5A 250VAC, 20A 16VAC\u003c\/span\u003e\u003cbr\u003e\u003cspan\u003eEnvironmental requirements: -10~60°C Humidity 20%-85%\u003c\/span\u003e\u003cbr\u003e\u003cspan\u003ePower consumption of the whole machine: quiescent current: ≤10MA Pull-in current: ≤65MA\u003c\/span\u003e\u003cbr\u003e\u003cspan\u003eDimensions:1.87X0.73X1.24 inch.\u003c\/span\u003e\u003cbr\u003e\u003cb\u003eInstructions:\u003c\/b\u003e\u003cbr\u003e\u003cspan\u003eConnect the power supply and equipment to supply power to the thermostat, which is displayed as measuring temperature.\u003c\/span\u003e\u003cbr\u003e\u003cspan\u003eClick the SET button, the display temperature will flash, press +- to set the desired temperature (press +- to quickly raise and lower).\u003c\/span\u003e\u003cbr\u003e\u003cspan\u003eAfter the setting is completed, click SET to confirm the return. At this time, the thermostat automatically performs the relay on\/off according to the setting!\u003c\/span\u003e\u003cbr\u003e\u003cbr\u003e\u003cb\u003eIndicator and digital tube status:\u003c\/b\u003e\u003cbr\u003e\u003cspan\u003eIndicator light: The yellow indicator light is always on, indicating that the relay is closed. Digital tube: Display LLL is the sensor open circuit, please connect the sensor according to the instructions.\u003c\/span\u003e\u003cbr\u003e\u003cspan\u003eIf the HHH is out of the measurement range, the thermostat will force the relay to open.\u003c\/span\u003e\u003cbr\u003e\u003cspan\u003ePress and hold SET for 5 seconds to enter the main menu settings, press +- to switch P0...P5.\u003c\/span\u003e\u003cbr\u003e\u003cspan\u003ePress and hold SET for 5 seconds without the button action. The thermostat automatically confirms the return.\u003c\/span\u003e\u003c\/span\u003e\u003c\/p\u003e\n\u003cp\u003e\u003cspan class=\"a-list-item\"\u003e\u003cspan\u003eControl accuracy: 0.1 °C\u003cbr\u003eHysteresis accuracy: 0.1 °C\u003cbr\u003eRefresh rate: 0.5 S\u003cbr\u003eDisplay type: 0.28 inch three digital tube\u003cbr\u003eInput power: DC 12V\u003cbr\u003eMeasurement input: NTC (10K 0.5%) Waterproof sensor Line length 300mm\u003cbr\u003eOutput: 1 relay output, 5A 250VAC, 20A 16VAC\u003cbr\u003eEnvironmental requirements: -10~60°C Humidity 20%-85%\u003cbr\u003eSize: 47.5*18.5*31.5mm\u003cbr\u003ePower consumption of the whole machine: quiescent current: ≤10MA Pull-in current: ≤65MA\u003cbr\u003e\u003cbr\u003e\u003cstrong\u003eInstructions\u003c\/strong\u003e\u003c\/span\u003e\u003c\/span\u003e\u003c\/p\u003e\n\u003cp\u003e\u003cspan class=\"a-list-item\"\u003e\u003cspan\u003e\u003cbr\u003eConnect the power supply and equipment to supply power to the thermostat, which is displayed as measuring temperature.\u003cbr\u003eClick the SET button, the display temperature will flash, press +- to set the desired temperature (press +- to quickly raise and lower).\u003cbr\u003eAfter the setting is completed, click SET to confirm the return. At this time, the thermostat automatically performs the relay on\/off according to the setting!\u003cbr\u003e\u003cbr\u003eIndicator and digital tube status description\u003cbr\u003eIndicator light: The yellow indicator light is always on, indicating that the relay is closed.\u003cbr\u003eDigital tube: Display LLL is the sensor open circuit, please connect the sensor according to the instructions;\u003cbr\u003eIf the HHH is out of the measurement range, the thermostat will force the relay to open.\u003cbr\u003ePress and hold SET for 5 seconds to enter the main menu settings, press +- to switch P0...P5.\u003cbr\u003ePress and hold SET for 5 seconds without the button action. The thermostat automatically confirms the return.\u003cbr\u003e\u003cbr\u003e\u003cstrong\u003eP0 Cooling and heating mode (factory is cooling mode):\u003c\/strong\u003e\u003c\/span\u003e\u003c\/span\u003e\u003c\/p\u003e\n\u003cp\u003e\u003cspan class=\"a-list-item\"\u003e\u003cspan\u003e\u003cbr\u003ePress and hold SET for 5 seconds to display P0, press SET to set the working mode, press +- to switch [H is heating mode] [C is cooling mode] Click SET to return.\u003cbr\u003eLong press SET or 5 seconds without key action The thermostat automatically confirms completion.\u003c\/span\u003e\u003c\/span\u003e\u003c\/p\u003e\n\u003cp\u003e\u003cspan class=\"a-list-item\"\u003e\u003cspan\u003eIn the cooling mode: when the temperature measurement value ≥ temperature set point + hysteresis, the refrigeration relay is closed and the refrigerator is started; when the temperature measurement value is ≤ temperature set point, the refrigeration relay is disconnected and the refrigerator is closed.\u003cbr\u003eIn heating mode: When the temperature measurement value ≤ temperature set point - hysteresis, the heating relay pulls in and the heater starts; when the temperature measurement value ≥ temperature set point, the heating relay is turned off and the heater is turned off.\u003cbr\u003e\u003c\/span\u003e\u003c\/span\u003e\u003c\/p\u003e\n\u003cp\u003e\u003cspan class=\"a-list-item\"\u003e\u003cspan\u003e\u003cstrong\u003eP1 hysteresis setting (factory value 2 ° C):\u003c\/strong\u003e\u003c\/span\u003e\u003c\/span\u003e\u003c\/p\u003e\n\u003cp\u003e\u003cspan class=\"a-list-item\"\u003e\u003cspan\u003e\u003cbr\u003ePress and hold SET for 5 seconds to display P0, press +- to switch to P1, press SET to set the difference back, press +- to set the difference to 0.1-15, press SET to return when finished, long press SET or 5 seconds without button The motion thermostat automatically confirms the completion.\u003cbr\u003e\u003cbr\u003eIn the cooling mode: when the temperature measurement value ≥ the set value + the return value, the relay is closed and the refrigerator is started; when the temperature measurement value is ≤ the set value, the relay is turned off and the refrigerator is turned off.\u003cbr\u003e\u003cbr\u003eFor example, the environment is 30 °C, the set value is 25 °C, and the hysteresis is set to 2 °C. After the power is turned on, the relay closes the refrigerator to start. When the cooling reaches the set value of 25 °C, the relay turns off the refrigerator and closes. The temperature has started to rise and the temperature has started to rise. When the temperature rises to 27 °C, the relay closes the refrigerator again, so the repeated cycle control temperature is not higher than 25 °C + 2 °C.\u003cbr\u003e\u003cbr\u003eIn heating mode: When the temperature measurement value ≤ set value - return difference, the relay is closed and the heater is started; when the temperature measurement value is ≥ set value, the relay is turned off and the heater is turned off.\u003cbr\u003e\u003cbr\u003eFor example, if the environment is 10 °C, the set value is 25 °C, and the hysteresis is set to 2 °C. After the power is turned on, the relay closes the heater to start. When it is heated to 25 °C, the relay turns off the heater and the heater is turned off. The on temperature begins to decrease. When it drops to the set value of 23 °C, the relay closes the heater to start again, so the repeated cycle control temperature is not lower than 25 °C - 2 °C.\u003c\/span\u003e\u003c\/span\u003e\u003c\/p\u003e\n\u003cp\u003e\u003cspan class=\"a-list-item\"\u003e\u003cspan\u003e\u003cstrong\u003eP2 upper temperature setting upper limit (factory value 110 °C):\u003c\/strong\u003e\u003c\/span\u003e\u003c\/span\u003e\u003c\/p\u003e\n\u003cp\u003e\u003cspan class=\"a-list-item\"\u003e\u003cspan\u003e\u003cbr\u003eIn order to avoid the danger of setting the temperature too high due to the misoperation of others, the thermostat has the highest setting upper limit function, which limits the setting range of the highest temperature set point controlled by the thermostat.\u003cbr\u003e\u003cbr\u003ePress and hold SET for 5 seconds to display P0, press +- to switch to P2, press SET to set the upper limit, press +- to set the highest settable temperature, the maximum value is 110, press SET to return after finishing, press SET or 5 The second time without the button action thermostat automatically confirms the completion.\u003cbr\u003e\u003cbr\u003eFor example: set to 60 temperature set point can only be set to 60 ° C. If the temperature set point is to be expanded, the upper limit set value needs to be adjusted first.\u003cbr\u003e\u003cbr\u003e\u003cbr\u003e\u003cstrong\u003eP3 lowest temperature setting lower limit (factory value -50 °C):\u003c\/strong\u003e\u003cbr\u003e\u003cbr\u003eIn order to avoid the ice blockage caused by the misoperation of others, the temperature controller has the lowest setting upper and lower limit functions, which limits the setting range of the lowest temperature set point controlled by the thermostat.\u003cbr\u003e\u003cbr\u003ePress and hold SET for 5 seconds to display P0, press +- to switch to P3, press SET to set the lower limit, press +- to set the lowest settable temperature, the lowest value is -50, press SET to return after finishing, press SET or The 5-second no-key action thermostat automatically confirms the completion.\u003cbr\u003e\u003cbr\u003eFor example: set to 2 temperature set point can only be set to 2 °C minimum. If the temperature set point is to be expanded lower, the lower limit set value needs to be adjusted first.\u003c\/span\u003e\u003c\/span\u003e\u003c\/p\u003e\n\u003cp\u003e\u003cspan class=\"a-list-item\"\u003e\u003cspan\u003e\u003cstrong\u003eP4 temperature correction (factory value 0 °C):\u003c\/strong\u003e\u003cbr\u003e\u003cbr\u003eWhen the measured temperature is deviated from the standard temperature or due to special needs of the user's hardware, this function can be used for correction. The corrected temperature = temperature before correction + correction value The valid range is -7.0~7.0.\u003cbr\u003e\u003cbr\u003ePress and hold SET for 5 seconds to display P0, press +- to switch to P4, press SET to correct, press +- to set the correction value, press SET to return when finished, long press SET or 5 seconds without key action thermostat automatically confirm carry out.\u003cbr\u003e\u003cbr\u003eFor example, the normal display is 25 degrees; when the temperature is corrected to 0, it displays 25 degrees; when the temperature is corrected to 1.5, it shows 26.5 degrees; when the temperature is corrected to -1.5, it shows 23.5.\u003c\/span\u003e\u003c\/span\u003e\u003c\/p\u003e\n\u003cp\u003e\u003cspan class=\"a-list-item\"\u003e\u003cspan\u003e\u003cstrong\u003eP5 Delay time (factory value 0 minutes):\u003c\/strong\u003e\u003c\/span\u003e\u003c\/span\u003e\u003c\/p\u003e\n\u003cp\u003e\u003cspan class=\"a-list-item\"\u003e\u003cspan\u003e\u003cbr\u003eWhen the refrigerator or heater is working with a delay, the delay function can be turned on to protect the life of the device. The delay function includes delay start and delay off.\u003cbr\u003ePress and hold SET for 5 seconds to display P0, press +- to switch to P5, press SET to set the delay time unit is minute, press +- to set 0-10 minutes, press SET to return after finishing, long press SET or 5 seconds without Key action thermostat automatically confirms completion.\u003cbr\u003e\u003cbr\u003eIn the cooling mode: When the temperature measurement value ≥ temperature set point + hysteresis, the chiller will not start the cooling immediately, and it needs to run after the set delay time. When the temperature measurement value ≤ temperature set point, the refrigerator will not stop cooling immediately, and it needs to be turned off after running the set delay time.\u003cbr\u003e\u003cbr\u003eIn heating mode: When the temperature measurement value ≤ temperature set point - hysteresis, the heater will not start heating immediately, and it needs to run after the set delay time. When the temperature measurement value ≥ temperature set point, the heater will not stop heating immediately, and it needs to be turned off after running the set delay time.\u003cbr\u003e\u003cbr\u003e\u003cbr\u003eFor example, the setting delay in the cooling state is 1 minute. When the opening condition is met, the refrigerator starts to delay, and after 1 minute, the refrigerator is turned on; when the closing condition is met, the delay is started, and after 1 minute, the refrigerator stops cooling.\u003c\/span\u003e\u003c\/span\u003e\u003c\/p\u003e\n\u003cp\u003e\u003cspan class=\"a-list-item\"\u003e\u003cspan\u003e\u003cb\u003ePackage included:\u003c\/b\u003e\u003cbr\u003e1x Temperature control switch\u003c\/span\u003e\u003c\/span\u003e\u003c\/p\u003e"}
 -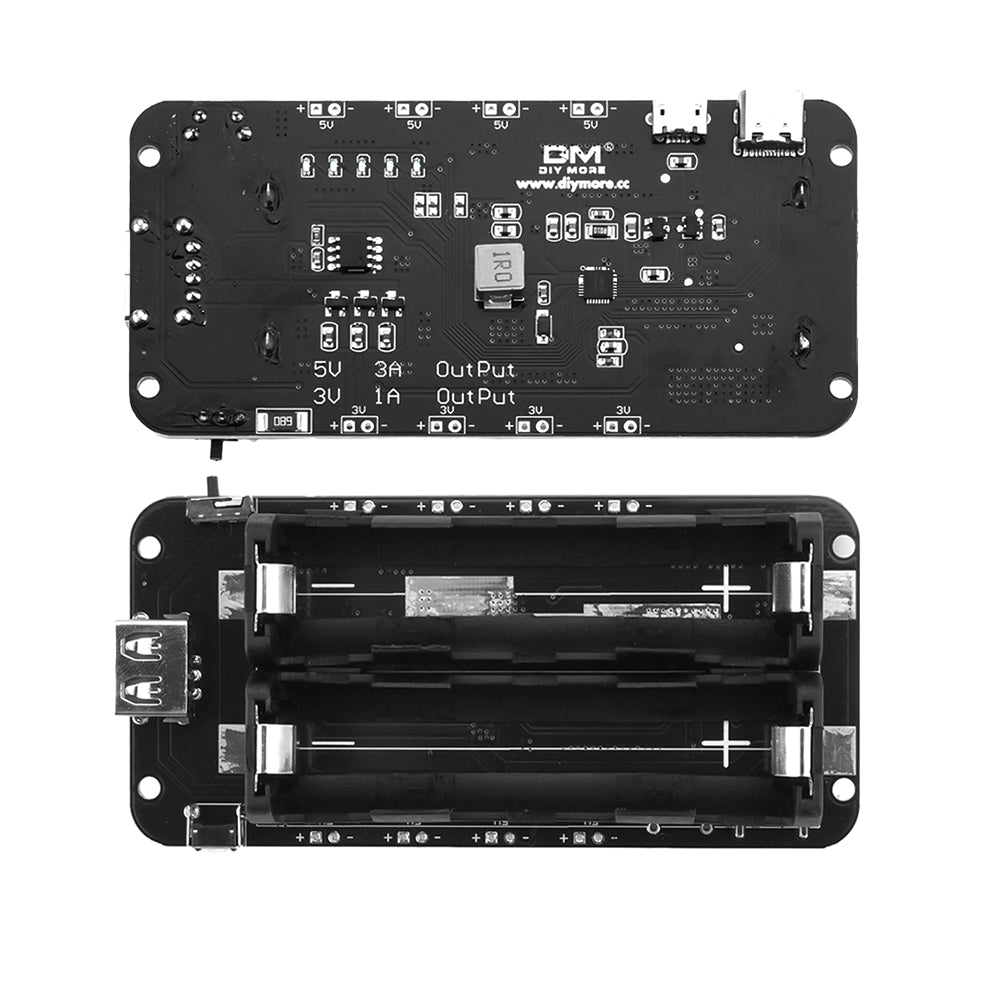
 Translation missing: en.products.product.regular_price $7.99{"id":1805974306874,"title":"W1209 -50-110°C 12V Thermostat Digital Temperature Controller Switch Sensor","handle":"diymore-w1209-led-digital-mini-thermostat-temperature-controller-cooling-heating-temp-control-switch-sensor-module-board-12v-dc-50-110-c-with-one-channel-relay-and-ntc-waterproof-sensor-probe","description":"\u003cdiv\u003e\u003cstrong\u003eFeature:\u003c\/strong\u003e\u003c\/div\u003e\n\u003cul class=\"a-unordered-list a-vertical a-spacing-none\"\u003e\n\u003cli\u003e\u003cspan class=\"a-list-item\"\u003eWide temperature control range: -50 to 110℃(-58℉-230℉); High accuracy: 0.1℃.\u003c\/span\u003e\u003c\/li\u003e\n\u003cli\u003e\u003cspan class=\"a-list-item\"\u003eWith waterproof sensitive NTC (10K 0.5%) sensor probe as the measuring input.\u003c\/span\u003e\u003c\/li\u003e\n\u003cli\u003e\u003cspan class=\"a-list-item\"\u003eDigital LED Tubes: \"LLL\" indicates sensor open, \"HHH\" indicates overrange, the relay will be forcibly disconnected;\u003c\/span\u003e\u003c\/li\u003e\n\u003cli\u003e\u003cspan class=\"a-list-item\"\u003eController automatically performs the relay ON\/OFF.\u003c\/span\u003e\u003c\/li\u003e\n\u003cli\u003e\u003cspan class=\"a-list-item\"\u003eOutput: 1 relay output, 5A 250VAC, 20A 16VAC, meet a variety of high-power loads.\u003c\/span\u003e\u003c\/li\u003e\n\u003cli\u003e\u003cspan class=\"a-list-item\"\u003eEmbedded central processor chip (MCU), smarter, lower power consumption,stable performance, good consistency, power-off setting automatic memory (MCU built-in EEPROM storage unit)\u003c\/span\u003e\u003c\/li\u003e\n\u003c\/ul\u003e\n\u003cp\u003e\u003cspan class=\"a-list-item\"\u003e\u003cb\u003eSpecifications:\u003c\/b\u003e\u003cbr\u003e\u003cspan\u003eControl accuracy: 0.1 °C\u003c\/span\u003e\u003cbr\u003e\u003cspan\u003eHysteresis accuracy: 0.1 °C\u003c\/span\u003e\u003cbr\u003e\u003cspan\u003eRefresh rate: 0.5 S\u003c\/span\u003e\u003cbr\u003e\u003cspan\u003eDisplay type: 0.28 inch three digital tube\u003c\/span\u003e\u003cbr\u003e\u003cspan\u003eInput power: DC 12V\u003c\/span\u003e\u003cbr\u003e\u003cspan\u003eMeasurement input: NTC (10K 0.5%) Waterproof sensor Line length 300mm\u003c\/span\u003e\u003cbr\u003e\u003cspan\u003eOutput: 1 relay output, 5A 250VAC, 20A 16VAC\u003c\/span\u003e\u003cbr\u003e\u003cspan\u003eEnvironmental requirements: -10~60°C Humidity 20%-85%\u003c\/span\u003e\u003cbr\u003e\u003cspan\u003ePower consumption of the whole machine: quiescent current: ≤10MA Pull-in current: ≤65MA\u003c\/span\u003e\u003cbr\u003e\u003cspan\u003eDimensions:1.87X0.73X1.24 inch.\u003c\/span\u003e\u003cbr\u003e\u003cb\u003eInstructions:\u003c\/b\u003e\u003cbr\u003e\u003cspan\u003eConnect the power supply and equipment to supply power to the thermostat, which is displayed as measuring temperature.\u003c\/span\u003e\u003cbr\u003e\u003cspan\u003eClick the SET button, the display temperature will flash, press +- to set the desired temperature (press +- to quickly raise and lower).\u003c\/span\u003e\u003cbr\u003e\u003cspan\u003eAfter the setting is completed, click SET to confirm the return. At this time, the thermostat automatically performs the relay on\/off according to the setting!\u003c\/span\u003e\u003cbr\u003e\u003cbr\u003e\u003cb\u003eIndicator and digital tube status:\u003c\/b\u003e\u003cbr\u003e\u003cspan\u003eIndicator light: The yellow indicator light is always on, indicating that the relay is closed. Digital tube: Display LLL is the sensor open circuit, please connect the sensor according to the instructions.\u003c\/span\u003e\u003cbr\u003e\u003cspan\u003eIf the HHH is out of the measurement range, the thermostat will force the relay to open.\u003c\/span\u003e\u003cbr\u003e\u003cspan\u003ePress and hold SET for 5 seconds to enter the main menu settings, press +- to switch P0...P5.\u003c\/span\u003e\u003cbr\u003e\u003cspan\u003ePress and hold SET for 5 seconds without the button action. The thermostat automatically confirms the return.\u003c\/span\u003e\u003c\/span\u003e\u003c\/p\u003e\n\u003cp\u003e\u003cspan class=\"a-list-item\"\u003e\u003cspan\u003eControl accuracy: 0.1 °C\u003cbr\u003eHysteresis accuracy: 0.1 °C\u003cbr\u003eRefresh rate: 0.5 S\u003cbr\u003eDisplay type: 0.28 inch three digital tube\u003cbr\u003eInput power: DC 12V\u003cbr\u003eMeasurement input: NTC (10K 0.5%) Waterproof sensor Line length 300mm\u003cbr\u003eOutput: 1 relay output, 5A 250VAC, 20A 16VAC\u003cbr\u003eEnvironmental requirements: -10~60°C Humidity 20%-85%\u003cbr\u003eSize: 47.5*18.5*31.5mm\u003cbr\u003ePower consumption of the whole machine: quiescent current: ≤10MA Pull-in current: ≤65MA\u003cbr\u003e\u003cbr\u003e\u003cstrong\u003eInstructions\u003c\/strong\u003e\u003c\/span\u003e\u003c\/span\u003e\u003c\/p\u003e\n\u003cp\u003e\u003cspan class=\"a-list-item\"\u003e\u003cspan\u003e\u003cbr\u003eConnect the power supply and equipment to supply power to the thermostat, which is displayed as measuring temperature.\u003cbr\u003eClick the SET button, the display temperature will flash, press +- to set the desired temperature (press +- to quickly raise and lower).\u003cbr\u003eAfter the setting is completed, click SET to confirm the return. At this time, the thermostat automatically performs the relay on\/off according to the setting!\u003cbr\u003e\u003cbr\u003eIndicator and digital tube status description\u003cbr\u003eIndicator light: The yellow indicator light is always on, indicating that the relay is closed.\u003cbr\u003eDigital tube: Display LLL is the sensor open circuit, please connect the sensor according to the instructions;\u003cbr\u003eIf the HHH is out of the measurement range, the thermostat will force the relay to open.\u003cbr\u003ePress and hold SET for 5 seconds to enter the main menu settings, press +- to switch P0...P5.\u003cbr\u003ePress and hold SET for 5 seconds without the button action. The thermostat automatically confirms the return.\u003cbr\u003e\u003cbr\u003e\u003cstrong\u003eP0 Cooling and heating mode (factory is cooling mode):\u003c\/strong\u003e\u003c\/span\u003e\u003c\/span\u003e\u003c\/p\u003e\n\u003cp\u003e\u003cspan class=\"a-list-item\"\u003e\u003cspan\u003e\u003cbr\u003ePress and hold SET for 5 seconds to display P0, press SET to set the working mode, press +- to switch [H is heating mode] [C is cooling mode] Click SET to return.\u003cbr\u003eLong press SET or 5 seconds without key action The thermostat automatically confirms completion.\u003c\/span\u003e\u003c\/span\u003e\u003c\/p\u003e\n\u003cp\u003e\u003cspan class=\"a-list-item\"\u003e\u003cspan\u003eIn the cooling mode: when the temperature measurement value ≥ temperature set point + hysteresis, the refrigeration relay is closed and the refrigerator is started; when the temperature measurement value is ≤ temperature set point, the refrigeration relay is disconnected and the refrigerator is closed.\u003cbr\u003eIn heating mode: When the temperature measurement value ≤ temperature set point - hysteresis, the heating relay pulls in and the heater starts; when the temperature measurement value ≥ temperature set point, the heating relay is turned off and the heater is turned off.\u003cbr\u003e\u003c\/span\u003e\u003c\/span\u003e\u003c\/p\u003e\n\u003cp\u003e\u003cspan class=\"a-list-item\"\u003e\u003cspan\u003e\u003cstrong\u003eP1 hysteresis setting (factory value 2 ° C):\u003c\/strong\u003e\u003c\/span\u003e\u003c\/span\u003e\u003c\/p\u003e\n\u003cp\u003e\u003cspan class=\"a-list-item\"\u003e\u003cspan\u003e\u003cbr\u003ePress and hold SET for 5 seconds to display P0, press +- to switch to P1, press SET to set the difference back, press +- to set the difference to 0.1-15, press SET to return when finished, long press SET or 5 seconds without button The motion thermostat automatically confirms the completion.\u003cbr\u003e\u003cbr\u003eIn the cooling mode: when the temperature measurement value ≥ the set value + the return value, the relay is closed and the refrigerator is started; when the temperature measurement value is ≤ the set value, the relay is turned off and the refrigerator is turned off.\u003cbr\u003e\u003cbr\u003eFor example, the environment is 30 °C, the set value is 25 °C, and the hysteresis is set to 2 °C. After the power is turned on, the relay closes the refrigerator to start. When the cooling reaches the set value of 25 °C, the relay turns off the refrigerator and closes. The temperature has started to rise and the temperature has started to rise. When the temperature rises to 27 °C, the relay closes the refrigerator again, so the repeated cycle control temperature is not higher than 25 °C + 2 °C.\u003cbr\u003e\u003cbr\u003eIn heating mode: When the temperature measurement value ≤ set value - return difference, the relay is closed and the heater is started; when the temperature measurement value is ≥ set value, the relay is turned off and the heater is turned off.\u003cbr\u003e\u003cbr\u003eFor example, if the environment is 10 °C, the set value is 25 °C, and the hysteresis is set to 2 °C. After the power is turned on, the relay closes the heater to start. When it is heated to 25 °C, the relay turns off the heater and the heater is turned off. The on temperature begins to decrease. When it drops to the set value of 23 °C, the relay closes the heater to start again, so the repeated cycle control temperature is not lower than 25 °C - 2 °C.\u003c\/span\u003e\u003c\/span\u003e\u003c\/p\u003e\n\u003cp\u003e\u003cspan class=\"a-list-item\"\u003e\u003cspan\u003e\u003cstrong\u003eP2 upper temperature setting upper limit (factory value 110 °C):\u003c\/strong\u003e\u003c\/span\u003e\u003c\/span\u003e\u003c\/p\u003e\n\u003cp\u003e\u003cspan class=\"a-list-item\"\u003e\u003cspan\u003e\u003cbr\u003eIn order to avoid the danger of setting the temperature too high due to the misoperation of others, the thermostat has the highest setting upper limit function, which limits the setting range of the highest temperature set point controlled by the thermostat.\u003cbr\u003e\u003cbr\u003ePress and hold SET for 5 seconds to display P0, press +- to switch to P2, press SET to set the upper limit, press +- to set the highest settable temperature, the maximum value is 110, press SET to return after finishing, press SET or 5 The second time without the button action thermostat automatically confirms the completion.\u003cbr\u003e\u003cbr\u003eFor example: set to 60 temperature set point can only be set to 60 ° C. If the temperature set point is to be expanded, the upper limit set value needs to be adjusted first.\u003cbr\u003e\u003cbr\u003e\u003cbr\u003e\u003cstrong\u003eP3 lowest temperature setting lower limit (factory value -50 °C):\u003c\/strong\u003e\u003cbr\u003e\u003cbr\u003eIn order to avoid the ice blockage caused by the misoperation of others, the temperature controller has the lowest setting upper and lower limit functions, which limits the setting range of the lowest temperature set point controlled by the thermostat.\u003cbr\u003e\u003cbr\u003ePress and hold SET for 5 seconds to display P0, press +- to switch to P3, press SET to set the lower limit, press +- to set the lowest settable temperature, the lowest value is -50, press SET to return after finishing, press SET or The 5-second no-key action thermostat automatically confirms the completion.\u003cbr\u003e\u003cbr\u003eFor example: set to 2 temperature set point can only be set to 2 °C minimum. If the temperature set point is to be expanded lower, the lower limit set value needs to be adjusted first.\u003c\/span\u003e\u003c\/span\u003e\u003c\/p\u003e\n\u003cp\u003e\u003cspan class=\"a-list-item\"\u003e\u003cspan\u003e\u003cstrong\u003eP4 temperature correction (factory value 0 °C):\u003c\/strong\u003e\u003cbr\u003e\u003cbr\u003eWhen the measured temperature is deviated from the standard temperature or due to special needs of the user's hardware, this function can be used for correction. The corrected temperature = temperature before correction + correction value The valid range is -7.0~7.0.\u003cbr\u003e\u003cbr\u003ePress and hold SET for 5 seconds to display P0, press +- to switch to P4, press SET to correct, press +- to set the correction value, press SET to return when finished, long press SET or 5 seconds without key action thermostat automatically confirm carry out.\u003cbr\u003e\u003cbr\u003eFor example, the normal display is 25 degrees; when the temperature is corrected to 0, it displays 25 degrees; when the temperature is corrected to 1.5, it shows 26.5 degrees; when the temperature is corrected to -1.5, it shows 23.5.\u003c\/span\u003e\u003c\/span\u003e\u003c\/p\u003e\n\u003cp\u003e\u003cspan class=\"a-list-item\"\u003e\u003cspan\u003e\u003cstrong\u003eP5 Delay time (factory value 0 minutes):\u003c\/strong\u003e\u003c\/span\u003e\u003c\/span\u003e\u003c\/p\u003e\n\u003cp\u003e\u003cspan class=\"a-list-item\"\u003e\u003cspan\u003e\u003cbr\u003eWhen the refrigerator or heater is working with a delay, the delay function can be turned on to protect the life of the device. The delay function includes delay start and delay off.\u003cbr\u003ePress and hold SET for 5 seconds to display P0, press +- to switch to P5, press SET to set the delay time unit is minute, press +- to set 0-10 minutes, press SET to return after finishing, long press SET or 5 seconds without Key action thermostat automatically confirms completion.\u003cbr\u003e\u003cbr\u003eIn the cooling mode: When the temperature measurement value ≥ temperature set point + hysteresis, the chiller will not start the cooling immediately, and it needs to run after the set delay time. When the temperature measurement value ≤ temperature set point, the refrigerator will not stop cooling immediately, and it needs to be turned off after running the set delay time.\u003cbr\u003e\u003cbr\u003eIn heating mode: When the temperature measurement value ≤ temperature set point - hysteresis, the heater will not start heating immediately, and it needs to run after the set delay time. When the temperature measurement value ≥ temperature set point, the heater will not stop heating immediately, and it needs to be turned off after running the set delay time.\u003cbr\u003e\u003cbr\u003e\u003cbr\u003eFor example, the setting delay in the cooling state is 1 minute. When the opening condition is met, the refrigerator starts to delay, and after 1 minute, the refrigerator is turned on; when the closing condition is met, the delay is started, and after 1 minute, the refrigerator stops cooling.\u003c\/span\u003e\u003c\/span\u003e\u003c\/p\u003e\n\u003cp\u003e\u003cspan class=\"a-list-item\"\u003e\u003cspan\u003e\u003cb\u003ePackage included:\u003c\/b\u003e\u003cbr\u003e1x Temperature control switch\u003c\/span\u003e\u003c\/span\u003e\u003c\/p\u003e","published_at":"2018-08-09T10:59:18+08:00","created_at":"2018-08-09T11:13:40+08:00","vendor":"diymore","type":"Thermostat","tags":["Display","Relay","STC 1000","STC1000"],"price":699,"price_min":699,"price_max":699,"available":true,"price_varies":false,"compare_at_price":null,"compare_at_price_min":0,"compare_at_price_max":0,"compare_at_price_varies":false,"variants":[{"id":17508649435194,"title":"Default Title","option1":"Default Title","option2":null,"option3":null,"sku":"012697","requires_shipping":true,"taxable":false,"featured_image":null,"available":true,"name":"W1209 -50-110°C 12V Thermostat Digital Temperature Controller Switch Sensor","public_title":null,"options":["Default Title"],"price":699,"weight":27,"compare_at_price":null,"inventory_management":null,"barcode":"","requires_selling_plan":false,"selling_plan_allocations":[],"quantity_rule":{"min":1,"max":null,"increment":1}}],"images":["\/\/www.diymore.cc\/cdn\/shop\/products\/012697_4_892.jpg?v=1588650891","\/\/www.diymore.cc\/cdn\/shop\/products\/012697_6_597.jpg?v=1588650891","\/\/www.diymore.cc\/cdn\/shop\/products\/012697_6_00adb3a7-8a71-4a4b-929c-6eb88ca0cf14_693.jpg?v=1588650891","\/\/www.diymore.cc\/cdn\/shop\/products\/012697_13_572.jpg?v=1588650891","\/\/www.diymore.cc\/cdn\/shop\/products\/012697_14_575.jpg?v=1588650891","\/\/www.diymore.cc\/cdn\/shop\/products\/012697_16_185.jpg?v=1588650891","\/\/www.diymore.cc\/cdn\/shop\/products\/012697_8_789.jpg?v=1588650891","\/\/www.diymore.cc\/cdn\/shop\/products\/012697_884.jpg?v=1588650891","\/\/www.diymore.cc\/cdn\/shop\/products\/012697_9_395.jpg?v=1588650891"],"featured_image":"\/\/www.diymore.cc\/cdn\/shop\/products\/012697_4_892.jpg?v=1588650891","options":["Title"],"media":[{"alt":"Diymore W1209 Led Digital Mini Thermostat Temperature Controller Cooling Heating Temp Control Switch","id":6678620635207,"position":1,"preview_image":{"aspect_ratio":1.0,"height":1000,"width":1000,"src":"\/\/www.diymore.cc\/cdn\/shop\/products\/012697_4_892.jpg?v=1588650891"},"aspect_ratio":1.0,"height":1000,"media_type":"image","src":"\/\/www.diymore.cc\/cdn\/shop\/products\/012697_4_892.jpg?v=1588650891","width":1000},{"alt":"Diymore W1209 Led Digital Mini Thermostat Temperature Controller Cooling Heating Temp Control Switch","id":6678621454407,"position":2,"preview_image":{"aspect_ratio":1.0,"height":1000,"width":1000,"src":"\/\/www.diymore.cc\/cdn\/shop\/products\/012697_6_597.jpg?v=1588650891"},"aspect_ratio":1.0,"height":1000,"media_type":"image","src":"\/\/www.diymore.cc\/cdn\/shop\/products\/012697_6_597.jpg?v=1588650891","width":1000},{"alt":"Diymore W1209 Led Digital Mini Thermostat Temperature Controller Cooling Heating Temp Control Switch","id":6678622208071,"position":3,"preview_image":{"aspect_ratio":1.0,"height":1000,"width":1000,"src":"\/\/www.diymore.cc\/cdn\/shop\/products\/012697_6_00adb3a7-8a71-4a4b-929c-6eb88ca0cf14_693.jpg?v=1588650891"},"aspect_ratio":1.0,"height":1000,"media_type":"image","src":"\/\/www.diymore.cc\/cdn\/shop\/products\/012697_6_00adb3a7-8a71-4a4b-929c-6eb88ca0cf14_693.jpg?v=1588650891","width":1000},{"alt":"Diymore W1209 Led Digital Mini Thermostat Temperature Controller Cooling Heating Temp Control Switch","id":6678622601287,"position":4,"preview_image":{"aspect_ratio":1.0,"height":1000,"width":1000,"src":"\/\/www.diymore.cc\/cdn\/shop\/products\/012697_13_572.jpg?v=1588650891"},"aspect_ratio":1.0,"height":1000,"media_type":"image","src":"\/\/www.diymore.cc\/cdn\/shop\/products\/012697_13_572.jpg?v=1588650891","width":1000},{"alt":"Diymore W1209 Led Digital Mini Thermostat Temperature Controller Cooling Heating Temp Control Switch","id":6678623191111,"position":5,"preview_image":{"aspect_ratio":1.0,"height":1000,"width":1000,"src":"\/\/www.diymore.cc\/cdn\/shop\/products\/012697_14_575.jpg?v=1588650891"},"aspect_ratio":1.0,"height":1000,"media_type":"image","src":"\/\/www.diymore.cc\/cdn\/shop\/products\/012697_14_575.jpg?v=1588650891","width":1000},{"alt":"Diymore W1209 Led Digital Mini Thermostat Temperature Controller Cooling Heating Temp Control Switch","id":6678623846471,"position":6,"preview_image":{"aspect_ratio":1.0,"height":1000,"width":1000,"src":"\/\/www.diymore.cc\/cdn\/shop\/products\/012697_16_185.jpg?v=1588650891"},"aspect_ratio":1.0,"height":1000,"media_type":"image","src":"\/\/www.diymore.cc\/cdn\/shop\/products\/012697_16_185.jpg?v=1588650891","width":1000},{"alt":"Diymore W1209 Led Digital Mini Thermostat Temperature Controller Cooling Heating Temp Control Switch","id":6678624469063,"position":7,"preview_image":{"aspect_ratio":1.0,"height":1000,"width":1000,"src":"\/\/www.diymore.cc\/cdn\/shop\/products\/012697_8_789.jpg?v=1588650891"},"aspect_ratio":1.0,"height":1000,"media_type":"image","src":"\/\/www.diymore.cc\/cdn\/shop\/products\/012697_8_789.jpg?v=1588650891","width":1000},{"alt":"Diymore W1209 Led Digital Mini Thermostat Temperature Controller Cooling Heating Temp Control Switch","id":6678625124423,"position":8,"preview_image":{"aspect_ratio":1.0,"height":1000,"width":1000,"src":"\/\/www.diymore.cc\/cdn\/shop\/products\/012697_884.jpg?v=1588650891"},"aspect_ratio":1.0,"height":1000,"media_type":"image","src":"\/\/www.diymore.cc\/cdn\/shop\/products\/012697_884.jpg?v=1588650891","width":1000},{"alt":"Diymore W1209 Led Digital Mini Thermostat Temperature Controller Cooling Heating Temp Control Switch","id":6678625812551,"position":9,"preview_image":{"aspect_ratio":1.0,"height":1000,"width":1000,"src":"\/\/www.diymore.cc\/cdn\/shop\/products\/012697_9_395.jpg?v=1588650891"},"aspect_ratio":1.0,"height":1000,"media_type":"image","src":"\/\/www.diymore.cc\/cdn\/shop\/products\/012697_9_395.jpg?v=1588650891","width":1000}],"requires_selling_plan":false,"selling_plan_groups":[],"content":"\u003cdiv\u003e\u003cstrong\u003eFeature:\u003c\/strong\u003e\u003c\/div\u003e\n\u003cul class=\"a-unordered-list a-vertical a-spacing-none\"\u003e\n\u003cli\u003e\u003cspan class=\"a-list-item\"\u003eWide temperature control range: -50 to 110℃(-58℉-230℉); High accuracy: 0.1℃.\u003c\/span\u003e\u003c\/li\u003e\n\u003cli\u003e\u003cspan class=\"a-list-item\"\u003eWith waterproof sensitive NTC (10K 0.5%) sensor probe as the measuring input.\u003c\/span\u003e\u003c\/li\u003e\n\u003cli\u003e\u003cspan class=\"a-list-item\"\u003eDigital LED Tubes: \"LLL\" indicates sensor open, \"HHH\" indicates overrange, the relay will be forcibly disconnected;\u003c\/span\u003e\u003c\/li\u003e\n\u003cli\u003e\u003cspan class=\"a-list-item\"\u003eController automatically performs the relay ON\/OFF.\u003c\/span\u003e\u003c\/li\u003e\n\u003cli\u003e\u003cspan class=\"a-list-item\"\u003eOutput: 1 relay output, 5A 250VAC, 20A 16VAC, meet a variety of high-power loads.\u003c\/span\u003e\u003c\/li\u003e\n\u003cli\u003e\u003cspan class=\"a-list-item\"\u003eEmbedded central processor chip (MCU), smarter, lower power consumption,stable performance, good consistency, power-off setting automatic memory (MCU built-in EEPROM storage unit)\u003c\/span\u003e\u003c\/li\u003e\n\u003c\/ul\u003e\n\u003cp\u003e\u003cspan class=\"a-list-item\"\u003e\u003cb\u003eSpecifications:\u003c\/b\u003e\u003cbr\u003e\u003cspan\u003eControl accuracy: 0.1 °C\u003c\/span\u003e\u003cbr\u003e\u003cspan\u003eHysteresis accuracy: 0.1 °C\u003c\/span\u003e\u003cbr\u003e\u003cspan\u003eRefresh rate: 0.5 S\u003c\/span\u003e\u003cbr\u003e\u003cspan\u003eDisplay type: 0.28 inch three digital tube\u003c\/span\u003e\u003cbr\u003e\u003cspan\u003eInput power: DC 12V\u003c\/span\u003e\u003cbr\u003e\u003cspan\u003eMeasurement input: NTC (10K 0.5%) Waterproof sensor Line length 300mm\u003c\/span\u003e\u003cbr\u003e\u003cspan\u003eOutput: 1 relay output, 5A 250VAC, 20A 16VAC\u003c\/span\u003e\u003cbr\u003e\u003cspan\u003eEnvironmental requirements: -10~60°C Humidity 20%-85%\u003c\/span\u003e\u003cbr\u003e\u003cspan\u003ePower consumption of the whole machine: quiescent current: ≤10MA Pull-in current: ≤65MA\u003c\/span\u003e\u003cbr\u003e\u003cspan\u003eDimensions:1.87X0.73X1.24 inch.\u003c\/span\u003e\u003cbr\u003e\u003cb\u003eInstructions:\u003c\/b\u003e\u003cbr\u003e\u003cspan\u003eConnect the power supply and equipment to supply power to the thermostat, which is displayed as measuring temperature.\u003c\/span\u003e\u003cbr\u003e\u003cspan\u003eClick the SET button, the display temperature will flash, press +- to set the desired temperature (press +- to quickly raise and lower).\u003c\/span\u003e\u003cbr\u003e\u003cspan\u003eAfter the setting is completed, click SET to confirm the return. At this time, the thermostat automatically performs the relay on\/off according to the setting!\u003c\/span\u003e\u003cbr\u003e\u003cbr\u003e\u003cb\u003eIndicator and digital tube status:\u003c\/b\u003e\u003cbr\u003e\u003cspan\u003eIndicator light: The yellow indicator light is always on, indicating that the relay is closed. Digital tube: Display LLL is the sensor open circuit, please connect the sensor according to the instructions.\u003c\/span\u003e\u003cbr\u003e\u003cspan\u003eIf the HHH is out of the measurement range, the thermostat will force the relay to open.\u003c\/span\u003e\u003cbr\u003e\u003cspan\u003ePress and hold SET for 5 seconds to enter the main menu settings, press +- to switch P0...P5.\u003c\/span\u003e\u003cbr\u003e\u003cspan\u003ePress and hold SET for 5 seconds without the button action. The thermostat automatically confirms the return.\u003c\/span\u003e\u003c\/span\u003e\u003c\/p\u003e\n\u003cp\u003e\u003cspan class=\"a-list-item\"\u003e\u003cspan\u003eControl accuracy: 0.1 °C\u003cbr\u003eHysteresis accuracy: 0.1 °C\u003cbr\u003eRefresh rate: 0.5 S\u003cbr\u003eDisplay type: 0.28 inch three digital tube\u003cbr\u003eInput power: DC 12V\u003cbr\u003eMeasurement input: NTC (10K 0.5%) Waterproof sensor Line length 300mm\u003cbr\u003eOutput: 1 relay output, 5A 250VAC, 20A 16VAC\u003cbr\u003eEnvironmental requirements: -10~60°C Humidity 20%-85%\u003cbr\u003eSize: 47.5*18.5*31.5mm\u003cbr\u003ePower consumption of the whole machine: quiescent current: ≤10MA Pull-in current: ≤65MA\u003cbr\u003e\u003cbr\u003e\u003cstrong\u003eInstructions\u003c\/strong\u003e\u003c\/span\u003e\u003c\/span\u003e\u003c\/p\u003e\n\u003cp\u003e\u003cspan class=\"a-list-item\"\u003e\u003cspan\u003e\u003cbr\u003eConnect the power supply and equipment to supply power to the thermostat, which is displayed as measuring temperature.\u003cbr\u003eClick the SET button, the display temperature will flash, press +- to set the desired temperature (press +- to quickly raise and lower).\u003cbr\u003eAfter the setting is completed, click SET to confirm the return. At this time, the thermostat automatically performs the relay on\/off according to the setting!\u003cbr\u003e\u003cbr\u003eIndicator and digital tube status description\u003cbr\u003eIndicator light: The yellow indicator light is always on, indicating that the relay is closed.\u003cbr\u003eDigital tube: Display LLL is the sensor open circuit, please connect the sensor according to the instructions;\u003cbr\u003eIf the HHH is out of the measurement range, the thermostat will force the relay to open.\u003cbr\u003ePress and hold SET for 5 seconds to enter the main menu settings, press +- to switch P0...P5.\u003cbr\u003ePress and hold SET for 5 seconds without the button action. The thermostat automatically confirms the return.\u003cbr\u003e\u003cbr\u003e\u003cstrong\u003eP0 Cooling and heating mode (factory is cooling mode):\u003c\/strong\u003e\u003c\/span\u003e\u003c\/span\u003e\u003c\/p\u003e\n\u003cp\u003e\u003cspan class=\"a-list-item\"\u003e\u003cspan\u003e\u003cbr\u003ePress and hold SET for 5 seconds to display P0, press SET to set the working mode, press +- to switch [H is heating mode] [C is cooling mode] Click SET to return.\u003cbr\u003eLong press SET or 5 seconds without key action The thermostat automatically confirms completion.\u003c\/span\u003e\u003c\/span\u003e\u003c\/p\u003e\n\u003cp\u003e\u003cspan class=\"a-list-item\"\u003e\u003cspan\u003eIn the cooling mode: when the temperature measurement value ≥ temperature set point + hysteresis, the refrigeration relay is closed and the refrigerator is started; when the temperature measurement value is ≤ temperature set point, the refrigeration relay is disconnected and the refrigerator is closed.\u003cbr\u003eIn heating mode: When the temperature measurement value ≤ temperature set point - hysteresis, the heating relay pulls in and the heater starts; when the temperature measurement value ≥ temperature set point, the heating relay is turned off and the heater is turned off.\u003cbr\u003e\u003c\/span\u003e\u003c\/span\u003e\u003c\/p\u003e\n\u003cp\u003e\u003cspan class=\"a-list-item\"\u003e\u003cspan\u003e\u003cstrong\u003eP1 hysteresis setting (factory value 2 ° C):\u003c\/strong\u003e\u003c\/span\u003e\u003c\/span\u003e\u003c\/p\u003e\n\u003cp\u003e\u003cspan class=\"a-list-item\"\u003e\u003cspan\u003e\u003cbr\u003ePress and hold SET for 5 seconds to display P0, press +- to switch to P1, press SET to set the difference back, press +- to set the difference to 0.1-15, press SET to return when finished, long press SET or 5 seconds without button The motion thermostat automatically confirms the completion.\u003cbr\u003e\u003cbr\u003eIn the cooling mode: when the temperature measurement value ≥ the set value + the return value, the relay is closed and the refrigerator is started; when the temperature measurement value is ≤ the set value, the relay is turned off and the refrigerator is turned off.\u003cbr\u003e\u003cbr\u003eFor example, the environment is 30 °C, the set value is 25 °C, and the hysteresis is set to 2 °C. After the power is turned on, the relay closes the refrigerator to start. When the cooling reaches the set value of 25 °C, the relay turns off the refrigerator and closes. The temperature has started to rise and the temperature has started to rise. When the temperature rises to 27 °C, the relay closes the refrigerator again, so the repeated cycle control temperature is not higher than 25 °C + 2 °C.\u003cbr\u003e\u003cbr\u003eIn heating mode: When the temperature measurement value ≤ set value - return difference, the relay is closed and the heater is started; when the temperature measurement value is ≥ set value, the relay is turned off and the heater is turned off.\u003cbr\u003e\u003cbr\u003eFor example, if the environment is 10 °C, the set value is 25 °C, and the hysteresis is set to 2 °C. After the power is turned on, the relay closes the heater to start. When it is heated to 25 °C, the relay turns off the heater and the heater is turned off. The on temperature begins to decrease. When it drops to the set value of 23 °C, the relay closes the heater to start again, so the repeated cycle control temperature is not lower than 25 °C - 2 °C.\u003c\/span\u003e\u003c\/span\u003e\u003c\/p\u003e\n\u003cp\u003e\u003cspan class=\"a-list-item\"\u003e\u003cspan\u003e\u003cstrong\u003eP2 upper temperature setting upper limit (factory value 110 °C):\u003c\/strong\u003e\u003c\/span\u003e\u003c\/span\u003e\u003c\/p\u003e\n\u003cp\u003e\u003cspan class=\"a-list-item\"\u003e\u003cspan\u003e\u003cbr\u003eIn order to avoid the danger of setting the temperature too high due to the misoperation of others, the thermostat has the highest setting upper limit function, which limits the setting range of the highest temperature set point controlled by the thermostat.\u003cbr\u003e\u003cbr\u003ePress and hold SET for 5 seconds to display P0, press +- to switch to P2, press SET to set the upper limit, press +- to set the highest settable temperature, the maximum value is 110, press SET to return after finishing, press SET or 5 The second time without the button action thermostat automatically confirms the completion.\u003cbr\u003e\u003cbr\u003eFor example: set to 60 temperature set point can only be set to 60 ° C. If the temperature set point is to be expanded, the upper limit set value needs to be adjusted first.\u003cbr\u003e\u003cbr\u003e\u003cbr\u003e\u003cstrong\u003eP3 lowest temperature setting lower limit (factory value -50 °C):\u003c\/strong\u003e\u003cbr\u003e\u003cbr\u003eIn order to avoid the ice blockage caused by the misoperation of others, the temperature controller has the lowest setting upper and lower limit functions, which limits the setting range of the lowest temperature set point controlled by the thermostat.\u003cbr\u003e\u003cbr\u003ePress and hold SET for 5 seconds to display P0, press +- to switch to P3, press SET to set the lower limit, press +- to set the lowest settable temperature, the lowest value is -50, press SET to return after finishing, press SET or The 5-second no-key action thermostat automatically confirms the completion.\u003cbr\u003e\u003cbr\u003eFor example: set to 2 temperature set point can only be set to 2 °C minimum. If the temperature set point is to be expanded lower, the lower limit set value needs to be adjusted first.\u003c\/span\u003e\u003c\/span\u003e\u003c\/p\u003e\n\u003cp\u003e\u003cspan class=\"a-list-item\"\u003e\u003cspan\u003e\u003cstrong\u003eP4 temperature correction (factory value 0 °C):\u003c\/strong\u003e\u003cbr\u003e\u003cbr\u003eWhen the measured temperature is deviated from the standard temperature or due to special needs of the user's hardware, this function can be used for correction. The corrected temperature = temperature before correction + correction value The valid range is -7.0~7.0.\u003cbr\u003e\u003cbr\u003ePress and hold SET for 5 seconds to display P0, press +- to switch to P4, press SET to correct, press +- to set the correction value, press SET to return when finished, long press SET or 5 seconds without key action thermostat automatically confirm carry out.\u003cbr\u003e\u003cbr\u003eFor example, the normal display is 25 degrees; when the temperature is corrected to 0, it displays 25 degrees; when the temperature is corrected to 1.5, it shows 26.5 degrees; when the temperature is corrected to -1.5, it shows 23.5.\u003c\/span\u003e\u003c\/span\u003e\u003c\/p\u003e\n\u003cp\u003e\u003cspan class=\"a-list-item\"\u003e\u003cspan\u003e\u003cstrong\u003eP5 Delay time (factory value 0 minutes):\u003c\/strong\u003e\u003c\/span\u003e\u003c\/span\u003e\u003c\/p\u003e\n\u003cp\u003e\u003cspan class=\"a-list-item\"\u003e\u003cspan\u003e\u003cbr\u003eWhen the refrigerator or heater is working with a delay, the delay function can be turned on to protect the life of the device. The delay function includes delay start and delay off.\u003cbr\u003ePress and hold SET for 5 seconds to display P0, press +- to switch to P5, press SET to set the delay time unit is minute, press +- to set 0-10 minutes, press SET to return after finishing, long press SET or 5 seconds without Key action thermostat automatically confirms completion.\u003cbr\u003e\u003cbr\u003eIn the cooling mode: When the temperature measurement value ≥ temperature set point + hysteresis, the chiller will not start the cooling immediately, and it needs to run after the set delay time. When the temperature measurement value ≤ temperature set point, the refrigerator will not stop cooling immediately, and it needs to be turned off after running the set delay time.\u003cbr\u003e\u003cbr\u003eIn heating mode: When the temperature measurement value ≤ temperature set point - hysteresis, the heater will not start heating immediately, and it needs to run after the set delay time. When the temperature measurement value ≥ temperature set point, the heater will not stop heating immediately, and it needs to be turned off after running the set delay time.\u003cbr\u003e\u003cbr\u003e\u003cbr\u003eFor example, the setting delay in the cooling state is 1 minute. When the opening condition is met, the refrigerator starts to delay, and after 1 minute, the refrigerator is turned on; when the closing condition is met, the delay is started, and after 1 minute, the refrigerator stops cooling.\u003c\/span\u003e\u003c\/span\u003e\u003c\/p\u003e\n\u003cp\u003e\u003cspan class=\"a-list-item\"\u003e\u003cspan\u003e\u003cb\u003ePackage included:\u003c\/b\u003e\u003cbr\u003e1x Temperature control switch\u003c\/span\u003e\u003c\/span\u003e\u003c\/p\u003e"}
 -

 Translation missing: en.products.product.regular_price $5.99{"id":1805974306874,"title":"W1209 -50-110°C 12V Thermostat Digital Temperature Controller Switch Sensor","handle":"diymore-w1209-led-digital-mini-thermostat-temperature-controller-cooling-heating-temp-control-switch-sensor-module-board-12v-dc-50-110-c-with-one-channel-relay-and-ntc-waterproof-sensor-probe","description":"\u003cdiv\u003e\u003cstrong\u003eFeature:\u003c\/strong\u003e\u003c\/div\u003e\n\u003cul class=\"a-unordered-list a-vertical a-spacing-none\"\u003e\n\u003cli\u003e\u003cspan class=\"a-list-item\"\u003eWide temperature control range: -50 to 110℃(-58℉-230℉); High accuracy: 0.1℃.\u003c\/span\u003e\u003c\/li\u003e\n\u003cli\u003e\u003cspan class=\"a-list-item\"\u003eWith waterproof sensitive NTC (10K 0.5%) sensor probe as the measuring input.\u003c\/span\u003e\u003c\/li\u003e\n\u003cli\u003e\u003cspan class=\"a-list-item\"\u003eDigital LED Tubes: \"LLL\" indicates sensor open, \"HHH\" indicates overrange, the relay will be forcibly disconnected;\u003c\/span\u003e\u003c\/li\u003e\n\u003cli\u003e\u003cspan class=\"a-list-item\"\u003eController automatically performs the relay ON\/OFF.\u003c\/span\u003e\u003c\/li\u003e\n\u003cli\u003e\u003cspan class=\"a-list-item\"\u003eOutput: 1 relay output, 5A 250VAC, 20A 16VAC, meet a variety of high-power loads.\u003c\/span\u003e\u003c\/li\u003e\n\u003cli\u003e\u003cspan class=\"a-list-item\"\u003eEmbedded central processor chip (MCU), smarter, lower power consumption,stable performance, good consistency, power-off setting automatic memory (MCU built-in EEPROM storage unit)\u003c\/span\u003e\u003c\/li\u003e\n\u003c\/ul\u003e\n\u003cp\u003e\u003cspan class=\"a-list-item\"\u003e\u003cb\u003eSpecifications:\u003c\/b\u003e\u003cbr\u003e\u003cspan\u003eControl accuracy: 0.1 °C\u003c\/span\u003e\u003cbr\u003e\u003cspan\u003eHysteresis accuracy: 0.1 °C\u003c\/span\u003e\u003cbr\u003e\u003cspan\u003eRefresh rate: 0.5 S\u003c\/span\u003e\u003cbr\u003e\u003cspan\u003eDisplay type: 0.28 inch three digital tube\u003c\/span\u003e\u003cbr\u003e\u003cspan\u003eInput power: DC 12V\u003c\/span\u003e\u003cbr\u003e\u003cspan\u003eMeasurement input: NTC (10K 0.5%) Waterproof sensor Line length 300mm\u003c\/span\u003e\u003cbr\u003e\u003cspan\u003eOutput: 1 relay output, 5A 250VAC, 20A 16VAC\u003c\/span\u003e\u003cbr\u003e\u003cspan\u003eEnvironmental requirements: -10~60°C Humidity 20%-85%\u003c\/span\u003e\u003cbr\u003e\u003cspan\u003ePower consumption of the whole machine: quiescent current: ≤10MA Pull-in current: ≤65MA\u003c\/span\u003e\u003cbr\u003e\u003cspan\u003eDimensions:1.87X0.73X1.24 inch.\u003c\/span\u003e\u003cbr\u003e\u003cb\u003eInstructions:\u003c\/b\u003e\u003cbr\u003e\u003cspan\u003eConnect the power supply and equipment to supply power to the thermostat, which is displayed as measuring temperature.\u003c\/span\u003e\u003cbr\u003e\u003cspan\u003eClick the SET button, the display temperature will flash, press +- to set the desired temperature (press +- to quickly raise and lower).\u003c\/span\u003e\u003cbr\u003e\u003cspan\u003eAfter the setting is completed, click SET to confirm the return. At this time, the thermostat automatically performs the relay on\/off according to the setting!\u003c\/span\u003e\u003cbr\u003e\u003cbr\u003e\u003cb\u003eIndicator and digital tube status:\u003c\/b\u003e\u003cbr\u003e\u003cspan\u003eIndicator light: The yellow indicator light is always on, indicating that the relay is closed. Digital tube: Display LLL is the sensor open circuit, please connect the sensor according to the instructions.\u003c\/span\u003e\u003cbr\u003e\u003cspan\u003eIf the HHH is out of the measurement range, the thermostat will force the relay to open.\u003c\/span\u003e\u003cbr\u003e\u003cspan\u003ePress and hold SET for 5 seconds to enter the main menu settings, press +- to switch P0...P5.\u003c\/span\u003e\u003cbr\u003e\u003cspan\u003ePress and hold SET for 5 seconds without the button action. The thermostat automatically confirms the return.\u003c\/span\u003e\u003c\/span\u003e\u003c\/p\u003e\n\u003cp\u003e\u003cspan class=\"a-list-item\"\u003e\u003cspan\u003eControl accuracy: 0.1 °C\u003cbr\u003eHysteresis accuracy: 0.1 °C\u003cbr\u003eRefresh rate: 0.5 S\u003cbr\u003eDisplay type: 0.28 inch three digital tube\u003cbr\u003eInput power: DC 12V\u003cbr\u003eMeasurement input: NTC (10K 0.5%) Waterproof sensor Line length 300mm\u003cbr\u003eOutput: 1 relay output, 5A 250VAC, 20A 16VAC\u003cbr\u003eEnvironmental requirements: -10~60°C Humidity 20%-85%\u003cbr\u003eSize: 47.5*18.5*31.5mm\u003cbr\u003ePower consumption of the whole machine: quiescent current: ≤10MA Pull-in current: ≤65MA\u003cbr\u003e\u003cbr\u003e\u003cstrong\u003eInstructions\u003c\/strong\u003e\u003c\/span\u003e\u003c\/span\u003e\u003c\/p\u003e\n\u003cp\u003e\u003cspan class=\"a-list-item\"\u003e\u003cspan\u003e\u003cbr\u003eConnect the power supply and equipment to supply power to the thermostat, which is displayed as measuring temperature.\u003cbr\u003eClick the SET button, the display temperature will flash, press +- to set the desired temperature (press +- to quickly raise and lower).\u003cbr\u003eAfter the setting is completed, click SET to confirm the return. At this time, the thermostat automatically performs the relay on\/off according to the setting!\u003cbr\u003e\u003cbr\u003eIndicator and digital tube status description\u003cbr\u003eIndicator light: The yellow indicator light is always on, indicating that the relay is closed.\u003cbr\u003eDigital tube: Display LLL is the sensor open circuit, please connect the sensor according to the instructions;\u003cbr\u003eIf the HHH is out of the measurement range, the thermostat will force the relay to open.\u003cbr\u003ePress and hold SET for 5 seconds to enter the main menu settings, press +- to switch P0...P5.\u003cbr\u003ePress and hold SET for 5 seconds without the button action. The thermostat automatically confirms the return.\u003cbr\u003e\u003cbr\u003e\u003cstrong\u003eP0 Cooling and heating mode (factory is cooling mode):\u003c\/strong\u003e\u003c\/span\u003e\u003c\/span\u003e\u003c\/p\u003e\n\u003cp\u003e\u003cspan class=\"a-list-item\"\u003e\u003cspan\u003e\u003cbr\u003ePress and hold SET for 5 seconds to display P0, press SET to set the working mode, press +- to switch [H is heating mode] [C is cooling mode] Click SET to return.\u003cbr\u003eLong press SET or 5 seconds without key action The thermostat automatically confirms completion.\u003c\/span\u003e\u003c\/span\u003e\u003c\/p\u003e\n\u003cp\u003e\u003cspan class=\"a-list-item\"\u003e\u003cspan\u003eIn the cooling mode: when the temperature measurement value ≥ temperature set point + hysteresis, the refrigeration relay is closed and the refrigerator is started; when the temperature measurement value is ≤ temperature set point, the refrigeration relay is disconnected and the refrigerator is closed.\u003cbr\u003eIn heating mode: When the temperature measurement value ≤ temperature set point - hysteresis, the heating relay pulls in and the heater starts; when the temperature measurement value ≥ temperature set point, the heating relay is turned off and the heater is turned off.\u003cbr\u003e\u003c\/span\u003e\u003c\/span\u003e\u003c\/p\u003e\n\u003cp\u003e\u003cspan class=\"a-list-item\"\u003e\u003cspan\u003e\u003cstrong\u003eP1 hysteresis setting (factory value 2 ° C):\u003c\/strong\u003e\u003c\/span\u003e\u003c\/span\u003e\u003c\/p\u003e\n\u003cp\u003e\u003cspan class=\"a-list-item\"\u003e\u003cspan\u003e\u003cbr\u003ePress and hold SET for 5 seconds to display P0, press +- to switch to P1, press SET to set the difference back, press +- to set the difference to 0.1-15, press SET to return when finished, long press SET or 5 seconds without button The motion thermostat automatically confirms the completion.\u003cbr\u003e\u003cbr\u003eIn the cooling mode: when the temperature measurement value ≥ the set value + the return value, the relay is closed and the refrigerator is started; when the temperature measurement value is ≤ the set value, the relay is turned off and the refrigerator is turned off.\u003cbr\u003e\u003cbr\u003eFor example, the environment is 30 °C, the set value is 25 °C, and the hysteresis is set to 2 °C. After the power is turned on, the relay closes the refrigerator to start. When the cooling reaches the set value of 25 °C, the relay turns off the refrigerator and closes. The temperature has started to rise and the temperature has started to rise. When the temperature rises to 27 °C, the relay closes the refrigerator again, so the repeated cycle control temperature is not higher than 25 °C + 2 °C.\u003cbr\u003e\u003cbr\u003eIn heating mode: When the temperature measurement value ≤ set value - return difference, the relay is closed and the heater is started; when the temperature measurement value is ≥ set value, the relay is turned off and the heater is turned off.\u003cbr\u003e\u003cbr\u003eFor example, if the environment is 10 °C, the set value is 25 °C, and the hysteresis is set to 2 °C. After the power is turned on, the relay closes the heater to start. When it is heated to 25 °C, the relay turns off the heater and the heater is turned off. The on temperature begins to decrease. When it drops to the set value of 23 °C, the relay closes the heater to start again, so the repeated cycle control temperature is not lower than 25 °C - 2 °C.\u003c\/span\u003e\u003c\/span\u003e\u003c\/p\u003e\n\u003cp\u003e\u003cspan class=\"a-list-item\"\u003e\u003cspan\u003e\u003cstrong\u003eP2 upper temperature setting upper limit (factory value 110 °C):\u003c\/strong\u003e\u003c\/span\u003e\u003c\/span\u003e\u003c\/p\u003e\n\u003cp\u003e\u003cspan class=\"a-list-item\"\u003e\u003cspan\u003e\u003cbr\u003eIn order to avoid the danger of setting the temperature too high due to the misoperation of others, the thermostat has the highest setting upper limit function, which limits the setting range of the highest temperature set point controlled by the thermostat.\u003cbr\u003e\u003cbr\u003ePress and hold SET for 5 seconds to display P0, press +- to switch to P2, press SET to set the upper limit, press +- to set the highest settable temperature, the maximum value is 110, press SET to return after finishing, press SET or 5 The second time without the button action thermostat automatically confirms the completion.\u003cbr\u003e\u003cbr\u003eFor example: set to 60 temperature set point can only be set to 60 ° C. If the temperature set point is to be expanded, the upper limit set value needs to be adjusted first.\u003cbr\u003e\u003cbr\u003e\u003cbr\u003e\u003cstrong\u003eP3 lowest temperature setting lower limit (factory value -50 °C):\u003c\/strong\u003e\u003cbr\u003e\u003cbr\u003eIn order to avoid the ice blockage caused by the misoperation of others, the temperature controller has the lowest setting upper and lower limit functions, which limits the setting range of the lowest temperature set point controlled by the thermostat.\u003cbr\u003e\u003cbr\u003ePress and hold SET for 5 seconds to display P0, press +- to switch to P3, press SET to set the lower limit, press +- to set the lowest settable temperature, the lowest value is -50, press SET to return after finishing, press SET or The 5-second no-key action thermostat automatically confirms the completion.\u003cbr\u003e\u003cbr\u003eFor example: set to 2 temperature set point can only be set to 2 °C minimum. If the temperature set point is to be expanded lower, the lower limit set value needs to be adjusted first.\u003c\/span\u003e\u003c\/span\u003e\u003c\/p\u003e\n\u003cp\u003e\u003cspan class=\"a-list-item\"\u003e\u003cspan\u003e\u003cstrong\u003eP4 temperature correction (factory value 0 °C):\u003c\/strong\u003e\u003cbr\u003e\u003cbr\u003eWhen the measured temperature is deviated from the standard temperature or due to special needs of the user's hardware, this function can be used for correction. The corrected temperature = temperature before correction + correction value The valid range is -7.0~7.0.\u003cbr\u003e\u003cbr\u003ePress and hold SET for 5 seconds to display P0, press +- to switch to P4, press SET to correct, press +- to set the correction value, press SET to return when finished, long press SET or 5 seconds without key action thermostat automatically confirm carry out.\u003cbr\u003e\u003cbr\u003eFor example, the normal display is 25 degrees; when the temperature is corrected to 0, it displays 25 degrees; when the temperature is corrected to 1.5, it shows 26.5 degrees; when the temperature is corrected to -1.5, it shows 23.5.\u003c\/span\u003e\u003c\/span\u003e\u003c\/p\u003e\n\u003cp\u003e\u003cspan class=\"a-list-item\"\u003e\u003cspan\u003e\u003cstrong\u003eP5 Delay time (factory value 0 minutes):\u003c\/strong\u003e\u003c\/span\u003e\u003c\/span\u003e\u003c\/p\u003e\n\u003cp\u003e\u003cspan class=\"a-list-item\"\u003e\u003cspan\u003e\u003cbr\u003eWhen the refrigerator or heater is working with a delay, the delay function can be turned on to protect the life of the device. The delay function includes delay start and delay off.\u003cbr\u003ePress and hold SET for 5 seconds to display P0, press +- to switch to P5, press SET to set the delay time unit is minute, press +- to set 0-10 minutes, press SET to return after finishing, long press SET or 5 seconds without Key action thermostat automatically confirms completion.\u003cbr\u003e\u003cbr\u003eIn the cooling mode: When the temperature measurement value ≥ temperature set point + hysteresis, the chiller will not start the cooling immediately, and it needs to run after the set delay time. When the temperature measurement value ≤ temperature set point, the refrigerator will not stop cooling immediately, and it needs to be turned off after running the set delay time.\u003cbr\u003e\u003cbr\u003eIn heating mode: When the temperature measurement value ≤ temperature set point - hysteresis, the heater will not start heating immediately, and it needs to run after the set delay time. When the temperature measurement value ≥ temperature set point, the heater will not stop heating immediately, and it needs to be turned off after running the set delay time.\u003cbr\u003e\u003cbr\u003e\u003cbr\u003eFor example, the setting delay in the cooling state is 1 minute. When the opening condition is met, the refrigerator starts to delay, and after 1 minute, the refrigerator is turned on; when the closing condition is met, the delay is started, and after 1 minute, the refrigerator stops cooling.\u003c\/span\u003e\u003c\/span\u003e\u003c\/p\u003e\n\u003cp\u003e\u003cspan class=\"a-list-item\"\u003e\u003cspan\u003e\u003cb\u003ePackage included:\u003c\/b\u003e\u003cbr\u003e1x Temperature control switch\u003c\/span\u003e\u003c\/span\u003e\u003c\/p\u003e","published_at":"2018-08-09T10:59:18+08:00","created_at":"2018-08-09T11:13:40+08:00","vendor":"diymore","type":"Thermostat","tags":["Display","Relay","STC 1000","STC1000"],"price":699,"price_min":699,"price_max":699,"available":true,"price_varies":false,"compare_at_price":null,"compare_at_price_min":0,"compare_at_price_max":0,"compare_at_price_varies":false,"variants":[{"id":17508649435194,"title":"Default Title","option1":"Default Title","option2":null,"option3":null,"sku":"012697","requires_shipping":true,"taxable":false,"featured_image":null,"available":true,"name":"W1209 -50-110°C 12V Thermostat Digital Temperature Controller Switch Sensor","public_title":null,"options":["Default Title"],"price":699,"weight":27,"compare_at_price":null,"inventory_management":null,"barcode":"","requires_selling_plan":false,"selling_plan_allocations":[],"quantity_rule":{"min":1,"max":null,"increment":1}}],"images":["\/\/www.diymore.cc\/cdn\/shop\/products\/012697_4_892.jpg?v=1588650891","\/\/www.diymore.cc\/cdn\/shop\/products\/012697_6_597.jpg?v=1588650891","\/\/www.diymore.cc\/cdn\/shop\/products\/012697_6_00adb3a7-8a71-4a4b-929c-6eb88ca0cf14_693.jpg?v=1588650891","\/\/www.diymore.cc\/cdn\/shop\/products\/012697_13_572.jpg?v=1588650891","\/\/www.diymore.cc\/cdn\/shop\/products\/012697_14_575.jpg?v=1588650891","\/\/www.diymore.cc\/cdn\/shop\/products\/012697_16_185.jpg?v=1588650891","\/\/www.diymore.cc\/cdn\/shop\/products\/012697_8_789.jpg?v=1588650891","\/\/www.diymore.cc\/cdn\/shop\/products\/012697_884.jpg?v=1588650891","\/\/www.diymore.cc\/cdn\/shop\/products\/012697_9_395.jpg?v=1588650891"],"featured_image":"\/\/www.diymore.cc\/cdn\/shop\/products\/012697_4_892.jpg?v=1588650891","options":["Title"],"media":[{"alt":"Diymore W1209 Led Digital Mini Thermostat Temperature Controller Cooling Heating Temp Control Switch","id":6678620635207,"position":1,"preview_image":{"aspect_ratio":1.0,"height":1000,"width":1000,"src":"\/\/www.diymore.cc\/cdn\/shop\/products\/012697_4_892.jpg?v=1588650891"},"aspect_ratio":1.0,"height":1000,"media_type":"image","src":"\/\/www.diymore.cc\/cdn\/shop\/products\/012697_4_892.jpg?v=1588650891","width":1000},{"alt":"Diymore W1209 Led Digital Mini Thermostat Temperature Controller Cooling Heating Temp Control Switch","id":6678621454407,"position":2,"preview_image":{"aspect_ratio":1.0,"height":1000,"width":1000,"src":"\/\/www.diymore.cc\/cdn\/shop\/products\/012697_6_597.jpg?v=1588650891"},"aspect_ratio":1.0,"height":1000,"media_type":"image","src":"\/\/www.diymore.cc\/cdn\/shop\/products\/012697_6_597.jpg?v=1588650891","width":1000},{"alt":"Diymore W1209 Led Digital Mini Thermostat Temperature Controller Cooling Heating Temp Control Switch","id":6678622208071,"position":3,"preview_image":{"aspect_ratio":1.0,"height":1000,"width":1000,"src":"\/\/www.diymore.cc\/cdn\/shop\/products\/012697_6_00adb3a7-8a71-4a4b-929c-6eb88ca0cf14_693.jpg?v=1588650891"},"aspect_ratio":1.0,"height":1000,"media_type":"image","src":"\/\/www.diymore.cc\/cdn\/shop\/products\/012697_6_00adb3a7-8a71-4a4b-929c-6eb88ca0cf14_693.jpg?v=1588650891","width":1000},{"alt":"Diymore W1209 Led Digital Mini Thermostat Temperature Controller Cooling Heating Temp Control Switch","id":6678622601287,"position":4,"preview_image":{"aspect_ratio":1.0,"height":1000,"width":1000,"src":"\/\/www.diymore.cc\/cdn\/shop\/products\/012697_13_572.jpg?v=1588650891"},"aspect_ratio":1.0,"height":1000,"media_type":"image","src":"\/\/www.diymore.cc\/cdn\/shop\/products\/012697_13_572.jpg?v=1588650891","width":1000},{"alt":"Diymore W1209 Led Digital Mini Thermostat Temperature Controller Cooling Heating Temp Control Switch","id":6678623191111,"position":5,"preview_image":{"aspect_ratio":1.0,"height":1000,"width":1000,"src":"\/\/www.diymore.cc\/cdn\/shop\/products\/012697_14_575.jpg?v=1588650891"},"aspect_ratio":1.0,"height":1000,"media_type":"image","src":"\/\/www.diymore.cc\/cdn\/shop\/products\/012697_14_575.jpg?v=1588650891","width":1000},{"alt":"Diymore W1209 Led Digital Mini Thermostat Temperature Controller Cooling Heating Temp Control Switch","id":6678623846471,"position":6,"preview_image":{"aspect_ratio":1.0,"height":1000,"width":1000,"src":"\/\/www.diymore.cc\/cdn\/shop\/products\/012697_16_185.jpg?v=1588650891"},"aspect_ratio":1.0,"height":1000,"media_type":"image","src":"\/\/www.diymore.cc\/cdn\/shop\/products\/012697_16_185.jpg?v=1588650891","width":1000},{"alt":"Diymore W1209 Led Digital Mini Thermostat Temperature Controller Cooling Heating Temp Control Switch","id":6678624469063,"position":7,"preview_image":{"aspect_ratio":1.0,"height":1000,"width":1000,"src":"\/\/www.diymore.cc\/cdn\/shop\/products\/012697_8_789.jpg?v=1588650891"},"aspect_ratio":1.0,"height":1000,"media_type":"image","src":"\/\/www.diymore.cc\/cdn\/shop\/products\/012697_8_789.jpg?v=1588650891","width":1000},{"alt":"Diymore W1209 Led Digital Mini Thermostat Temperature Controller Cooling Heating Temp Control Switch","id":6678625124423,"position":8,"preview_image":{"aspect_ratio":1.0,"height":1000,"width":1000,"src":"\/\/www.diymore.cc\/cdn\/shop\/products\/012697_884.jpg?v=1588650891"},"aspect_ratio":1.0,"height":1000,"media_type":"image","src":"\/\/www.diymore.cc\/cdn\/shop\/products\/012697_884.jpg?v=1588650891","width":1000},{"alt":"Diymore W1209 Led Digital Mini Thermostat Temperature Controller Cooling Heating Temp Control Switch","id":6678625812551,"position":9,"preview_image":{"aspect_ratio":1.0,"height":1000,"width":1000,"src":"\/\/www.diymore.cc\/cdn\/shop\/products\/012697_9_395.jpg?v=1588650891"},"aspect_ratio":1.0,"height":1000,"media_type":"image","src":"\/\/www.diymore.cc\/cdn\/shop\/products\/012697_9_395.jpg?v=1588650891","width":1000}],"requires_selling_plan":false,"selling_plan_groups":[],"content":"\u003cdiv\u003e\u003cstrong\u003eFeature:\u003c\/strong\u003e\u003c\/div\u003e\n\u003cul class=\"a-unordered-list a-vertical a-spacing-none\"\u003e\n\u003cli\u003e\u003cspan class=\"a-list-item\"\u003eWide temperature control range: -50 to 110℃(-58℉-230℉); High accuracy: 0.1℃.\u003c\/span\u003e\u003c\/li\u003e\n\u003cli\u003e\u003cspan class=\"a-list-item\"\u003eWith waterproof sensitive NTC (10K 0.5%) sensor probe as the measuring input.\u003c\/span\u003e\u003c\/li\u003e\n\u003cli\u003e\u003cspan class=\"a-list-item\"\u003eDigital LED Tubes: \"LLL\" indicates sensor open, \"HHH\" indicates overrange, the relay will be forcibly disconnected;\u003c\/span\u003e\u003c\/li\u003e\n\u003cli\u003e\u003cspan class=\"a-list-item\"\u003eController automatically performs the relay ON\/OFF.\u003c\/span\u003e\u003c\/li\u003e\n\u003cli\u003e\u003cspan class=\"a-list-item\"\u003eOutput: 1 relay output, 5A 250VAC, 20A 16VAC, meet a variety of high-power loads.\u003c\/span\u003e\u003c\/li\u003e\n\u003cli\u003e\u003cspan class=\"a-list-item\"\u003eEmbedded central processor chip (MCU), smarter, lower power consumption,stable performance, good consistency, power-off setting automatic memory (MCU built-in EEPROM storage unit)\u003c\/span\u003e\u003c\/li\u003e\n\u003c\/ul\u003e\n\u003cp\u003e\u003cspan class=\"a-list-item\"\u003e\u003cb\u003eSpecifications:\u003c\/b\u003e\u003cbr\u003e\u003cspan\u003eControl accuracy: 0.1 °C\u003c\/span\u003e\u003cbr\u003e\u003cspan\u003eHysteresis accuracy: 0.1 °C\u003c\/span\u003e\u003cbr\u003e\u003cspan\u003eRefresh rate: 0.5 S\u003c\/span\u003e\u003cbr\u003e\u003cspan\u003eDisplay type: 0.28 inch three digital tube\u003c\/span\u003e\u003cbr\u003e\u003cspan\u003eInput power: DC 12V\u003c\/span\u003e\u003cbr\u003e\u003cspan\u003eMeasurement input: NTC (10K 0.5%) Waterproof sensor Line length 300mm\u003c\/span\u003e\u003cbr\u003e\u003cspan\u003eOutput: 1 relay output, 5A 250VAC, 20A 16VAC\u003c\/span\u003e\u003cbr\u003e\u003cspan\u003eEnvironmental requirements: -10~60°C Humidity 20%-85%\u003c\/span\u003e\u003cbr\u003e\u003cspan\u003ePower consumption of the whole machine: quiescent current: ≤10MA Pull-in current: ≤65MA\u003c\/span\u003e\u003cbr\u003e\u003cspan\u003eDimensions:1.87X0.73X1.24 inch.\u003c\/span\u003e\u003cbr\u003e\u003cb\u003eInstructions:\u003c\/b\u003e\u003cbr\u003e\u003cspan\u003eConnect the power supply and equipment to supply power to the thermostat, which is displayed as measuring temperature.\u003c\/span\u003e\u003cbr\u003e\u003cspan\u003eClick the SET button, the display temperature will flash, press +- to set the desired temperature (press +- to quickly raise and lower).\u003c\/span\u003e\u003cbr\u003e\u003cspan\u003eAfter the setting is completed, click SET to confirm the return. At this time, the thermostat automatically performs the relay on\/off according to the setting!\u003c\/span\u003e\u003cbr\u003e\u003cbr\u003e\u003cb\u003eIndicator and digital tube status:\u003c\/b\u003e\u003cbr\u003e\u003cspan\u003eIndicator light: The yellow indicator light is always on, indicating that the relay is closed. Digital tube: Display LLL is the sensor open circuit, please connect the sensor according to the instructions.\u003c\/span\u003e\u003cbr\u003e\u003cspan\u003eIf the HHH is out of the measurement range, the thermostat will force the relay to open.\u003c\/span\u003e\u003cbr\u003e\u003cspan\u003ePress and hold SET for 5 seconds to enter the main menu settings, press +- to switch P0...P5.\u003c\/span\u003e\u003cbr\u003e\u003cspan\u003ePress and hold SET for 5 seconds without the button action. The thermostat automatically confirms the return.\u003c\/span\u003e\u003c\/span\u003e\u003c\/p\u003e\n\u003cp\u003e\u003cspan class=\"a-list-item\"\u003e\u003cspan\u003eControl accuracy: 0.1 °C\u003cbr\u003eHysteresis accuracy: 0.1 °C\u003cbr\u003eRefresh rate: 0.5 S\u003cbr\u003eDisplay type: 0.28 inch three digital tube\u003cbr\u003eInput power: DC 12V\u003cbr\u003eMeasurement input: NTC (10K 0.5%) Waterproof sensor Line length 300mm\u003cbr\u003eOutput: 1 relay output, 5A 250VAC, 20A 16VAC\u003cbr\u003eEnvironmental requirements: -10~60°C Humidity 20%-85%\u003cbr\u003eSize: 47.5*18.5*31.5mm\u003cbr\u003ePower consumption of the whole machine: quiescent current: ≤10MA Pull-in current: ≤65MA\u003cbr\u003e\u003cbr\u003e\u003cstrong\u003eInstructions\u003c\/strong\u003e\u003c\/span\u003e\u003c\/span\u003e\u003c\/p\u003e\n\u003cp\u003e\u003cspan class=\"a-list-item\"\u003e\u003cspan\u003e\u003cbr\u003eConnect the power supply and equipment to supply power to the thermostat, which is displayed as measuring temperature.\u003cbr\u003eClick the SET button, the display temperature will flash, press +- to set the desired temperature (press +- to quickly raise and lower).\u003cbr\u003eAfter the setting is completed, click SET to confirm the return. At this time, the thermostat automatically performs the relay on\/off according to the setting!\u003cbr\u003e\u003cbr\u003eIndicator and digital tube status description\u003cbr\u003eIndicator light: The yellow indicator light is always on, indicating that the relay is closed.\u003cbr\u003eDigital tube: Display LLL is the sensor open circuit, please connect the sensor according to the instructions;\u003cbr\u003eIf the HHH is out of the measurement range, the thermostat will force the relay to open.\u003cbr\u003ePress and hold SET for 5 seconds to enter the main menu settings, press +- to switch P0...P5.\u003cbr\u003ePress and hold SET for 5 seconds without the button action. The thermostat automatically confirms the return.\u003cbr\u003e\u003cbr\u003e\u003cstrong\u003eP0 Cooling and heating mode (factory is cooling mode):\u003c\/strong\u003e\u003c\/span\u003e\u003c\/span\u003e\u003c\/p\u003e\n\u003cp\u003e\u003cspan class=\"a-list-item\"\u003e\u003cspan\u003e\u003cbr\u003ePress and hold SET for 5 seconds to display P0, press SET to set the working mode, press +- to switch [H is heating mode] [C is cooling mode] Click SET to return.\u003cbr\u003eLong press SET or 5 seconds without key action The thermostat automatically confirms completion.\u003c\/span\u003e\u003c\/span\u003e\u003c\/p\u003e\n\u003cp\u003e\u003cspan class=\"a-list-item\"\u003e\u003cspan\u003eIn the cooling mode: when the temperature measurement value ≥ temperature set point + hysteresis, the refrigeration relay is closed and the refrigerator is started; when the temperature measurement value is ≤ temperature set point, the refrigeration relay is disconnected and the refrigerator is closed.\u003cbr\u003eIn heating mode: When the temperature measurement value ≤ temperature set point - hysteresis, the heating relay pulls in and the heater starts; when the temperature measurement value ≥ temperature set point, the heating relay is turned off and the heater is turned off.\u003cbr\u003e\u003c\/span\u003e\u003c\/span\u003e\u003c\/p\u003e\n\u003cp\u003e\u003cspan class=\"a-list-item\"\u003e\u003cspan\u003e\u003cstrong\u003eP1 hysteresis setting (factory value 2 ° C):\u003c\/strong\u003e\u003c\/span\u003e\u003c\/span\u003e\u003c\/p\u003e\n\u003cp\u003e\u003cspan class=\"a-list-item\"\u003e\u003cspan\u003e\u003cbr\u003ePress and hold SET for 5 seconds to display P0, press +- to switch to P1, press SET to set the difference back, press +- to set the difference to 0.1-15, press SET to return when finished, long press SET or 5 seconds without button The motion thermostat automatically confirms the completion.\u003cbr\u003e\u003cbr\u003eIn the cooling mode: when the temperature measurement value ≥ the set value + the return value, the relay is closed and the refrigerator is started; when the temperature measurement value is ≤ the set value, the relay is turned off and the refrigerator is turned off.\u003cbr\u003e\u003cbr\u003eFor example, the environment is 30 °C, the set value is 25 °C, and the hysteresis is set to 2 °C. After the power is turned on, the relay closes the refrigerator to start. When the cooling reaches the set value of 25 °C, the relay turns off the refrigerator and closes. The temperature has started to rise and the temperature has started to rise. When the temperature rises to 27 °C, the relay closes the refrigerator again, so the repeated cycle control temperature is not higher than 25 °C + 2 °C.\u003cbr\u003e\u003cbr\u003eIn heating mode: When the temperature measurement value ≤ set value - return difference, the relay is closed and the heater is started; when the temperature measurement value is ≥ set value, the relay is turned off and the heater is turned off.\u003cbr\u003e\u003cbr\u003eFor example, if the environment is 10 °C, the set value is 25 °C, and the hysteresis is set to 2 °C. After the power is turned on, the relay closes the heater to start. When it is heated to 25 °C, the relay turns off the heater and the heater is turned off. The on temperature begins to decrease. When it drops to the set value of 23 °C, the relay closes the heater to start again, so the repeated cycle control temperature is not lower than 25 °C - 2 °C.\u003c\/span\u003e\u003c\/span\u003e\u003c\/p\u003e\n\u003cp\u003e\u003cspan class=\"a-list-item\"\u003e\u003cspan\u003e\u003cstrong\u003eP2 upper temperature setting upper limit (factory value 110 °C):\u003c\/strong\u003e\u003c\/span\u003e\u003c\/span\u003e\u003c\/p\u003e\n\u003cp\u003e\u003cspan class=\"a-list-item\"\u003e\u003cspan\u003e\u003cbr\u003eIn order to avoid the danger of setting the temperature too high due to the misoperation of others, the thermostat has the highest setting upper limit function, which limits the setting range of the highest temperature set point controlled by the thermostat.\u003cbr\u003e\u003cbr\u003ePress and hold SET for 5 seconds to display P0, press +- to switch to P2, press SET to set the upper limit, press +- to set the highest settable temperature, the maximum value is 110, press SET to return after finishing, press SET or 5 The second time without the button action thermostat automatically confirms the completion.\u003cbr\u003e\u003cbr\u003eFor example: set to 60 temperature set point can only be set to 60 ° C. If the temperature set point is to be expanded, the upper limit set value needs to be adjusted first.\u003cbr\u003e\u003cbr\u003e\u003cbr\u003e\u003cstrong\u003eP3 lowest temperature setting lower limit (factory value -50 °C):\u003c\/strong\u003e\u003cbr\u003e\u003cbr\u003eIn order to avoid the ice blockage caused by the misoperation of others, the temperature controller has the lowest setting upper and lower limit functions, which limits the setting range of the lowest temperature set point controlled by the thermostat.\u003cbr\u003e\u003cbr\u003ePress and hold SET for 5 seconds to display P0, press +- to switch to P3, press SET to set the lower limit, press +- to set the lowest settable temperature, the lowest value is -50, press SET to return after finishing, press SET or The 5-second no-key action thermostat automatically confirms the completion.\u003cbr\u003e\u003cbr\u003eFor example: set to 2 temperature set point can only be set to 2 °C minimum. If the temperature set point is to be expanded lower, the lower limit set value needs to be adjusted first.\u003c\/span\u003e\u003c\/span\u003e\u003c\/p\u003e\n\u003cp\u003e\u003cspan class=\"a-list-item\"\u003e\u003cspan\u003e\u003cstrong\u003eP4 temperature correction (factory value 0 °C):\u003c\/strong\u003e\u003cbr\u003e\u003cbr\u003eWhen the measured temperature is deviated from the standard temperature or due to special needs of the user's hardware, this function can be used for correction. The corrected temperature = temperature before correction + correction value The valid range is -7.0~7.0.\u003cbr\u003e\u003cbr\u003ePress and hold SET for 5 seconds to display P0, press +- to switch to P4, press SET to correct, press +- to set the correction value, press SET to return when finished, long press SET or 5 seconds without key action thermostat automatically confirm carry out.\u003cbr\u003e\u003cbr\u003eFor example, the normal display is 25 degrees; when the temperature is corrected to 0, it displays 25 degrees; when the temperature is corrected to 1.5, it shows 26.5 degrees; when the temperature is corrected to -1.5, it shows 23.5.\u003c\/span\u003e\u003c\/span\u003e\u003c\/p\u003e\n\u003cp\u003e\u003cspan class=\"a-list-item\"\u003e\u003cspan\u003e\u003cstrong\u003eP5 Delay time (factory value 0 minutes):\u003c\/strong\u003e\u003c\/span\u003e\u003c\/span\u003e\u003c\/p\u003e\n\u003cp\u003e\u003cspan class=\"a-list-item\"\u003e\u003cspan\u003e\u003cbr\u003eWhen the refrigerator or heater is working with a delay, the delay function can be turned on to protect the life of the device. The delay function includes delay start and delay off.\u003cbr\u003ePress and hold SET for 5 seconds to display P0, press +- to switch to P5, press SET to set the delay time unit is minute, press +- to set 0-10 minutes, press SET to return after finishing, long press SET or 5 seconds without Key action thermostat automatically confirms completion.\u003cbr\u003e\u003cbr\u003eIn the cooling mode: When the temperature measurement value ≥ temperature set point + hysteresis, the chiller will not start the cooling immediately, and it needs to run after the set delay time. When the temperature measurement value ≤ temperature set point, the refrigerator will not stop cooling immediately, and it needs to be turned off after running the set delay time.\u003cbr\u003e\u003cbr\u003eIn heating mode: When the temperature measurement value ≤ temperature set point - hysteresis, the heater will not start heating immediately, and it needs to run after the set delay time. When the temperature measurement value ≥ temperature set point, the heater will not stop heating immediately, and it needs to be turned off after running the set delay time.\u003cbr\u003e\u003cbr\u003e\u003cbr\u003eFor example, the setting delay in the cooling state is 1 minute. When the opening condition is met, the refrigerator starts to delay, and after 1 minute, the refrigerator is turned on; when the closing condition is met, the delay is started, and after 1 minute, the refrigerator stops cooling.\u003c\/span\u003e\u003c\/span\u003e\u003c\/p\u003e\n\u003cp\u003e\u003cspan class=\"a-list-item\"\u003e\u003cspan\u003e\u003cb\u003ePackage included:\u003c\/b\u003e\u003cbr\u003e1x Temperature control switch\u003c\/span\u003e\u003c\/span\u003e\u003c\/p\u003e"}
 -
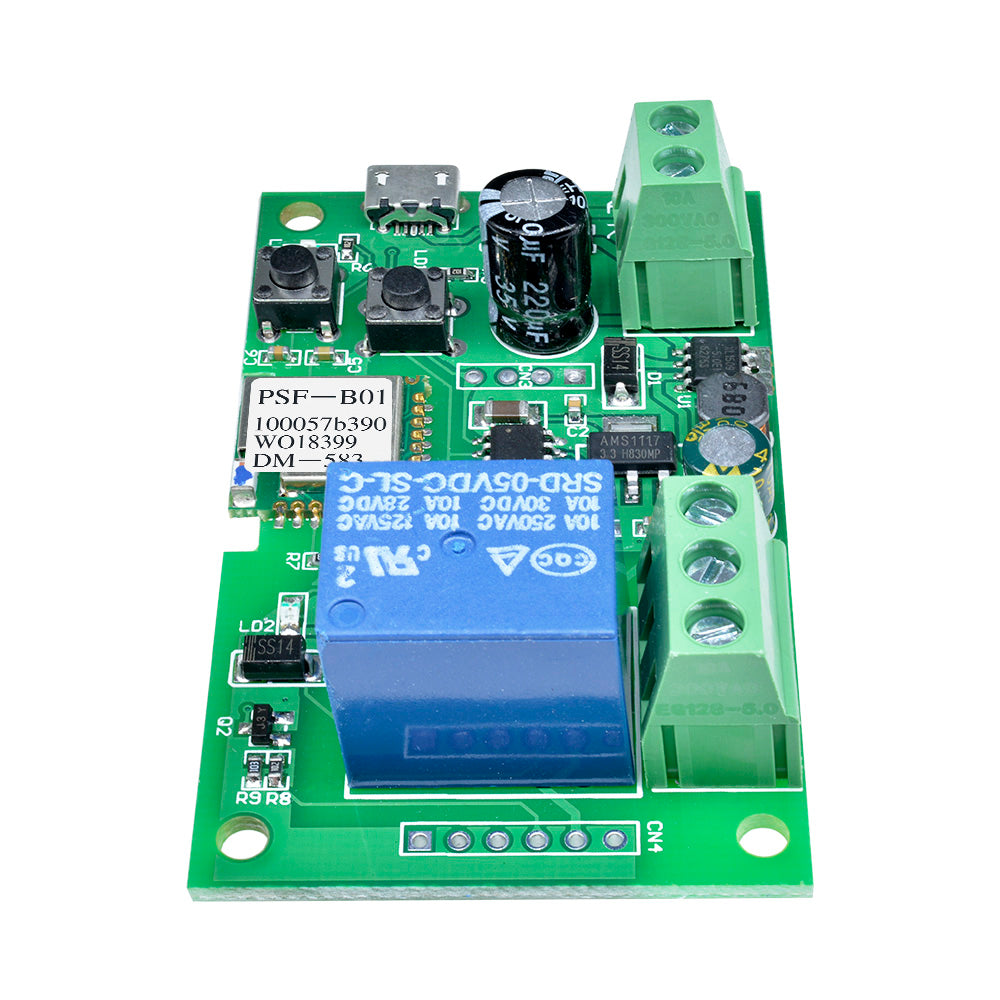
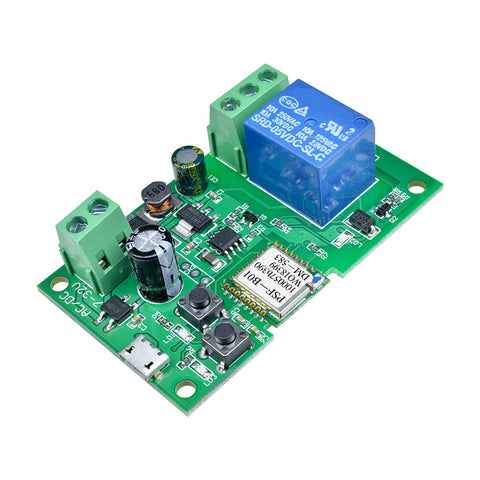 Translation missing: en.products.product.regular_price $8.99{"id":1805974306874,"title":"W1209 -50-110°C 12V Thermostat Digital Temperature Controller Switch Sensor","handle":"diymore-w1209-led-digital-mini-thermostat-temperature-controller-cooling-heating-temp-control-switch-sensor-module-board-12v-dc-50-110-c-with-one-channel-relay-and-ntc-waterproof-sensor-probe","description":"\u003cdiv\u003e\u003cstrong\u003eFeature:\u003c\/strong\u003e\u003c\/div\u003e\n\u003cul class=\"a-unordered-list a-vertical a-spacing-none\"\u003e\n\u003cli\u003e\u003cspan class=\"a-list-item\"\u003eWide temperature control range: -50 to 110℃(-58℉-230℉); High accuracy: 0.1℃.\u003c\/span\u003e\u003c\/li\u003e\n\u003cli\u003e\u003cspan class=\"a-list-item\"\u003eWith waterproof sensitive NTC (10K 0.5%) sensor probe as the measuring input.\u003c\/span\u003e\u003c\/li\u003e\n\u003cli\u003e\u003cspan class=\"a-list-item\"\u003eDigital LED Tubes: \"LLL\" indicates sensor open, \"HHH\" indicates overrange, the relay will be forcibly disconnected;\u003c\/span\u003e\u003c\/li\u003e\n\u003cli\u003e\u003cspan class=\"a-list-item\"\u003eController automatically performs the relay ON\/OFF.\u003c\/span\u003e\u003c\/li\u003e\n\u003cli\u003e\u003cspan class=\"a-list-item\"\u003eOutput: 1 relay output, 5A 250VAC, 20A 16VAC, meet a variety of high-power loads.\u003c\/span\u003e\u003c\/li\u003e\n\u003cli\u003e\u003cspan class=\"a-list-item\"\u003eEmbedded central processor chip (MCU), smarter, lower power consumption,stable performance, good consistency, power-off setting automatic memory (MCU built-in EEPROM storage unit)\u003c\/span\u003e\u003c\/li\u003e\n\u003c\/ul\u003e\n\u003cp\u003e\u003cspan class=\"a-list-item\"\u003e\u003cb\u003eSpecifications:\u003c\/b\u003e\u003cbr\u003e\u003cspan\u003eControl accuracy: 0.1 °C\u003c\/span\u003e\u003cbr\u003e\u003cspan\u003eHysteresis accuracy: 0.1 °C\u003c\/span\u003e\u003cbr\u003e\u003cspan\u003eRefresh rate: 0.5 S\u003c\/span\u003e\u003cbr\u003e\u003cspan\u003eDisplay type: 0.28 inch three digital tube\u003c\/span\u003e\u003cbr\u003e\u003cspan\u003eInput power: DC 12V\u003c\/span\u003e\u003cbr\u003e\u003cspan\u003eMeasurement input: NTC (10K 0.5%) Waterproof sensor Line length 300mm\u003c\/span\u003e\u003cbr\u003e\u003cspan\u003eOutput: 1 relay output, 5A 250VAC, 20A 16VAC\u003c\/span\u003e\u003cbr\u003e\u003cspan\u003eEnvironmental requirements: -10~60°C Humidity 20%-85%\u003c\/span\u003e\u003cbr\u003e\u003cspan\u003ePower consumption of the whole machine: quiescent current: ≤10MA Pull-in current: ≤65MA\u003c\/span\u003e\u003cbr\u003e\u003cspan\u003eDimensions:1.87X0.73X1.24 inch.\u003c\/span\u003e\u003cbr\u003e\u003cb\u003eInstructions:\u003c\/b\u003e\u003cbr\u003e\u003cspan\u003eConnect the power supply and equipment to supply power to the thermostat, which is displayed as measuring temperature.\u003c\/span\u003e\u003cbr\u003e\u003cspan\u003eClick the SET button, the display temperature will flash, press +- to set the desired temperature (press +- to quickly raise and lower).\u003c\/span\u003e\u003cbr\u003e\u003cspan\u003eAfter the setting is completed, click SET to confirm the return. At this time, the thermostat automatically performs the relay on\/off according to the setting!\u003c\/span\u003e\u003cbr\u003e\u003cbr\u003e\u003cb\u003eIndicator and digital tube status:\u003c\/b\u003e\u003cbr\u003e\u003cspan\u003eIndicator light: The yellow indicator light is always on, indicating that the relay is closed. Digital tube: Display LLL is the sensor open circuit, please connect the sensor according to the instructions.\u003c\/span\u003e\u003cbr\u003e\u003cspan\u003eIf the HHH is out of the measurement range, the thermostat will force the relay to open.\u003c\/span\u003e\u003cbr\u003e\u003cspan\u003ePress and hold SET for 5 seconds to enter the main menu settings, press +- to switch P0...P5.\u003c\/span\u003e\u003cbr\u003e\u003cspan\u003ePress and hold SET for 5 seconds without the button action. The thermostat automatically confirms the return.\u003c\/span\u003e\u003c\/span\u003e\u003c\/p\u003e\n\u003cp\u003e\u003cspan class=\"a-list-item\"\u003e\u003cspan\u003eControl accuracy: 0.1 °C\u003cbr\u003eHysteresis accuracy: 0.1 °C\u003cbr\u003eRefresh rate: 0.5 S\u003cbr\u003eDisplay type: 0.28 inch three digital tube\u003cbr\u003eInput power: DC 12V\u003cbr\u003eMeasurement input: NTC (10K 0.5%) Waterproof sensor Line length 300mm\u003cbr\u003eOutput: 1 relay output, 5A 250VAC, 20A 16VAC\u003cbr\u003eEnvironmental requirements: -10~60°C Humidity 20%-85%\u003cbr\u003eSize: 47.5*18.5*31.5mm\u003cbr\u003ePower consumption of the whole machine: quiescent current: ≤10MA Pull-in current: ≤65MA\u003cbr\u003e\u003cbr\u003e\u003cstrong\u003eInstructions\u003c\/strong\u003e\u003c\/span\u003e\u003c\/span\u003e\u003c\/p\u003e\n\u003cp\u003e\u003cspan class=\"a-list-item\"\u003e\u003cspan\u003e\u003cbr\u003eConnect the power supply and equipment to supply power to the thermostat, which is displayed as measuring temperature.\u003cbr\u003eClick the SET button, the display temperature will flash, press +- to set the desired temperature (press +- to quickly raise and lower).\u003cbr\u003eAfter the setting is completed, click SET to confirm the return. At this time, the thermostat automatically performs the relay on\/off according to the setting!\u003cbr\u003e\u003cbr\u003eIndicator and digital tube status description\u003cbr\u003eIndicator light: The yellow indicator light is always on, indicating that the relay is closed.\u003cbr\u003eDigital tube: Display LLL is the sensor open circuit, please connect the sensor according to the instructions;\u003cbr\u003eIf the HHH is out of the measurement range, the thermostat will force the relay to open.\u003cbr\u003ePress and hold SET for 5 seconds to enter the main menu settings, press +- to switch P0...P5.\u003cbr\u003ePress and hold SET for 5 seconds without the button action. The thermostat automatically confirms the return.\u003cbr\u003e\u003cbr\u003e\u003cstrong\u003eP0 Cooling and heating mode (factory is cooling mode):\u003c\/strong\u003e\u003c\/span\u003e\u003c\/span\u003e\u003c\/p\u003e\n\u003cp\u003e\u003cspan class=\"a-list-item\"\u003e\u003cspan\u003e\u003cbr\u003ePress and hold SET for 5 seconds to display P0, press SET to set the working mode, press +- to switch [H is heating mode] [C is cooling mode] Click SET to return.\u003cbr\u003eLong press SET or 5 seconds without key action The thermostat automatically confirms completion.\u003c\/span\u003e\u003c\/span\u003e\u003c\/p\u003e\n\u003cp\u003e\u003cspan class=\"a-list-item\"\u003e\u003cspan\u003eIn the cooling mode: when the temperature measurement value ≥ temperature set point + hysteresis, the refrigeration relay is closed and the refrigerator is started; when the temperature measurement value is ≤ temperature set point, the refrigeration relay is disconnected and the refrigerator is closed.\u003cbr\u003eIn heating mode: When the temperature measurement value ≤ temperature set point - hysteresis, the heating relay pulls in and the heater starts; when the temperature measurement value ≥ temperature set point, the heating relay is turned off and the heater is turned off.\u003cbr\u003e\u003c\/span\u003e\u003c\/span\u003e\u003c\/p\u003e\n\u003cp\u003e\u003cspan class=\"a-list-item\"\u003e\u003cspan\u003e\u003cstrong\u003eP1 hysteresis setting (factory value 2 ° C):\u003c\/strong\u003e\u003c\/span\u003e\u003c\/span\u003e\u003c\/p\u003e\n\u003cp\u003e\u003cspan class=\"a-list-item\"\u003e\u003cspan\u003e\u003cbr\u003ePress and hold SET for 5 seconds to display P0, press +- to switch to P1, press SET to set the difference back, press +- to set the difference to 0.1-15, press SET to return when finished, long press SET or 5 seconds without button The motion thermostat automatically confirms the completion.\u003cbr\u003e\u003cbr\u003eIn the cooling mode: when the temperature measurement value ≥ the set value + the return value, the relay is closed and the refrigerator is started; when the temperature measurement value is ≤ the set value, the relay is turned off and the refrigerator is turned off.\u003cbr\u003e\u003cbr\u003eFor example, the environment is 30 °C, the set value is 25 °C, and the hysteresis is set to 2 °C. After the power is turned on, the relay closes the refrigerator to start. When the cooling reaches the set value of 25 °C, the relay turns off the refrigerator and closes. The temperature has started to rise and the temperature has started to rise. When the temperature rises to 27 °C, the relay closes the refrigerator again, so the repeated cycle control temperature is not higher than 25 °C + 2 °C.\u003cbr\u003e\u003cbr\u003eIn heating mode: When the temperature measurement value ≤ set value - return difference, the relay is closed and the heater is started; when the temperature measurement value is ≥ set value, the relay is turned off and the heater is turned off.\u003cbr\u003e\u003cbr\u003eFor example, if the environment is 10 °C, the set value is 25 °C, and the hysteresis is set to 2 °C. After the power is turned on, the relay closes the heater to start. When it is heated to 25 °C, the relay turns off the heater and the heater is turned off. The on temperature begins to decrease. When it drops to the set value of 23 °C, the relay closes the heater to start again, so the repeated cycle control temperature is not lower than 25 °C - 2 °C.\u003c\/span\u003e\u003c\/span\u003e\u003c\/p\u003e\n\u003cp\u003e\u003cspan class=\"a-list-item\"\u003e\u003cspan\u003e\u003cstrong\u003eP2 upper temperature setting upper limit (factory value 110 °C):\u003c\/strong\u003e\u003c\/span\u003e\u003c\/span\u003e\u003c\/p\u003e\n\u003cp\u003e\u003cspan class=\"a-list-item\"\u003e\u003cspan\u003e\u003cbr\u003eIn order to avoid the danger of setting the temperature too high due to the misoperation of others, the thermostat has the highest setting upper limit function, which limits the setting range of the highest temperature set point controlled by the thermostat.\u003cbr\u003e\u003cbr\u003ePress and hold SET for 5 seconds to display P0, press +- to switch to P2, press SET to set the upper limit, press +- to set the highest settable temperature, the maximum value is 110, press SET to return after finishing, press SET or 5 The second time without the button action thermostat automatically confirms the completion.\u003cbr\u003e\u003cbr\u003eFor example: set to 60 temperature set point can only be set to 60 ° C. If the temperature set point is to be expanded, the upper limit set value needs to be adjusted first.\u003cbr\u003e\u003cbr\u003e\u003cbr\u003e\u003cstrong\u003eP3 lowest temperature setting lower limit (factory value -50 °C):\u003c\/strong\u003e\u003cbr\u003e\u003cbr\u003eIn order to avoid the ice blockage caused by the misoperation of others, the temperature controller has the lowest setting upper and lower limit functions, which limits the setting range of the lowest temperature set point controlled by the thermostat.\u003cbr\u003e\u003cbr\u003ePress and hold SET for 5 seconds to display P0, press +- to switch to P3, press SET to set the lower limit, press +- to set the lowest settable temperature, the lowest value is -50, press SET to return after finishing, press SET or The 5-second no-key action thermostat automatically confirms the completion.\u003cbr\u003e\u003cbr\u003eFor example: set to 2 temperature set point can only be set to 2 °C minimum. If the temperature set point is to be expanded lower, the lower limit set value needs to be adjusted first.\u003c\/span\u003e\u003c\/span\u003e\u003c\/p\u003e\n\u003cp\u003e\u003cspan class=\"a-list-item\"\u003e\u003cspan\u003e\u003cstrong\u003eP4 temperature correction (factory value 0 °C):\u003c\/strong\u003e\u003cbr\u003e\u003cbr\u003eWhen the measured temperature is deviated from the standard temperature or due to special needs of the user's hardware, this function can be used for correction. The corrected temperature = temperature before correction + correction value The valid range is -7.0~7.0.\u003cbr\u003e\u003cbr\u003ePress and hold SET for 5 seconds to display P0, press +- to switch to P4, press SET to correct, press +- to set the correction value, press SET to return when finished, long press SET or 5 seconds without key action thermostat automatically confirm carry out.\u003cbr\u003e\u003cbr\u003eFor example, the normal display is 25 degrees; when the temperature is corrected to 0, it displays 25 degrees; when the temperature is corrected to 1.5, it shows 26.5 degrees; when the temperature is corrected to -1.5, it shows 23.5.\u003c\/span\u003e\u003c\/span\u003e\u003c\/p\u003e\n\u003cp\u003e\u003cspan class=\"a-list-item\"\u003e\u003cspan\u003e\u003cstrong\u003eP5 Delay time (factory value 0 minutes):\u003c\/strong\u003e\u003c\/span\u003e\u003c\/span\u003e\u003c\/p\u003e\n\u003cp\u003e\u003cspan class=\"a-list-item\"\u003e\u003cspan\u003e\u003cbr\u003eWhen the refrigerator or heater is working with a delay, the delay function can be turned on to protect the life of the device. The delay function includes delay start and delay off.\u003cbr\u003ePress and hold SET for 5 seconds to display P0, press +- to switch to P5, press SET to set the delay time unit is minute, press +- to set 0-10 minutes, press SET to return after finishing, long press SET or 5 seconds without Key action thermostat automatically confirms completion.\u003cbr\u003e\u003cbr\u003eIn the cooling mode: When the temperature measurement value ≥ temperature set point + hysteresis, the chiller will not start the cooling immediately, and it needs to run after the set delay time. When the temperature measurement value ≤ temperature set point, the refrigerator will not stop cooling immediately, and it needs to be turned off after running the set delay time.\u003cbr\u003e\u003cbr\u003eIn heating mode: When the temperature measurement value ≤ temperature set point - hysteresis, the heater will not start heating immediately, and it needs to run after the set delay time. When the temperature measurement value ≥ temperature set point, the heater will not stop heating immediately, and it needs to be turned off after running the set delay time.\u003cbr\u003e\u003cbr\u003e\u003cbr\u003eFor example, the setting delay in the cooling state is 1 minute. When the opening condition is met, the refrigerator starts to delay, and after 1 minute, the refrigerator is turned on; when the closing condition is met, the delay is started, and after 1 minute, the refrigerator stops cooling.\u003c\/span\u003e\u003c\/span\u003e\u003c\/p\u003e\n\u003cp\u003e\u003cspan class=\"a-list-item\"\u003e\u003cspan\u003e\u003cb\u003ePackage included:\u003c\/b\u003e\u003cbr\u003e1x Temperature control switch\u003c\/span\u003e\u003c\/span\u003e\u003c\/p\u003e","published_at":"2018-08-09T10:59:18+08:00","created_at":"2018-08-09T11:13:40+08:00","vendor":"diymore","type":"Thermostat","tags":["Display","Relay","STC 1000","STC1000"],"price":699,"price_min":699,"price_max":699,"available":true,"price_varies":false,"compare_at_price":null,"compare_at_price_min":0,"compare_at_price_max":0,"compare_at_price_varies":false,"variants":[{"id":17508649435194,"title":"Default Title","option1":"Default Title","option2":null,"option3":null,"sku":"012697","requires_shipping":true,"taxable":false,"featured_image":null,"available":true,"name":"W1209 -50-110°C 12V Thermostat Digital Temperature Controller Switch Sensor","public_title":null,"options":["Default Title"],"price":699,"weight":27,"compare_at_price":null,"inventory_management":null,"barcode":"","requires_selling_plan":false,"selling_plan_allocations":[],"quantity_rule":{"min":1,"max":null,"increment":1}}],"images":["\/\/www.diymore.cc\/cdn\/shop\/products\/012697_4_892.jpg?v=1588650891","\/\/www.diymore.cc\/cdn\/shop\/products\/012697_6_597.jpg?v=1588650891","\/\/www.diymore.cc\/cdn\/shop\/products\/012697_6_00adb3a7-8a71-4a4b-929c-6eb88ca0cf14_693.jpg?v=1588650891","\/\/www.diymore.cc\/cdn\/shop\/products\/012697_13_572.jpg?v=1588650891","\/\/www.diymore.cc\/cdn\/shop\/products\/012697_14_575.jpg?v=1588650891","\/\/www.diymore.cc\/cdn\/shop\/products\/012697_16_185.jpg?v=1588650891","\/\/www.diymore.cc\/cdn\/shop\/products\/012697_8_789.jpg?v=1588650891","\/\/www.diymore.cc\/cdn\/shop\/products\/012697_884.jpg?v=1588650891","\/\/www.diymore.cc\/cdn\/shop\/products\/012697_9_395.jpg?v=1588650891"],"featured_image":"\/\/www.diymore.cc\/cdn\/shop\/products\/012697_4_892.jpg?v=1588650891","options":["Title"],"media":[{"alt":"Diymore W1209 Led Digital Mini Thermostat Temperature Controller Cooling Heating Temp Control Switch","id":6678620635207,"position":1,"preview_image":{"aspect_ratio":1.0,"height":1000,"width":1000,"src":"\/\/www.diymore.cc\/cdn\/shop\/products\/012697_4_892.jpg?v=1588650891"},"aspect_ratio":1.0,"height":1000,"media_type":"image","src":"\/\/www.diymore.cc\/cdn\/shop\/products\/012697_4_892.jpg?v=1588650891","width":1000},{"alt":"Diymore W1209 Led Digital Mini Thermostat Temperature Controller Cooling Heating Temp Control Switch","id":6678621454407,"position":2,"preview_image":{"aspect_ratio":1.0,"height":1000,"width":1000,"src":"\/\/www.diymore.cc\/cdn\/shop\/products\/012697_6_597.jpg?v=1588650891"},"aspect_ratio":1.0,"height":1000,"media_type":"image","src":"\/\/www.diymore.cc\/cdn\/shop\/products\/012697_6_597.jpg?v=1588650891","width":1000},{"alt":"Diymore W1209 Led Digital Mini Thermostat Temperature Controller Cooling Heating Temp Control Switch","id":6678622208071,"position":3,"preview_image":{"aspect_ratio":1.0,"height":1000,"width":1000,"src":"\/\/www.diymore.cc\/cdn\/shop\/products\/012697_6_00adb3a7-8a71-4a4b-929c-6eb88ca0cf14_693.jpg?v=1588650891"},"aspect_ratio":1.0,"height":1000,"media_type":"image","src":"\/\/www.diymore.cc\/cdn\/shop\/products\/012697_6_00adb3a7-8a71-4a4b-929c-6eb88ca0cf14_693.jpg?v=1588650891","width":1000},{"alt":"Diymore W1209 Led Digital Mini Thermostat Temperature Controller Cooling Heating Temp Control Switch","id":6678622601287,"position":4,"preview_image":{"aspect_ratio":1.0,"height":1000,"width":1000,"src":"\/\/www.diymore.cc\/cdn\/shop\/products\/012697_13_572.jpg?v=1588650891"},"aspect_ratio":1.0,"height":1000,"media_type":"image","src":"\/\/www.diymore.cc\/cdn\/shop\/products\/012697_13_572.jpg?v=1588650891","width":1000},{"alt":"Diymore W1209 Led Digital Mini Thermostat Temperature Controller Cooling Heating Temp Control Switch","id":6678623191111,"position":5,"preview_image":{"aspect_ratio":1.0,"height":1000,"width":1000,"src":"\/\/www.diymore.cc\/cdn\/shop\/products\/012697_14_575.jpg?v=1588650891"},"aspect_ratio":1.0,"height":1000,"media_type":"image","src":"\/\/www.diymore.cc\/cdn\/shop\/products\/012697_14_575.jpg?v=1588650891","width":1000},{"alt":"Diymore W1209 Led Digital Mini Thermostat Temperature Controller Cooling Heating Temp Control Switch","id":6678623846471,"position":6,"preview_image":{"aspect_ratio":1.0,"height":1000,"width":1000,"src":"\/\/www.diymore.cc\/cdn\/shop\/products\/012697_16_185.jpg?v=1588650891"},"aspect_ratio":1.0,"height":1000,"media_type":"image","src":"\/\/www.diymore.cc\/cdn\/shop\/products\/012697_16_185.jpg?v=1588650891","width":1000},{"alt":"Diymore W1209 Led Digital Mini Thermostat Temperature Controller Cooling Heating Temp Control Switch","id":6678624469063,"position":7,"preview_image":{"aspect_ratio":1.0,"height":1000,"width":1000,"src":"\/\/www.diymore.cc\/cdn\/shop\/products\/012697_8_789.jpg?v=1588650891"},"aspect_ratio":1.0,"height":1000,"media_type":"image","src":"\/\/www.diymore.cc\/cdn\/shop\/products\/012697_8_789.jpg?v=1588650891","width":1000},{"alt":"Diymore W1209 Led Digital Mini Thermostat Temperature Controller Cooling Heating Temp Control Switch","id":6678625124423,"position":8,"preview_image":{"aspect_ratio":1.0,"height":1000,"width":1000,"src":"\/\/www.diymore.cc\/cdn\/shop\/products\/012697_884.jpg?v=1588650891"},"aspect_ratio":1.0,"height":1000,"media_type":"image","src":"\/\/www.diymore.cc\/cdn\/shop\/products\/012697_884.jpg?v=1588650891","width":1000},{"alt":"Diymore W1209 Led Digital Mini Thermostat Temperature Controller Cooling Heating Temp Control Switch","id":6678625812551,"position":9,"preview_image":{"aspect_ratio":1.0,"height":1000,"width":1000,"src":"\/\/www.diymore.cc\/cdn\/shop\/products\/012697_9_395.jpg?v=1588650891"},"aspect_ratio":1.0,"height":1000,"media_type":"image","src":"\/\/www.diymore.cc\/cdn\/shop\/products\/012697_9_395.jpg?v=1588650891","width":1000}],"requires_selling_plan":false,"selling_plan_groups":[],"content":"\u003cdiv\u003e\u003cstrong\u003eFeature:\u003c\/strong\u003e\u003c\/div\u003e\n\u003cul class=\"a-unordered-list a-vertical a-spacing-none\"\u003e\n\u003cli\u003e\u003cspan class=\"a-list-item\"\u003eWide temperature control range: -50 to 110℃(-58℉-230℉); High accuracy: 0.1℃.\u003c\/span\u003e\u003c\/li\u003e\n\u003cli\u003e\u003cspan class=\"a-list-item\"\u003eWith waterproof sensitive NTC (10K 0.5%) sensor probe as the measuring input.\u003c\/span\u003e\u003c\/li\u003e\n\u003cli\u003e\u003cspan class=\"a-list-item\"\u003eDigital LED Tubes: \"LLL\" indicates sensor open, \"HHH\" indicates overrange, the relay will be forcibly disconnected;\u003c\/span\u003e\u003c\/li\u003e\n\u003cli\u003e\u003cspan class=\"a-list-item\"\u003eController automatically performs the relay ON\/OFF.\u003c\/span\u003e\u003c\/li\u003e\n\u003cli\u003e\u003cspan class=\"a-list-item\"\u003eOutput: 1 relay output, 5A 250VAC, 20A 16VAC, meet a variety of high-power loads.\u003c\/span\u003e\u003c\/li\u003e\n\u003cli\u003e\u003cspan class=\"a-list-item\"\u003eEmbedded central processor chip (MCU), smarter, lower power consumption,stable performance, good consistency, power-off setting automatic memory (MCU built-in EEPROM storage unit)\u003c\/span\u003e\u003c\/li\u003e\n\u003c\/ul\u003e\n\u003cp\u003e\u003cspan class=\"a-list-item\"\u003e\u003cb\u003eSpecifications:\u003c\/b\u003e\u003cbr\u003e\u003cspan\u003eControl accuracy: 0.1 °C\u003c\/span\u003e\u003cbr\u003e\u003cspan\u003eHysteresis accuracy: 0.1 °C\u003c\/span\u003e\u003cbr\u003e\u003cspan\u003eRefresh rate: 0.5 S\u003c\/span\u003e\u003cbr\u003e\u003cspan\u003eDisplay type: 0.28 inch three digital tube\u003c\/span\u003e\u003cbr\u003e\u003cspan\u003eInput power: DC 12V\u003c\/span\u003e\u003cbr\u003e\u003cspan\u003eMeasurement input: NTC (10K 0.5%) Waterproof sensor Line length 300mm\u003c\/span\u003e\u003cbr\u003e\u003cspan\u003eOutput: 1 relay output, 5A 250VAC, 20A 16VAC\u003c\/span\u003e\u003cbr\u003e\u003cspan\u003eEnvironmental requirements: -10~60°C Humidity 20%-85%\u003c\/span\u003e\u003cbr\u003e\u003cspan\u003ePower consumption of the whole machine: quiescent current: ≤10MA Pull-in current: ≤65MA\u003c\/span\u003e\u003cbr\u003e\u003cspan\u003eDimensions:1.87X0.73X1.24 inch.\u003c\/span\u003e\u003cbr\u003e\u003cb\u003eInstructions:\u003c\/b\u003e\u003cbr\u003e\u003cspan\u003eConnect the power supply and equipment to supply power to the thermostat, which is displayed as measuring temperature.\u003c\/span\u003e\u003cbr\u003e\u003cspan\u003eClick the SET button, the display temperature will flash, press +- to set the desired temperature (press +- to quickly raise and lower).\u003c\/span\u003e\u003cbr\u003e\u003cspan\u003eAfter the setting is completed, click SET to confirm the return. At this time, the thermostat automatically performs the relay on\/off according to the setting!\u003c\/span\u003e\u003cbr\u003e\u003cbr\u003e\u003cb\u003eIndicator and digital tube status:\u003c\/b\u003e\u003cbr\u003e\u003cspan\u003eIndicator light: The yellow indicator light is always on, indicating that the relay is closed. Digital tube: Display LLL is the sensor open circuit, please connect the sensor according to the instructions.\u003c\/span\u003e\u003cbr\u003e\u003cspan\u003eIf the HHH is out of the measurement range, the thermostat will force the relay to open.\u003c\/span\u003e\u003cbr\u003e\u003cspan\u003ePress and hold SET for 5 seconds to enter the main menu settings, press +- to switch P0...P5.\u003c\/span\u003e\u003cbr\u003e\u003cspan\u003ePress and hold SET for 5 seconds without the button action. The thermostat automatically confirms the return.\u003c\/span\u003e\u003c\/span\u003e\u003c\/p\u003e\n\u003cp\u003e\u003cspan class=\"a-list-item\"\u003e\u003cspan\u003eControl accuracy: 0.1 °C\u003cbr\u003eHysteresis accuracy: 0.1 °C\u003cbr\u003eRefresh rate: 0.5 S\u003cbr\u003eDisplay type: 0.28 inch three digital tube\u003cbr\u003eInput power: DC 12V\u003cbr\u003eMeasurement input: NTC (10K 0.5%) Waterproof sensor Line length 300mm\u003cbr\u003eOutput: 1 relay output, 5A 250VAC, 20A 16VAC\u003cbr\u003eEnvironmental requirements: -10~60°C Humidity 20%-85%\u003cbr\u003eSize: 47.5*18.5*31.5mm\u003cbr\u003ePower consumption of the whole machine: quiescent current: ≤10MA Pull-in current: ≤65MA\u003cbr\u003e\u003cbr\u003e\u003cstrong\u003eInstructions\u003c\/strong\u003e\u003c\/span\u003e\u003c\/span\u003e\u003c\/p\u003e\n\u003cp\u003e\u003cspan class=\"a-list-item\"\u003e\u003cspan\u003e\u003cbr\u003eConnect the power supply and equipment to supply power to the thermostat, which is displayed as measuring temperature.\u003cbr\u003eClick the SET button, the display temperature will flash, press +- to set the desired temperature (press +- to quickly raise and lower).\u003cbr\u003eAfter the setting is completed, click SET to confirm the return. At this time, the thermostat automatically performs the relay on\/off according to the setting!\u003cbr\u003e\u003cbr\u003eIndicator and digital tube status description\u003cbr\u003eIndicator light: The yellow indicator light is always on, indicating that the relay is closed.\u003cbr\u003eDigital tube: Display LLL is the sensor open circuit, please connect the sensor according to the instructions;\u003cbr\u003eIf the HHH is out of the measurement range, the thermostat will force the relay to open.\u003cbr\u003ePress and hold SET for 5 seconds to enter the main menu settings, press +- to switch P0...P5.\u003cbr\u003ePress and hold SET for 5 seconds without the button action. The thermostat automatically confirms the return.\u003cbr\u003e\u003cbr\u003e\u003cstrong\u003eP0 Cooling and heating mode (factory is cooling mode):\u003c\/strong\u003e\u003c\/span\u003e\u003c\/span\u003e\u003c\/p\u003e\n\u003cp\u003e\u003cspan class=\"a-list-item\"\u003e\u003cspan\u003e\u003cbr\u003ePress and hold SET for 5 seconds to display P0, press SET to set the working mode, press +- to switch [H is heating mode] [C is cooling mode] Click SET to return.\u003cbr\u003eLong press SET or 5 seconds without key action The thermostat automatically confirms completion.\u003c\/span\u003e\u003c\/span\u003e\u003c\/p\u003e\n\u003cp\u003e\u003cspan class=\"a-list-item\"\u003e\u003cspan\u003eIn the cooling mode: when the temperature measurement value ≥ temperature set point + hysteresis, the refrigeration relay is closed and the refrigerator is started; when the temperature measurement value is ≤ temperature set point, the refrigeration relay is disconnected and the refrigerator is closed.\u003cbr\u003eIn heating mode: When the temperature measurement value ≤ temperature set point - hysteresis, the heating relay pulls in and the heater starts; when the temperature measurement value ≥ temperature set point, the heating relay is turned off and the heater is turned off.\u003cbr\u003e\u003c\/span\u003e\u003c\/span\u003e\u003c\/p\u003e\n\u003cp\u003e\u003cspan class=\"a-list-item\"\u003e\u003cspan\u003e\u003cstrong\u003eP1 hysteresis setting (factory value 2 ° C):\u003c\/strong\u003e\u003c\/span\u003e\u003c\/span\u003e\u003c\/p\u003e\n\u003cp\u003e\u003cspan class=\"a-list-item\"\u003e\u003cspan\u003e\u003cbr\u003ePress and hold SET for 5 seconds to display P0, press +- to switch to P1, press SET to set the difference back, press +- to set the difference to 0.1-15, press SET to return when finished, long press SET or 5 seconds without button The motion thermostat automatically confirms the completion.\u003cbr\u003e\u003cbr\u003eIn the cooling mode: when the temperature measurement value ≥ the set value + the return value, the relay is closed and the refrigerator is started; when the temperature measurement value is ≤ the set value, the relay is turned off and the refrigerator is turned off.\u003cbr\u003e\u003cbr\u003eFor example, the environment is 30 °C, the set value is 25 °C, and the hysteresis is set to 2 °C. After the power is turned on, the relay closes the refrigerator to start. When the cooling reaches the set value of 25 °C, the relay turns off the refrigerator and closes. The temperature has started to rise and the temperature has started to rise. When the temperature rises to 27 °C, the relay closes the refrigerator again, so the repeated cycle control temperature is not higher than 25 °C + 2 °C.\u003cbr\u003e\u003cbr\u003eIn heating mode: When the temperature measurement value ≤ set value - return difference, the relay is closed and the heater is started; when the temperature measurement value is ≥ set value, the relay is turned off and the heater is turned off.\u003cbr\u003e\u003cbr\u003eFor example, if the environment is 10 °C, the set value is 25 °C, and the hysteresis is set to 2 °C. After the power is turned on, the relay closes the heater to start. When it is heated to 25 °C, the relay turns off the heater and the heater is turned off. The on temperature begins to decrease. When it drops to the set value of 23 °C, the relay closes the heater to start again, so the repeated cycle control temperature is not lower than 25 °C - 2 °C.\u003c\/span\u003e\u003c\/span\u003e\u003c\/p\u003e\n\u003cp\u003e\u003cspan class=\"a-list-item\"\u003e\u003cspan\u003e\u003cstrong\u003eP2 upper temperature setting upper limit (factory value 110 °C):\u003c\/strong\u003e\u003c\/span\u003e\u003c\/span\u003e\u003c\/p\u003e\n\u003cp\u003e\u003cspan class=\"a-list-item\"\u003e\u003cspan\u003e\u003cbr\u003eIn order to avoid the danger of setting the temperature too high due to the misoperation of others, the thermostat has the highest setting upper limit function, which limits the setting range of the highest temperature set point controlled by the thermostat.\u003cbr\u003e\u003cbr\u003ePress and hold SET for 5 seconds to display P0, press +- to switch to P2, press SET to set the upper limit, press +- to set the highest settable temperature, the maximum value is 110, press SET to return after finishing, press SET or 5 The second time without the button action thermostat automatically confirms the completion.\u003cbr\u003e\u003cbr\u003eFor example: set to 60 temperature set point can only be set to 60 ° C. If the temperature set point is to be expanded, the upper limit set value needs to be adjusted first.\u003cbr\u003e\u003cbr\u003e\u003cbr\u003e\u003cstrong\u003eP3 lowest temperature setting lower limit (factory value -50 °C):\u003c\/strong\u003e\u003cbr\u003e\u003cbr\u003eIn order to avoid the ice blockage caused by the misoperation of others, the temperature controller has the lowest setting upper and lower limit functions, which limits the setting range of the lowest temperature set point controlled by the thermostat.\u003cbr\u003e\u003cbr\u003ePress and hold SET for 5 seconds to display P0, press +- to switch to P3, press SET to set the lower limit, press +- to set the lowest settable temperature, the lowest value is -50, press SET to return after finishing, press SET or The 5-second no-key action thermostat automatically confirms the completion.\u003cbr\u003e\u003cbr\u003eFor example: set to 2 temperature set point can only be set to 2 °C minimum. If the temperature set point is to be expanded lower, the lower limit set value needs to be adjusted first.\u003c\/span\u003e\u003c\/span\u003e\u003c\/p\u003e\n\u003cp\u003e\u003cspan class=\"a-list-item\"\u003e\u003cspan\u003e\u003cstrong\u003eP4 temperature correction (factory value 0 °C):\u003c\/strong\u003e\u003cbr\u003e\u003cbr\u003eWhen the measured temperature is deviated from the standard temperature or due to special needs of the user's hardware, this function can be used for correction. The corrected temperature = temperature before correction + correction value The valid range is -7.0~7.0.\u003cbr\u003e\u003cbr\u003ePress and hold SET for 5 seconds to display P0, press +- to switch to P4, press SET to correct, press +- to set the correction value, press SET to return when finished, long press SET or 5 seconds without key action thermostat automatically confirm carry out.\u003cbr\u003e\u003cbr\u003eFor example, the normal display is 25 degrees; when the temperature is corrected to 0, it displays 25 degrees; when the temperature is corrected to 1.5, it shows 26.5 degrees; when the temperature is corrected to -1.5, it shows 23.5.\u003c\/span\u003e\u003c\/span\u003e\u003c\/p\u003e\n\u003cp\u003e\u003cspan class=\"a-list-item\"\u003e\u003cspan\u003e\u003cstrong\u003eP5 Delay time (factory value 0 minutes):\u003c\/strong\u003e\u003c\/span\u003e\u003c\/span\u003e\u003c\/p\u003e\n\u003cp\u003e\u003cspan class=\"a-list-item\"\u003e\u003cspan\u003e\u003cbr\u003eWhen the refrigerator or heater is working with a delay, the delay function can be turned on to protect the life of the device. The delay function includes delay start and delay off.\u003cbr\u003ePress and hold SET for 5 seconds to display P0, press +- to switch to P5, press SET to set the delay time unit is minute, press +- to set 0-10 minutes, press SET to return after finishing, long press SET or 5 seconds without Key action thermostat automatically confirms completion.\u003cbr\u003e\u003cbr\u003eIn the cooling mode: When the temperature measurement value ≥ temperature set point + hysteresis, the chiller will not start the cooling immediately, and it needs to run after the set delay time. When the temperature measurement value ≤ temperature set point, the refrigerator will not stop cooling immediately, and it needs to be turned off after running the set delay time.\u003cbr\u003e\u003cbr\u003eIn heating mode: When the temperature measurement value ≤ temperature set point - hysteresis, the heater will not start heating immediately, and it needs to run after the set delay time. When the temperature measurement value ≥ temperature set point, the heater will not stop heating immediately, and it needs to be turned off after running the set delay time.\u003cbr\u003e\u003cbr\u003e\u003cbr\u003eFor example, the setting delay in the cooling state is 1 minute. When the opening condition is met, the refrigerator starts to delay, and after 1 minute, the refrigerator is turned on; when the closing condition is met, the delay is started, and after 1 minute, the refrigerator stops cooling.\u003c\/span\u003e\u003c\/span\u003e\u003c\/p\u003e\n\u003cp\u003e\u003cspan class=\"a-list-item\"\u003e\u003cspan\u003e\u003cb\u003ePackage included:\u003c\/b\u003e\u003cbr\u003e1x Temperature control switch\u003c\/span\u003e\u003c\/span\u003e\u003c\/p\u003e"}
 -
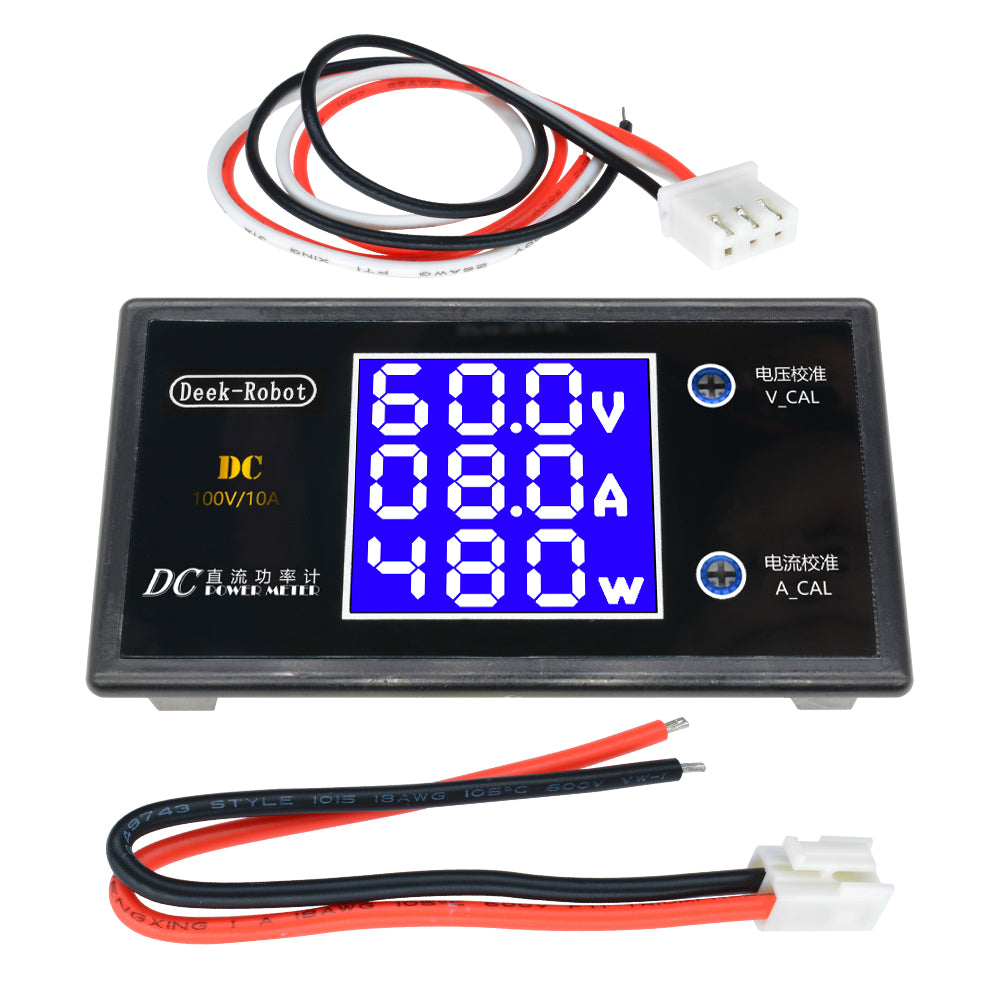
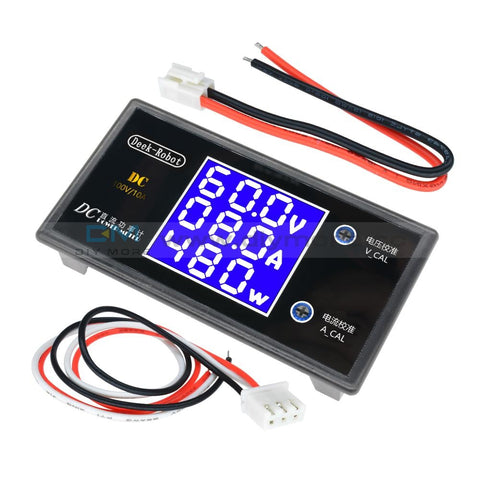 Translation missing: en.products.product.regular_price $7.99{"id":1805974306874,"title":"W1209 -50-110°C 12V Thermostat Digital Temperature Controller Switch Sensor","handle":"diymore-w1209-led-digital-mini-thermostat-temperature-controller-cooling-heating-temp-control-switch-sensor-module-board-12v-dc-50-110-c-with-one-channel-relay-and-ntc-waterproof-sensor-probe","description":"\u003cdiv\u003e\u003cstrong\u003eFeature:\u003c\/strong\u003e\u003c\/div\u003e\n\u003cul class=\"a-unordered-list a-vertical a-spacing-none\"\u003e\n\u003cli\u003e\u003cspan class=\"a-list-item\"\u003eWide temperature control range: -50 to 110℃(-58℉-230℉); High accuracy: 0.1℃.\u003c\/span\u003e\u003c\/li\u003e\n\u003cli\u003e\u003cspan class=\"a-list-item\"\u003eWith waterproof sensitive NTC (10K 0.5%) sensor probe as the measuring input.\u003c\/span\u003e\u003c\/li\u003e\n\u003cli\u003e\u003cspan class=\"a-list-item\"\u003eDigital LED Tubes: \"LLL\" indicates sensor open, \"HHH\" indicates overrange, the relay will be forcibly disconnected;\u003c\/span\u003e\u003c\/li\u003e\n\u003cli\u003e\u003cspan class=\"a-list-item\"\u003eController automatically performs the relay ON\/OFF.\u003c\/span\u003e\u003c\/li\u003e\n\u003cli\u003e\u003cspan class=\"a-list-item\"\u003eOutput: 1 relay output, 5A 250VAC, 20A 16VAC, meet a variety of high-power loads.\u003c\/span\u003e\u003c\/li\u003e\n\u003cli\u003e\u003cspan class=\"a-list-item\"\u003eEmbedded central processor chip (MCU), smarter, lower power consumption,stable performance, good consistency, power-off setting automatic memory (MCU built-in EEPROM storage unit)\u003c\/span\u003e\u003c\/li\u003e\n\u003c\/ul\u003e\n\u003cp\u003e\u003cspan class=\"a-list-item\"\u003e\u003cb\u003eSpecifications:\u003c\/b\u003e\u003cbr\u003e\u003cspan\u003eControl accuracy: 0.1 °C\u003c\/span\u003e\u003cbr\u003e\u003cspan\u003eHysteresis accuracy: 0.1 °C\u003c\/span\u003e\u003cbr\u003e\u003cspan\u003eRefresh rate: 0.5 S\u003c\/span\u003e\u003cbr\u003e\u003cspan\u003eDisplay type: 0.28 inch three digital tube\u003c\/span\u003e\u003cbr\u003e\u003cspan\u003eInput power: DC 12V\u003c\/span\u003e\u003cbr\u003e\u003cspan\u003eMeasurement input: NTC (10K 0.5%) Waterproof sensor Line length 300mm\u003c\/span\u003e\u003cbr\u003e\u003cspan\u003eOutput: 1 relay output, 5A 250VAC, 20A 16VAC\u003c\/span\u003e\u003cbr\u003e\u003cspan\u003eEnvironmental requirements: -10~60°C Humidity 20%-85%\u003c\/span\u003e\u003cbr\u003e\u003cspan\u003ePower consumption of the whole machine: quiescent current: ≤10MA Pull-in current: ≤65MA\u003c\/span\u003e\u003cbr\u003e\u003cspan\u003eDimensions:1.87X0.73X1.24 inch.\u003c\/span\u003e\u003cbr\u003e\u003cb\u003eInstructions:\u003c\/b\u003e\u003cbr\u003e\u003cspan\u003eConnect the power supply and equipment to supply power to the thermostat, which is displayed as measuring temperature.\u003c\/span\u003e\u003cbr\u003e\u003cspan\u003eClick the SET button, the display temperature will flash, press +- to set the desired temperature (press +- to quickly raise and lower).\u003c\/span\u003e\u003cbr\u003e\u003cspan\u003eAfter the setting is completed, click SET to confirm the return. At this time, the thermostat automatically performs the relay on\/off according to the setting!\u003c\/span\u003e\u003cbr\u003e\u003cbr\u003e\u003cb\u003eIndicator and digital tube status:\u003c\/b\u003e\u003cbr\u003e\u003cspan\u003eIndicator light: The yellow indicator light is always on, indicating that the relay is closed. Digital tube: Display LLL is the sensor open circuit, please connect the sensor according to the instructions.\u003c\/span\u003e\u003cbr\u003e\u003cspan\u003eIf the HHH is out of the measurement range, the thermostat will force the relay to open.\u003c\/span\u003e\u003cbr\u003e\u003cspan\u003ePress and hold SET for 5 seconds to enter the main menu settings, press +- to switch P0...P5.\u003c\/span\u003e\u003cbr\u003e\u003cspan\u003ePress and hold SET for 5 seconds without the button action. The thermostat automatically confirms the return.\u003c\/span\u003e\u003c\/span\u003e\u003c\/p\u003e\n\u003cp\u003e\u003cspan class=\"a-list-item\"\u003e\u003cspan\u003eControl accuracy: 0.1 °C\u003cbr\u003eHysteresis accuracy: 0.1 °C\u003cbr\u003eRefresh rate: 0.5 S\u003cbr\u003eDisplay type: 0.28 inch three digital tube\u003cbr\u003eInput power: DC 12V\u003cbr\u003eMeasurement input: NTC (10K 0.5%) Waterproof sensor Line length 300mm\u003cbr\u003eOutput: 1 relay output, 5A 250VAC, 20A 16VAC\u003cbr\u003eEnvironmental requirements: -10~60°C Humidity 20%-85%\u003cbr\u003eSize: 47.5*18.5*31.5mm\u003cbr\u003ePower consumption of the whole machine: quiescent current: ≤10MA Pull-in current: ≤65MA\u003cbr\u003e\u003cbr\u003e\u003cstrong\u003eInstructions\u003c\/strong\u003e\u003c\/span\u003e\u003c\/span\u003e\u003c\/p\u003e\n\u003cp\u003e\u003cspan class=\"a-list-item\"\u003e\u003cspan\u003e\u003cbr\u003eConnect the power supply and equipment to supply power to the thermostat, which is displayed as measuring temperature.\u003cbr\u003eClick the SET button, the display temperature will flash, press +- to set the desired temperature (press +- to quickly raise and lower).\u003cbr\u003eAfter the setting is completed, click SET to confirm the return. At this time, the thermostat automatically performs the relay on\/off according to the setting!\u003cbr\u003e\u003cbr\u003eIndicator and digital tube status description\u003cbr\u003eIndicator light: The yellow indicator light is always on, indicating that the relay is closed.\u003cbr\u003eDigital tube: Display LLL is the sensor open circuit, please connect the sensor according to the instructions;\u003cbr\u003eIf the HHH is out of the measurement range, the thermostat will force the relay to open.\u003cbr\u003ePress and hold SET for 5 seconds to enter the main menu settings, press +- to switch P0...P5.\u003cbr\u003ePress and hold SET for 5 seconds without the button action. The thermostat automatically confirms the return.\u003cbr\u003e\u003cbr\u003e\u003cstrong\u003eP0 Cooling and heating mode (factory is cooling mode):\u003c\/strong\u003e\u003c\/span\u003e\u003c\/span\u003e\u003c\/p\u003e\n\u003cp\u003e\u003cspan class=\"a-list-item\"\u003e\u003cspan\u003e\u003cbr\u003ePress and hold SET for 5 seconds to display P0, press SET to set the working mode, press +- to switch [H is heating mode] [C is cooling mode] Click SET to return.\u003cbr\u003eLong press SET or 5 seconds without key action The thermostat automatically confirms completion.\u003c\/span\u003e\u003c\/span\u003e\u003c\/p\u003e\n\u003cp\u003e\u003cspan class=\"a-list-item\"\u003e\u003cspan\u003eIn the cooling mode: when the temperature measurement value ≥ temperature set point + hysteresis, the refrigeration relay is closed and the refrigerator is started; when the temperature measurement value is ≤ temperature set point, the refrigeration relay is disconnected and the refrigerator is closed.\u003cbr\u003eIn heating mode: When the temperature measurement value ≤ temperature set point - hysteresis, the heating relay pulls in and the heater starts; when the temperature measurement value ≥ temperature set point, the heating relay is turned off and the heater is turned off.\u003cbr\u003e\u003c\/span\u003e\u003c\/span\u003e\u003c\/p\u003e\n\u003cp\u003e\u003cspan class=\"a-list-item\"\u003e\u003cspan\u003e\u003cstrong\u003eP1 hysteresis setting (factory value 2 ° C):\u003c\/strong\u003e\u003c\/span\u003e\u003c\/span\u003e\u003c\/p\u003e\n\u003cp\u003e\u003cspan class=\"a-list-item\"\u003e\u003cspan\u003e\u003cbr\u003ePress and hold SET for 5 seconds to display P0, press +- to switch to P1, press SET to set the difference back, press +- to set the difference to 0.1-15, press SET to return when finished, long press SET or 5 seconds without button The motion thermostat automatically confirms the completion.\u003cbr\u003e\u003cbr\u003eIn the cooling mode: when the temperature measurement value ≥ the set value + the return value, the relay is closed and the refrigerator is started; when the temperature measurement value is ≤ the set value, the relay is turned off and the refrigerator is turned off.\u003cbr\u003e\u003cbr\u003eFor example, the environment is 30 °C, the set value is 25 °C, and the hysteresis is set to 2 °C. After the power is turned on, the relay closes the refrigerator to start. When the cooling reaches the set value of 25 °C, the relay turns off the refrigerator and closes. The temperature has started to rise and the temperature has started to rise. When the temperature rises to 27 °C, the relay closes the refrigerator again, so the repeated cycle control temperature is not higher than 25 °C + 2 °C.\u003cbr\u003e\u003cbr\u003eIn heating mode: When the temperature measurement value ≤ set value - return difference, the relay is closed and the heater is started; when the temperature measurement value is ≥ set value, the relay is turned off and the heater is turned off.\u003cbr\u003e\u003cbr\u003eFor example, if the environment is 10 °C, the set value is 25 °C, and the hysteresis is set to 2 °C. After the power is turned on, the relay closes the heater to start. When it is heated to 25 °C, the relay turns off the heater and the heater is turned off. The on temperature begins to decrease. When it drops to the set value of 23 °C, the relay closes the heater to start again, so the repeated cycle control temperature is not lower than 25 °C - 2 °C.\u003c\/span\u003e\u003c\/span\u003e\u003c\/p\u003e\n\u003cp\u003e\u003cspan class=\"a-list-item\"\u003e\u003cspan\u003e\u003cstrong\u003eP2 upper temperature setting upper limit (factory value 110 °C):\u003c\/strong\u003e\u003c\/span\u003e\u003c\/span\u003e\u003c\/p\u003e\n\u003cp\u003e\u003cspan class=\"a-list-item\"\u003e\u003cspan\u003e\u003cbr\u003eIn order to avoid the danger of setting the temperature too high due to the misoperation of others, the thermostat has the highest setting upper limit function, which limits the setting range of the highest temperature set point controlled by the thermostat.\u003cbr\u003e\u003cbr\u003ePress and hold SET for 5 seconds to display P0, press +- to switch to P2, press SET to set the upper limit, press +- to set the highest settable temperature, the maximum value is 110, press SET to return after finishing, press SET or 5 The second time without the button action thermostat automatically confirms the completion.\u003cbr\u003e\u003cbr\u003eFor example: set to 60 temperature set point can only be set to 60 ° C. If the temperature set point is to be expanded, the upper limit set value needs to be adjusted first.\u003cbr\u003e\u003cbr\u003e\u003cbr\u003e\u003cstrong\u003eP3 lowest temperature setting lower limit (factory value -50 °C):\u003c\/strong\u003e\u003cbr\u003e\u003cbr\u003eIn order to avoid the ice blockage caused by the misoperation of others, the temperature controller has the lowest setting upper and lower limit functions, which limits the setting range of the lowest temperature set point controlled by the thermostat.\u003cbr\u003e\u003cbr\u003ePress and hold SET for 5 seconds to display P0, press +- to switch to P3, press SET to set the lower limit, press +- to set the lowest settable temperature, the lowest value is -50, press SET to return after finishing, press SET or The 5-second no-key action thermostat automatically confirms the completion.\u003cbr\u003e\u003cbr\u003eFor example: set to 2 temperature set point can only be set to 2 °C minimum. If the temperature set point is to be expanded lower, the lower limit set value needs to be adjusted first.\u003c\/span\u003e\u003c\/span\u003e\u003c\/p\u003e\n\u003cp\u003e\u003cspan class=\"a-list-item\"\u003e\u003cspan\u003e\u003cstrong\u003eP4 temperature correction (factory value 0 °C):\u003c\/strong\u003e\u003cbr\u003e\u003cbr\u003eWhen the measured temperature is deviated from the standard temperature or due to special needs of the user's hardware, this function can be used for correction. The corrected temperature = temperature before correction + correction value The valid range is -7.0~7.0.\u003cbr\u003e\u003cbr\u003ePress and hold SET for 5 seconds to display P0, press +- to switch to P4, press SET to correct, press +- to set the correction value, press SET to return when finished, long press SET or 5 seconds without key action thermostat automatically confirm carry out.\u003cbr\u003e\u003cbr\u003eFor example, the normal display is 25 degrees; when the temperature is corrected to 0, it displays 25 degrees; when the temperature is corrected to 1.5, it shows 26.5 degrees; when the temperature is corrected to -1.5, it shows 23.5.\u003c\/span\u003e\u003c\/span\u003e\u003c\/p\u003e\n\u003cp\u003e\u003cspan class=\"a-list-item\"\u003e\u003cspan\u003e\u003cstrong\u003eP5 Delay time (factory value 0 minutes):\u003c\/strong\u003e\u003c\/span\u003e\u003c\/span\u003e\u003c\/p\u003e\n\u003cp\u003e\u003cspan class=\"a-list-item\"\u003e\u003cspan\u003e\u003cbr\u003eWhen the refrigerator or heater is working with a delay, the delay function can be turned on to protect the life of the device. The delay function includes delay start and delay off.\u003cbr\u003ePress and hold SET for 5 seconds to display P0, press +- to switch to P5, press SET to set the delay time unit is minute, press +- to set 0-10 minutes, press SET to return after finishing, long press SET or 5 seconds without Key action thermostat automatically confirms completion.\u003cbr\u003e\u003cbr\u003eIn the cooling mode: When the temperature measurement value ≥ temperature set point + hysteresis, the chiller will not start the cooling immediately, and it needs to run after the set delay time. When the temperature measurement value ≤ temperature set point, the refrigerator will not stop cooling immediately, and it needs to be turned off after running the set delay time.\u003cbr\u003e\u003cbr\u003eIn heating mode: When the temperature measurement value ≤ temperature set point - hysteresis, the heater will not start heating immediately, and it needs to run after the set delay time. When the temperature measurement value ≥ temperature set point, the heater will not stop heating immediately, and it needs to be turned off after running the set delay time.\u003cbr\u003e\u003cbr\u003e\u003cbr\u003eFor example, the setting delay in the cooling state is 1 minute. When the opening condition is met, the refrigerator starts to delay, and after 1 minute, the refrigerator is turned on; when the closing condition is met, the delay is started, and after 1 minute, the refrigerator stops cooling.\u003c\/span\u003e\u003c\/span\u003e\u003c\/p\u003e\n\u003cp\u003e\u003cspan class=\"a-list-item\"\u003e\u003cspan\u003e\u003cb\u003ePackage included:\u003c\/b\u003e\u003cbr\u003e1x Temperature control switch\u003c\/span\u003e\u003c\/span\u003e\u003c\/p\u003e","published_at":"2018-08-09T10:59:18+08:00","created_at":"2018-08-09T11:13:40+08:00","vendor":"diymore","type":"Thermostat","tags":["Display","Relay","STC 1000","STC1000"],"price":699,"price_min":699,"price_max":699,"available":true,"price_varies":false,"compare_at_price":null,"compare_at_price_min":0,"compare_at_price_max":0,"compare_at_price_varies":false,"variants":[{"id":17508649435194,"title":"Default Title","option1":"Default Title","option2":null,"option3":null,"sku":"012697","requires_shipping":true,"taxable":false,"featured_image":null,"available":true,"name":"W1209 -50-110°C 12V Thermostat Digital Temperature Controller Switch Sensor","public_title":null,"options":["Default Title"],"price":699,"weight":27,"compare_at_price":null,"inventory_management":null,"barcode":"","requires_selling_plan":false,"selling_plan_allocations":[],"quantity_rule":{"min":1,"max":null,"increment":1}}],"images":["\/\/www.diymore.cc\/cdn\/shop\/products\/012697_4_892.jpg?v=1588650891","\/\/www.diymore.cc\/cdn\/shop\/products\/012697_6_597.jpg?v=1588650891","\/\/www.diymore.cc\/cdn\/shop\/products\/012697_6_00adb3a7-8a71-4a4b-929c-6eb88ca0cf14_693.jpg?v=1588650891","\/\/www.diymore.cc\/cdn\/shop\/products\/012697_13_572.jpg?v=1588650891","\/\/www.diymore.cc\/cdn\/shop\/products\/012697_14_575.jpg?v=1588650891","\/\/www.diymore.cc\/cdn\/shop\/products\/012697_16_185.jpg?v=1588650891","\/\/www.diymore.cc\/cdn\/shop\/products\/012697_8_789.jpg?v=1588650891","\/\/www.diymore.cc\/cdn\/shop\/products\/012697_884.jpg?v=1588650891","\/\/www.diymore.cc\/cdn\/shop\/products\/012697_9_395.jpg?v=1588650891"],"featured_image":"\/\/www.diymore.cc\/cdn\/shop\/products\/012697_4_892.jpg?v=1588650891","options":["Title"],"media":[{"alt":"Diymore W1209 Led Digital Mini Thermostat Temperature Controller Cooling Heating Temp Control Switch","id":6678620635207,"position":1,"preview_image":{"aspect_ratio":1.0,"height":1000,"width":1000,"src":"\/\/www.diymore.cc\/cdn\/shop\/products\/012697_4_892.jpg?v=1588650891"},"aspect_ratio":1.0,"height":1000,"media_type":"image","src":"\/\/www.diymore.cc\/cdn\/shop\/products\/012697_4_892.jpg?v=1588650891","width":1000},{"alt":"Diymore W1209 Led Digital Mini Thermostat Temperature Controller Cooling Heating Temp Control Switch","id":6678621454407,"position":2,"preview_image":{"aspect_ratio":1.0,"height":1000,"width":1000,"src":"\/\/www.diymore.cc\/cdn\/shop\/products\/012697_6_597.jpg?v=1588650891"},"aspect_ratio":1.0,"height":1000,"media_type":"image","src":"\/\/www.diymore.cc\/cdn\/shop\/products\/012697_6_597.jpg?v=1588650891","width":1000},{"alt":"Diymore W1209 Led Digital Mini Thermostat Temperature Controller Cooling Heating Temp Control Switch","id":6678622208071,"position":3,"preview_image":{"aspect_ratio":1.0,"height":1000,"width":1000,"src":"\/\/www.diymore.cc\/cdn\/shop\/products\/012697_6_00adb3a7-8a71-4a4b-929c-6eb88ca0cf14_693.jpg?v=1588650891"},"aspect_ratio":1.0,"height":1000,"media_type":"image","src":"\/\/www.diymore.cc\/cdn\/shop\/products\/012697_6_00adb3a7-8a71-4a4b-929c-6eb88ca0cf14_693.jpg?v=1588650891","width":1000},{"alt":"Diymore W1209 Led Digital Mini Thermostat Temperature Controller Cooling Heating Temp Control Switch","id":6678622601287,"position":4,"preview_image":{"aspect_ratio":1.0,"height":1000,"width":1000,"src":"\/\/www.diymore.cc\/cdn\/shop\/products\/012697_13_572.jpg?v=1588650891"},"aspect_ratio":1.0,"height":1000,"media_type":"image","src":"\/\/www.diymore.cc\/cdn\/shop\/products\/012697_13_572.jpg?v=1588650891","width":1000},{"alt":"Diymore W1209 Led Digital Mini Thermostat Temperature Controller Cooling Heating Temp Control Switch","id":6678623191111,"position":5,"preview_image":{"aspect_ratio":1.0,"height":1000,"width":1000,"src":"\/\/www.diymore.cc\/cdn\/shop\/products\/012697_14_575.jpg?v=1588650891"},"aspect_ratio":1.0,"height":1000,"media_type":"image","src":"\/\/www.diymore.cc\/cdn\/shop\/products\/012697_14_575.jpg?v=1588650891","width":1000},{"alt":"Diymore W1209 Led Digital Mini Thermostat Temperature Controller Cooling Heating Temp Control Switch","id":6678623846471,"position":6,"preview_image":{"aspect_ratio":1.0,"height":1000,"width":1000,"src":"\/\/www.diymore.cc\/cdn\/shop\/products\/012697_16_185.jpg?v=1588650891"},"aspect_ratio":1.0,"height":1000,"media_type":"image","src":"\/\/www.diymore.cc\/cdn\/shop\/products\/012697_16_185.jpg?v=1588650891","width":1000},{"alt":"Diymore W1209 Led Digital Mini Thermostat Temperature Controller Cooling Heating Temp Control Switch","id":6678624469063,"position":7,"preview_image":{"aspect_ratio":1.0,"height":1000,"width":1000,"src":"\/\/www.diymore.cc\/cdn\/shop\/products\/012697_8_789.jpg?v=1588650891"},"aspect_ratio":1.0,"height":1000,"media_type":"image","src":"\/\/www.diymore.cc\/cdn\/shop\/products\/012697_8_789.jpg?v=1588650891","width":1000},{"alt":"Diymore W1209 Led Digital Mini Thermostat Temperature Controller Cooling Heating Temp Control Switch","id":6678625124423,"position":8,"preview_image":{"aspect_ratio":1.0,"height":1000,"width":1000,"src":"\/\/www.diymore.cc\/cdn\/shop\/products\/012697_884.jpg?v=1588650891"},"aspect_ratio":1.0,"height":1000,"media_type":"image","src":"\/\/www.diymore.cc\/cdn\/shop\/products\/012697_884.jpg?v=1588650891","width":1000},{"alt":"Diymore W1209 Led Digital Mini Thermostat Temperature Controller Cooling Heating Temp Control Switch","id":6678625812551,"position":9,"preview_image":{"aspect_ratio":1.0,"height":1000,"width":1000,"src":"\/\/www.diymore.cc\/cdn\/shop\/products\/012697_9_395.jpg?v=1588650891"},"aspect_ratio":1.0,"height":1000,"media_type":"image","src":"\/\/www.diymore.cc\/cdn\/shop\/products\/012697_9_395.jpg?v=1588650891","width":1000}],"requires_selling_plan":false,"selling_plan_groups":[],"content":"\u003cdiv\u003e\u003cstrong\u003eFeature:\u003c\/strong\u003e\u003c\/div\u003e\n\u003cul class=\"a-unordered-list a-vertical a-spacing-none\"\u003e\n\u003cli\u003e\u003cspan class=\"a-list-item\"\u003eWide temperature control range: -50 to 110℃(-58℉-230℉); High accuracy: 0.1℃.\u003c\/span\u003e\u003c\/li\u003e\n\u003cli\u003e\u003cspan class=\"a-list-item\"\u003eWith waterproof sensitive NTC (10K 0.5%) sensor probe as the measuring input.\u003c\/span\u003e\u003c\/li\u003e\n\u003cli\u003e\u003cspan class=\"a-list-item\"\u003eDigital LED Tubes: \"LLL\" indicates sensor open, \"HHH\" indicates overrange, the relay will be forcibly disconnected;\u003c\/span\u003e\u003c\/li\u003e\n\u003cli\u003e\u003cspan class=\"a-list-item\"\u003eController automatically performs the relay ON\/OFF.\u003c\/span\u003e\u003c\/li\u003e\n\u003cli\u003e\u003cspan class=\"a-list-item\"\u003eOutput: 1 relay output, 5A 250VAC, 20A 16VAC, meet a variety of high-power loads.\u003c\/span\u003e\u003c\/li\u003e\n\u003cli\u003e\u003cspan class=\"a-list-item\"\u003eEmbedded central processor chip (MCU), smarter, lower power consumption,stable performance, good consistency, power-off setting automatic memory (MCU built-in EEPROM storage unit)\u003c\/span\u003e\u003c\/li\u003e\n\u003c\/ul\u003e\n\u003cp\u003e\u003cspan class=\"a-list-item\"\u003e\u003cb\u003eSpecifications:\u003c\/b\u003e\u003cbr\u003e\u003cspan\u003eControl accuracy: 0.1 °C\u003c\/span\u003e\u003cbr\u003e\u003cspan\u003eHysteresis accuracy: 0.1 °C\u003c\/span\u003e\u003cbr\u003e\u003cspan\u003eRefresh rate: 0.5 S\u003c\/span\u003e\u003cbr\u003e\u003cspan\u003eDisplay type: 0.28 inch three digital tube\u003c\/span\u003e\u003cbr\u003e\u003cspan\u003eInput power: DC 12V\u003c\/span\u003e\u003cbr\u003e\u003cspan\u003eMeasurement input: NTC (10K 0.5%) Waterproof sensor Line length 300mm\u003c\/span\u003e\u003cbr\u003e\u003cspan\u003eOutput: 1 relay output, 5A 250VAC, 20A 16VAC\u003c\/span\u003e\u003cbr\u003e\u003cspan\u003eEnvironmental requirements: -10~60°C Humidity 20%-85%\u003c\/span\u003e\u003cbr\u003e\u003cspan\u003ePower consumption of the whole machine: quiescent current: ≤10MA Pull-in current: ≤65MA\u003c\/span\u003e\u003cbr\u003e\u003cspan\u003eDimensions:1.87X0.73X1.24 inch.\u003c\/span\u003e\u003cbr\u003e\u003cb\u003eInstructions:\u003c\/b\u003e\u003cbr\u003e\u003cspan\u003eConnect the power supply and equipment to supply power to the thermostat, which is displayed as measuring temperature.\u003c\/span\u003e\u003cbr\u003e\u003cspan\u003eClick the SET button, the display temperature will flash, press +- to set the desired temperature (press +- to quickly raise and lower).\u003c\/span\u003e\u003cbr\u003e\u003cspan\u003eAfter the setting is completed, click SET to confirm the return. At this time, the thermostat automatically performs the relay on\/off according to the setting!\u003c\/span\u003e\u003cbr\u003e\u003cbr\u003e\u003cb\u003eIndicator and digital tube status:\u003c\/b\u003e\u003cbr\u003e\u003cspan\u003eIndicator light: The yellow indicator light is always on, indicating that the relay is closed. Digital tube: Display LLL is the sensor open circuit, please connect the sensor according to the instructions.\u003c\/span\u003e\u003cbr\u003e\u003cspan\u003eIf the HHH is out of the measurement range, the thermostat will force the relay to open.\u003c\/span\u003e\u003cbr\u003e\u003cspan\u003ePress and hold SET for 5 seconds to enter the main menu settings, press +- to switch P0...P5.\u003c\/span\u003e\u003cbr\u003e\u003cspan\u003ePress and hold SET for 5 seconds without the button action. The thermostat automatically confirms the return.\u003c\/span\u003e\u003c\/span\u003e\u003c\/p\u003e\n\u003cp\u003e\u003cspan class=\"a-list-item\"\u003e\u003cspan\u003eControl accuracy: 0.1 °C\u003cbr\u003eHysteresis accuracy: 0.1 °C\u003cbr\u003eRefresh rate: 0.5 S\u003cbr\u003eDisplay type: 0.28 inch three digital tube\u003cbr\u003eInput power: DC 12V\u003cbr\u003eMeasurement input: NTC (10K 0.5%) Waterproof sensor Line length 300mm\u003cbr\u003eOutput: 1 relay output, 5A 250VAC, 20A 16VAC\u003cbr\u003eEnvironmental requirements: -10~60°C Humidity 20%-85%\u003cbr\u003eSize: 47.5*18.5*31.5mm\u003cbr\u003ePower consumption of the whole machine: quiescent current: ≤10MA Pull-in current: ≤65MA\u003cbr\u003e\u003cbr\u003e\u003cstrong\u003eInstructions\u003c\/strong\u003e\u003c\/span\u003e\u003c\/span\u003e\u003c\/p\u003e\n\u003cp\u003e\u003cspan class=\"a-list-item\"\u003e\u003cspan\u003e\u003cbr\u003eConnect the power supply and equipment to supply power to the thermostat, which is displayed as measuring temperature.\u003cbr\u003eClick the SET button, the display temperature will flash, press +- to set the desired temperature (press +- to quickly raise and lower).\u003cbr\u003eAfter the setting is completed, click SET to confirm the return. At this time, the thermostat automatically performs the relay on\/off according to the setting!\u003cbr\u003e\u003cbr\u003eIndicator and digital tube status description\u003cbr\u003eIndicator light: The yellow indicator light is always on, indicating that the relay is closed.\u003cbr\u003eDigital tube: Display LLL is the sensor open circuit, please connect the sensor according to the instructions;\u003cbr\u003eIf the HHH is out of the measurement range, the thermostat will force the relay to open.\u003cbr\u003ePress and hold SET for 5 seconds to enter the main menu settings, press +- to switch P0...P5.\u003cbr\u003ePress and hold SET for 5 seconds without the button action. The thermostat automatically confirms the return.\u003cbr\u003e\u003cbr\u003e\u003cstrong\u003eP0 Cooling and heating mode (factory is cooling mode):\u003c\/strong\u003e\u003c\/span\u003e\u003c\/span\u003e\u003c\/p\u003e\n\u003cp\u003e\u003cspan class=\"a-list-item\"\u003e\u003cspan\u003e\u003cbr\u003ePress and hold SET for 5 seconds to display P0, press SET to set the working mode, press +- to switch [H is heating mode] [C is cooling mode] Click SET to return.\u003cbr\u003eLong press SET or 5 seconds without key action The thermostat automatically confirms completion.\u003c\/span\u003e\u003c\/span\u003e\u003c\/p\u003e\n\u003cp\u003e\u003cspan class=\"a-list-item\"\u003e\u003cspan\u003eIn the cooling mode: when the temperature measurement value ≥ temperature set point + hysteresis, the refrigeration relay is closed and the refrigerator is started; when the temperature measurement value is ≤ temperature set point, the refrigeration relay is disconnected and the refrigerator is closed.\u003cbr\u003eIn heating mode: When the temperature measurement value ≤ temperature set point - hysteresis, the heating relay pulls in and the heater starts; when the temperature measurement value ≥ temperature set point, the heating relay is turned off and the heater is turned off.\u003cbr\u003e\u003c\/span\u003e\u003c\/span\u003e\u003c\/p\u003e\n\u003cp\u003e\u003cspan class=\"a-list-item\"\u003e\u003cspan\u003e\u003cstrong\u003eP1 hysteresis setting (factory value 2 ° C):\u003c\/strong\u003e\u003c\/span\u003e\u003c\/span\u003e\u003c\/p\u003e\n\u003cp\u003e\u003cspan class=\"a-list-item\"\u003e\u003cspan\u003e\u003cbr\u003ePress and hold SET for 5 seconds to display P0, press +- to switch to P1, press SET to set the difference back, press +- to set the difference to 0.1-15, press SET to return when finished, long press SET or 5 seconds without button The motion thermostat automatically confirms the completion.\u003cbr\u003e\u003cbr\u003eIn the cooling mode: when the temperature measurement value ≥ the set value + the return value, the relay is closed and the refrigerator is started; when the temperature measurement value is ≤ the set value, the relay is turned off and the refrigerator is turned off.\u003cbr\u003e\u003cbr\u003eFor example, the environment is 30 °C, the set value is 25 °C, and the hysteresis is set to 2 °C. After the power is turned on, the relay closes the refrigerator to start. When the cooling reaches the set value of 25 °C, the relay turns off the refrigerator and closes. The temperature has started to rise and the temperature has started to rise. When the temperature rises to 27 °C, the relay closes the refrigerator again, so the repeated cycle control temperature is not higher than 25 °C + 2 °C.\u003cbr\u003e\u003cbr\u003eIn heating mode: When the temperature measurement value ≤ set value - return difference, the relay is closed and the heater is started; when the temperature measurement value is ≥ set value, the relay is turned off and the heater is turned off.\u003cbr\u003e\u003cbr\u003eFor example, if the environment is 10 °C, the set value is 25 °C, and the hysteresis is set to 2 °C. After the power is turned on, the relay closes the heater to start. When it is heated to 25 °C, the relay turns off the heater and the heater is turned off. The on temperature begins to decrease. When it drops to the set value of 23 °C, the relay closes the heater to start again, so the repeated cycle control temperature is not lower than 25 °C - 2 °C.\u003c\/span\u003e\u003c\/span\u003e\u003c\/p\u003e\n\u003cp\u003e\u003cspan class=\"a-list-item\"\u003e\u003cspan\u003e\u003cstrong\u003eP2 upper temperature setting upper limit (factory value 110 °C):\u003c\/strong\u003e\u003c\/span\u003e\u003c\/span\u003e\u003c\/p\u003e\n\u003cp\u003e\u003cspan class=\"a-list-item\"\u003e\u003cspan\u003e\u003cbr\u003eIn order to avoid the danger of setting the temperature too high due to the misoperation of others, the thermostat has the highest setting upper limit function, which limits the setting range of the highest temperature set point controlled by the thermostat.\u003cbr\u003e\u003cbr\u003ePress and hold SET for 5 seconds to display P0, press +- to switch to P2, press SET to set the upper limit, press +- to set the highest settable temperature, the maximum value is 110, press SET to return after finishing, press SET or 5 The second time without the button action thermostat automatically confirms the completion.\u003cbr\u003e\u003cbr\u003eFor example: set to 60 temperature set point can only be set to 60 ° C. If the temperature set point is to be expanded, the upper limit set value needs to be adjusted first.\u003cbr\u003e\u003cbr\u003e\u003cbr\u003e\u003cstrong\u003eP3 lowest temperature setting lower limit (factory value -50 °C):\u003c\/strong\u003e\u003cbr\u003e\u003cbr\u003eIn order to avoid the ice blockage caused by the misoperation of others, the temperature controller has the lowest setting upper and lower limit functions, which limits the setting range of the lowest temperature set point controlled by the thermostat.\u003cbr\u003e\u003cbr\u003ePress and hold SET for 5 seconds to display P0, press +- to switch to P3, press SET to set the lower limit, press +- to set the lowest settable temperature, the lowest value is -50, press SET to return after finishing, press SET or The 5-second no-key action thermostat automatically confirms the completion.\u003cbr\u003e\u003cbr\u003eFor example: set to 2 temperature set point can only be set to 2 °C minimum. If the temperature set point is to be expanded lower, the lower limit set value needs to be adjusted first.\u003c\/span\u003e\u003c\/span\u003e\u003c\/p\u003e\n\u003cp\u003e\u003cspan class=\"a-list-item\"\u003e\u003cspan\u003e\u003cstrong\u003eP4 temperature correction (factory value 0 °C):\u003c\/strong\u003e\u003cbr\u003e\u003cbr\u003eWhen the measured temperature is deviated from the standard temperature or due to special needs of the user's hardware, this function can be used for correction. The corrected temperature = temperature before correction + correction value The valid range is -7.0~7.0.\u003cbr\u003e\u003cbr\u003ePress and hold SET for 5 seconds to display P0, press +- to switch to P4, press SET to correct, press +- to set the correction value, press SET to return when finished, long press SET or 5 seconds without key action thermostat automatically confirm carry out.\u003cbr\u003e\u003cbr\u003eFor example, the normal display is 25 degrees; when the temperature is corrected to 0, it displays 25 degrees; when the temperature is corrected to 1.5, it shows 26.5 degrees; when the temperature is corrected to -1.5, it shows 23.5.\u003c\/span\u003e\u003c\/span\u003e\u003c\/p\u003e\n\u003cp\u003e\u003cspan class=\"a-list-item\"\u003e\u003cspan\u003e\u003cstrong\u003eP5 Delay time (factory value 0 minutes):\u003c\/strong\u003e\u003c\/span\u003e\u003c\/span\u003e\u003c\/p\u003e\n\u003cp\u003e\u003cspan class=\"a-list-item\"\u003e\u003cspan\u003e\u003cbr\u003eWhen the refrigerator or heater is working with a delay, the delay function can be turned on to protect the life of the device. The delay function includes delay start and delay off.\u003cbr\u003ePress and hold SET for 5 seconds to display P0, press +- to switch to P5, press SET to set the delay time unit is minute, press +- to set 0-10 minutes, press SET to return after finishing, long press SET or 5 seconds without Key action thermostat automatically confirms completion.\u003cbr\u003e\u003cbr\u003eIn the cooling mode: When the temperature measurement value ≥ temperature set point + hysteresis, the chiller will not start the cooling immediately, and it needs to run after the set delay time. When the temperature measurement value ≤ temperature set point, the refrigerator will not stop cooling immediately, and it needs to be turned off after running the set delay time.\u003cbr\u003e\u003cbr\u003eIn heating mode: When the temperature measurement value ≤ temperature set point - hysteresis, the heater will not start heating immediately, and it needs to run after the set delay time. When the temperature measurement value ≥ temperature set point, the heater will not stop heating immediately, and it needs to be turned off after running the set delay time.\u003cbr\u003e\u003cbr\u003e\u003cbr\u003eFor example, the setting delay in the cooling state is 1 minute. When the opening condition is met, the refrigerator starts to delay, and after 1 minute, the refrigerator is turned on; when the closing condition is met, the delay is started, and after 1 minute, the refrigerator stops cooling.\u003c\/span\u003e\u003c\/span\u003e\u003c\/p\u003e\n\u003cp\u003e\u003cspan class=\"a-list-item\"\u003e\u003cspan\u003e\u003cb\u003ePackage included:\u003c\/b\u003e\u003cbr\u003e1x Temperature control switch\u003c\/span\u003e\u003c\/span\u003e\u003c\/p\u003e"}