

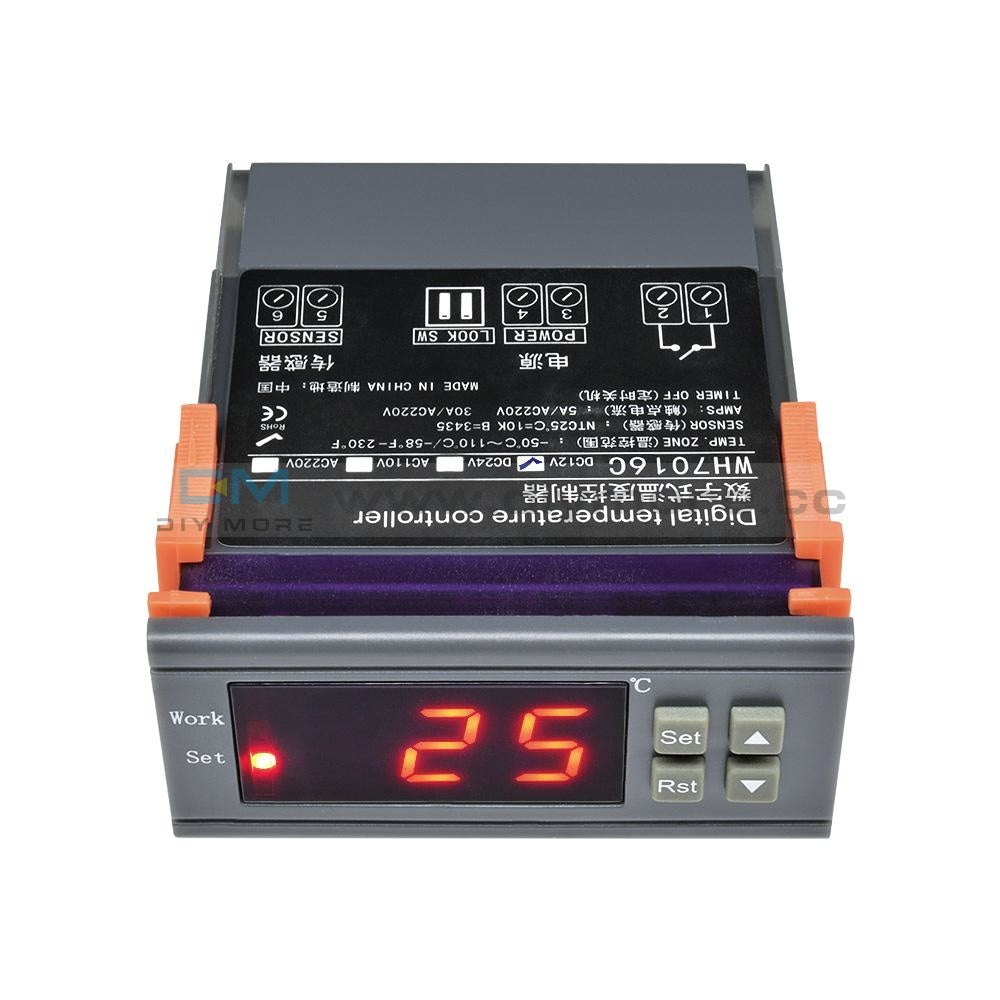
Digital MH1210W Temperature Humidity Hygrometer Thermostat Controller 10A Sensor
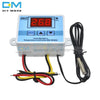
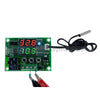


Digital MH1210W Temperature Humidity Hygrometer Thermostat Controller 10A Sensor
SKU:X13067- guaranteeQuality checked
- Special gift cardsSpecial gift cards
- Free return Within 60 days
- Consultancy86-0755-85201155
Technical Parameters:
- The working voltage is referenced on the product casing;
- -40°C ~120°C: Measurement error ± 0. 5 ° C
- -40°C~120°C: Temperature control accuracy: 1C display accuracy 0. 1°C
- NTC25°C=10K B3435± 1% (1 meter long, regardless of positive or negative)
- Power supply voltage: DC version is DC12~72V
- Working environment: Temperature: -20 ° C ~ 70 ° C, humidity: 90% RH no condensation
- Product size: 75*85*35 (width, depth, height) mm
Instructions:
Press the S key for 3 seconds to enter the program menu code mode, which displays the code HC. Press the △ or ▽ key to cycle through the HC-CP-LA-PU-CA parameters. To enter a code, press the S key, press the △ or ▽ key to change the desired value and press SET to save and exit. . Control temperature setting: Short press S key (not more than 2 seconds) to display the factory default control temperature. Press △ or ▽ key to change the value well to save automatically. (Press and hold the △ or ▽ key for 2 seconds to quickly adjust the value.)
Heating control:
When the temperature control method (code HC) is set to H, for example, the set control temperature value is 28 ° C, and the temperature difference is 2 ° C. When the ambient temperature value ≥ the set temperature value (28 °C), the relay opens and closes the output load; when the ambient temperature value ≤ the set temperature value (28 ° C) - the return temperature (2 ° C) and the "delay" is set After the start time, the relay pulls up to start the output load; (if the delay function is not needed, the delay start (code PU) can be set to 0).
Cooling mode:
When the temperature control method (code HC) is set to C, for example, the set control temperature value is 28 ° C, and the temperature difference is 2 ° C.
When the ambient temperature value ≤ set temperature value (28 °C), the relay opens and closes the output load; when the ambient temperature value ≥ set temperature value (28 °C) + hysteresis temperature (2 ° C) and the "delay start" is set After the time, the relay is sucked and the output load is started: (It is recommended that the delay start time is the default time to protect the compressor. If no delay is required, the code (PU) is set to 0)
Note: LA minimum lower limit and HA upper limit non-control temperature parameter adjustment, if changed, reduce control temperature range
Power button instructions:
1 long press the power button for 5 seconds to shut down, short press the power button to boot
2 In the temperature setting interface and mode setting interface, short press the power button to quickly save the settings and exit the setting interface.
Restore the factory default value: After pressing the “▲” button for 5 seconds, all the set parameters of the user will be restored to the factory default values.
Parameter lock: Press the ▼ key for 3 seconds to flash “0FF” to indicate that the user has set the parameter to be locked. In this way, the same operation flashes “ON” to indicate that the user has set the parameter lock to be released. (The user can only view and cannot modify after the parameter is locked, but the control degree adjustment is still valid)
Fault prompt:
When the sensor is short-circuited or when the ambient temperature is detected above the upper temperature limit of 120 degrees, the flashing indicates that the HHH well closes the output load. When the sensor is open or detects that the ambient temperature is below the lower temperature limit of -40 degrees, the LLL is flashed and the output load is turned off.
Precautions:
- In order to prevent high-frequency interference, the sensing time line during installation cannot be bundled with the power supply line and the negative-voltage equipment line, and separate wiring is required.
- The power supply and the host shall indicate the voltage--cause, the deviation of the rated voltage value is not more than 1% of 0%. The sensor, power line and load output interface are strictly distinguished during installation.
- The thermostat main unit cannot be installed in places where dripping water, old people, and children are within easy reach.
- After wiring, check whether the line is correct and then energize, so as to avoid accidentally burning the temperature controller and load equipment. After installation, apply the protective cover to cover. Installation wiring diagram
When installing the wiring, please make sure that the working voltage of the load itself and the voltage marked by the thermostat are the same voltage value, otherwise you cannot connect according to this figure.
Package Included:
1PCS*Digital MH1210W Temperature Humidity Hygrometer Thermostat Controller 10A Sensor
Purchasing & Delivery
Before you make your purchase, it’s helpful to know the measurements of the area you plan to place the furniture. You should also measure any doorways and hallways through which the furniture will pass to get to its final destination.Picking up at the store
Shopify Shop requires that all products are properly inspected BEFORE you take it home to insure there are no surprises. Our team is happy to open all packages and will assist in the inspection process. We will then reseal packages for safe transport. We encourage all customers to bring furniture pads or blankets to protect the items during transport as well as rope or tie downs. Shopify Shop will not be responsible for damage that occurs after leaving the store or during transit. It is the purchaser’s responsibility to make sure the correct items are picked up and in good condition.Delivery
Customers are able to pick the next available delivery day that best fits their schedule. However, to route stops as efficiently as possible, Shopify Shop will provide the time frame. Customers will not be able to choose a time. You will be notified in advance of your scheduled time frame. Please make sure that a responsible adult (18 years or older) will be home at that time.In preparation for your delivery, please remove existing furniture, pictures, mirrors, accessories, etc. to prevent damages. Also insure that the area where you would like your furniture placed is clear of any old furniture and any other items that may obstruct the passageway of the delivery team. Shopify Shop will deliver, assemble, and set-up your new furniture purchase and remove all packing materials from your home. Our delivery crews are not permitted to move your existing furniture or other household items. Delivery personnel will attempt to deliver the purchased items in a safe and controlled manner but will not attempt to place furniture if they feel it will result in damage to the product or your home. Delivery personnel are unable to remove doors, hoist furniture or carry furniture up more than 3 flights of stairs. An elevator must be available for deliveries to the 4th floor and above.
Other Customers also buy:
-
 Translation missing: en.products.product.regular_price $6.99{"id":2326224502842,"title":"Digital MH1210W Temperature Humidity Hygrometer Thermostat Controller 10A Sensor","handle":"digital-mh1210w-temperature-humidity-hygrometer-thermostat-controller-10a-sensor-dc-9-72v","description":"\u003cp\u003e\u003cspan style=\"font-size: 18px; font-family: times new roman, times;\"\u003e\u003cstrong\u003e\u003cb\u003eTechnical Parameters:\u003c\/b\u003e\u003c\/strong\u003e\u003c\/span\u003e\u003c\/p\u003e\n\u003col\u003e\n\u003cli\u003e\u003cspan style=\"font-family: times new roman, times; font-size: 18px;\"\u003e The working voltage is referenced on the product casing;\u003c\/span\u003e\u003c\/li\u003e\n\u003cli\u003e\u003cspan style=\"font-family: times new roman, times; font-size: 18px;\"\u003e -40°C ~120°C: Measurement error ± 0. 5 ° C\u003c\/span\u003e\u003c\/li\u003e\n\u003cli\u003e\u003cspan style=\"font-family: times new roman, times; font-size: 18px;\"\u003e -40°C~120°C: Temperature control accuracy: 1C display accuracy 0. 1°C\u003c\/span\u003e\u003c\/li\u003e\n\u003cli\u003e\u003cspan style=\"font-family: times new roman, times; font-size: 18px;\"\u003e NTC25°C=10K B3435\u003cspan style=\"font-size: 18px;\"\u003e± \u003c\/span\u003e 1% (1 meter long, regardless of positive or negative)\u003c\/span\u003e\u003c\/li\u003e\n\u003cli\u003e\u003cspan style=\"font-family: times new roman, times; font-size: 18px;\"\u003e Power supply voltage: DC version is DC12~72V\u003cbr\u003e\u003c\/span\u003e\u003c\/li\u003e\n\u003cli\u003e\u003cspan style=\"font-family: times new roman, times; font-size: 18px;\"\u003e Working environment: Temperature: -20 ° C ~ 70 ° C, humidity: 90% RH no condensation\u003c\/span\u003e\u003c\/li\u003e\n\u003cli\u003e\u003cspan style=\"font-family: times new roman, times; font-size: 18px;\"\u003e Product size: 75*85*35 (width, depth, height) mm\u003c\/span\u003e\u003c\/li\u003e\n\u003c\/ol\u003e\n\u003cp\u003e\u003cspan style=\"font-family: times new roman, times; font-size: 18px;\"\u003e\u003cstrong\u003e\u003cb\u003eInstructions:\u003c\/b\u003e\u003c\/strong\u003e\u003c\/span\u003e\u003c\/p\u003e\n\u003cp\u003e\u003cspan style=\"font-family: times new roman, times; font-size: 18px;\"\u003ePress the S key for 3 seconds to enter the program menu code mode, which displays the code HC. Press the △ or ▽ key to cycle through the HC-CP-LA-PU-CA parameters. To enter a code, press the S key, press the △ or ▽ key to change the desired value and press SET to save and exit. . Control temperature setting: Short press S key (not more than 2 seconds) to display the factory default control temperature. Press △ or ▽ key to change the value well to save automatically. (Press and hold the △ or ▽ key for 2 seconds to quickly adjust the value.)\u003c\/span\u003e\u003c\/p\u003e\n\u003cp\u003e\u003cspan style=\"font-size: 18px; font-family: times new roman, times;\"\u003e\u003cstrong\u003eHeating control:\u003c\/strong\u003e\u003c\/span\u003e\u003c\/p\u003e\n\u003cp\u003e\u003cspan style=\"font-family: times new roman, times; font-size: 18px;\"\u003eWhen the temperature control method (code HC) is set to H, for example, the set control temperature value is 28 ° C, and the temperature difference is 2 ° C. When the ambient temperature value ≥ the set temperature value (28 °C), the relay opens and closes the output load; when the ambient temperature value ≤ the set temperature value (28 ° C) - the return temperature (2 ° C) and the \"delay\" is set After the start time, the relay pulls up to start the output load; (if the delay function is not needed, the delay start (code PU) can be set to 0).\u003c\/span\u003e\u003c\/p\u003e\n\u003cp\u003e\u003cspan style=\"font-family: times new roman, times; font-size: 18px;\"\u003e\u003cstrong\u003e\u003cb\u003eCooling mode:\u003c\/b\u003e\u003c\/strong\u003e\u003c\/span\u003e\u003c\/p\u003e\n\u003cp\u003e\u003cspan style=\"font-family: times new roman, times; font-size: 18px;\"\u003eWhen the temperature control method (code HC) is set to C, for example, the set control temperature value is 28 ° C, and the temperature difference is 2 ° C.\u003c\/span\u003e\u003c\/p\u003e\n\u003cp\u003e \u003c\/p\u003e\n\u003cp\u003e\u003cspan style=\"font-family: times new roman, times;\"\u003eWhen the ambient temperature value ≤ set temperature value (28 °C), the relay opens and closes the output load; when the ambient temperature value ≥ set temperature value (28 °C) + hysteresis temperature (2 ° C) and the \"delay start\" is set After the time, the relay is sucked and the output load is started: (It is recommended that the delay start time is the default time to protect the compressor. If no delay is required, the code (PU) is set to 0)\u003c\/span\u003e\u003c\/p\u003e\n\u003cp\u003e \u003c\/p\u003e\n\u003cp\u003e\u003cspan style=\"font-family: times new roman, times;\"\u003e\u003cstrong\u003e\u003cb\u003eNote:\u003c\/b\u003e\u003c\/strong\u003e LA minimum lower limit and HA upper limit non-control temperature parameter adjustment, if changed, reduce control temperature range\u003c\/span\u003e\u003c\/p\u003e\n\u003cp\u003e\u003cspan style=\"font-family: times new roman, times;\"\u003e\u003cstrong\u003ePower button instructions:\u003c\/strong\u003e\u003c\/span\u003e\u003c\/p\u003e\n\u003cp\u003e\u003cspan style=\"font-family: times new roman, times;\"\u003e1 long press the power button for 5 seconds to shut down, short press the power button to boot\u003c\/span\u003e\u003c\/p\u003e\n\u003cp\u003e\u003cspan style=\"font-family: times new roman, times;\"\u003e2 In the temperature setting interface and mode setting interface, short press the power button to quickly save the settings and exit the setting interface.\u003c\/span\u003e\u003c\/p\u003e\n\u003cp\u003e\u003cspan style=\"font-family: times new roman, times;\"\u003eRestore the factory default value: After pressing the “▲” button for 5 seconds, all the set parameters of the user will be restored to the factory default values.\u003c\/span\u003e\u003c\/p\u003e\n\u003cp\u003e\u003cspan style=\"font-family: times new roman, times;\"\u003eParameter lock: Press the ▼ key for 3 seconds to flash “0FF” to indicate that the user has set the parameter to be locked. In this way, the same operation flashes “ON” to indicate that the user has set the parameter lock to be released. (The user can only view and cannot modify after the parameter is locked, but the control degree adjustment is still valid)\u003c\/span\u003e\u003c\/p\u003e\n\u003cp\u003e\u003cspan style=\"font-family: times new roman, times;\"\u003e\u003cstrong\u003eFault prompt:\u003c\/strong\u003e\u003c\/span\u003e\u003c\/p\u003e\n\u003cp\u003e\u003cspan style=\"font-family: times new roman, times;\"\u003eWhen the sensor is short-circuited or when the ambient temperature is detected above the upper temperature limit of 120 degrees, the flashing indicates that the HHH well closes the output load. When the sensor is open or detects that the ambient temperature is below the lower temperature limit of -40 degrees, the LLL is flashed and the output load is turned off.\u003c\/span\u003e\u003c\/p\u003e\n\u003cp\u003e\u003cspan style=\"font-family: times new roman, times;\"\u003e\u003cstrong\u003e\u003cb\u003ePrecautions:\u003c\/b\u003e\u003c\/strong\u003e\u003c\/span\u003e\u003c\/p\u003e\n\u003col\u003e\n\u003cli\u003e\u003cspan style=\"font-family: times new roman, times;\"\u003eIn order to prevent high-frequency interference, the sensing time line during installation cannot be bundled with the power supply line and the negative-voltage equipment line, and separate wiring is required.\u003c\/span\u003e\u003c\/li\u003e\n\u003cli\u003e\u003cspan style=\"font-family: times new roman, times;\"\u003eThe power supply and the host shall indicate the voltage--cause, the deviation of the rated voltage value is not more than 1% of 0%. The sensor, power line and load output interface are strictly distinguished during installation.\u003c\/span\u003e\u003c\/li\u003e\n\u003cli\u003e\u003cspan style=\"font-family: times new roman, times;\"\u003eThe thermostat main unit cannot be installed in places where dripping water, old people, and children are within easy reach.\u003c\/span\u003e\u003c\/li\u003e\n\u003cli\u003e\u003cspan style=\"font-family: times new roman, times;\"\u003eAfter wiring, check whether the line is correct and then energize, so as to avoid accidentally burning the temperature controller and load equipment. After installation, apply the protective cover to cover. Installation wiring diagram\u003c\/span\u003e\u003c\/li\u003e\n\u003c\/ol\u003e\n\u003cp\u003e\u003cspan style=\"font-family: times new roman, times;\"\u003e When installing the wiring, please make sure that the working voltage of the load itself and the voltage marked by the thermostat are the same voltage value, otherwise you cannot connect according to this figure.\u003c\/span\u003e\u003c\/p\u003e\n\u003cp\u003e\u003cspan style=\"font-size: 18px;\"\u003e\u003cspan style=\"font-size: 18px; font-family: times new roman, times;\"\u003e\u003cstrong\u003ePackage Included:\u003c\/strong\u003e\u003cstrong\u003e\u003c\/strong\u003e\u003c\/span\u003e\u003c\/span\u003e\u003c\/p\u003e\n\u003cp\u003e\u003cspan style=\"font-size: 18px;\"\u003e\u003cspan style=\"font-size: 18px; font-family: times new roman, times;\"\u003e1PCS*Digital MH1210W Temperature Humidity Hygrometer Thermostat Controller 10A Sensor\u003c\/span\u003e\u003c\/span\u003e\u003c\/p\u003e\n\u003cp\u003e \u003c\/p\u003e","published_at":"2019-03-04T16:12:08+08:00","created_at":"2019-03-04T16:28:29+08:00","vendor":"diymore","type":"Thermostat","tags":["Display","Relay","STC 1000","STC1000"],"price":1099,"price_min":1099,"price_max":1099,"available":true,"price_varies":false,"compare_at_price":null,"compare_at_price_min":0,"compare_at_price_max":0,"compare_at_price_varies":false,"variants":[{"id":22773885304890,"title":"Default Title","option1":"Default Title","option2":null,"option3":null,"sku":"X13067","requires_shipping":true,"taxable":false,"featured_image":null,"available":true,"name":"Digital MH1210W Temperature Humidity Hygrometer Thermostat Controller 10A Sensor","public_title":null,"options":["Default Title"],"price":1099,"weight":94,"compare_at_price":null,"inventory_management":null,"barcode":"","requires_selling_plan":false,"selling_plan_allocations":[]}],"images":["\/\/www.diymore.cc\/cdn\/shop\/products\/X13067_1_860.jpg?v=1588659475","\/\/www.diymore.cc\/cdn\/shop\/products\/X13067_12_794.jpg?v=1588659475","\/\/www.diymore.cc\/cdn\/shop\/products\/X13067_2_377.jpg?v=1588659475","\/\/www.diymore.cc\/cdn\/shop\/products\/X13067_3_847.jpg?v=1588659475","\/\/www.diymore.cc\/cdn\/shop\/products\/X13067_4_335.jpg?v=1588659475","\/\/www.diymore.cc\/cdn\/shop\/products\/X13067_5_155.jpg?v=1588659475","\/\/www.diymore.cc\/cdn\/shop\/products\/X13067_6_121.jpg?v=1588659475","\/\/www.diymore.cc\/cdn\/shop\/products\/X13067_7_553.jpg?v=1588659475","\/\/www.diymore.cc\/cdn\/shop\/products\/X13067_8_484.jpg?v=1588659475"],"featured_image":"\/\/www.diymore.cc\/cdn\/shop\/products\/X13067_1_860.jpg?v=1588659475","options":["Title"],"media":[{"alt":"Digital Mh1210W Temperature Humidity Hygrometer Thermostat Controller 10A Sensor Dc 9-72V","id":6678959947847,"position":1,"preview_image":{"aspect_ratio":1.0,"height":1000,"width":1000,"src":"\/\/www.diymore.cc\/cdn\/shop\/products\/X13067_1_860.jpg?v=1588659475"},"aspect_ratio":1.0,"height":1000,"media_type":"image","src":"\/\/www.diymore.cc\/cdn\/shop\/products\/X13067_1_860.jpg?v=1588659475","width":1000},{"alt":"Digital Mh1210W Temperature Humidity Hygrometer Thermostat Controller 10A Sensor Dc 9-72V","id":6678960078919,"position":2,"preview_image":{"aspect_ratio":1.0,"height":1000,"width":1000,"src":"\/\/www.diymore.cc\/cdn\/shop\/products\/X13067_12_794.jpg?v=1588659475"},"aspect_ratio":1.0,"height":1000,"media_type":"image","src":"\/\/www.diymore.cc\/cdn\/shop\/products\/X13067_12_794.jpg?v=1588659475","width":1000},{"alt":"Digital Mh1210W Temperature Humidity Hygrometer Thermostat Controller 10A Sensor Dc 9-72V","id":6678960111687,"position":3,"preview_image":{"aspect_ratio":1.0,"height":1000,"width":1000,"src":"\/\/www.diymore.cc\/cdn\/shop\/products\/X13067_2_377.jpg?v=1588659475"},"aspect_ratio":1.0,"height":1000,"media_type":"image","src":"\/\/www.diymore.cc\/cdn\/shop\/products\/X13067_2_377.jpg?v=1588659475","width":1000},{"alt":"Digital Mh1210W Temperature Humidity Hygrometer Thermostat Controller 10A Sensor Dc 9-72V","id":6678960144455,"position":4,"preview_image":{"aspect_ratio":1.0,"height":1000,"width":1000,"src":"\/\/www.diymore.cc\/cdn\/shop\/products\/X13067_3_847.jpg?v=1588659475"},"aspect_ratio":1.0,"height":1000,"media_type":"image","src":"\/\/www.diymore.cc\/cdn\/shop\/products\/X13067_3_847.jpg?v=1588659475","width":1000},{"alt":"Digital Mh1210W Temperature Humidity Hygrometer Thermostat Controller 10A Sensor Dc 9-72V","id":6678960177223,"position":5,"preview_image":{"aspect_ratio":1.0,"height":1000,"width":1000,"src":"\/\/www.diymore.cc\/cdn\/shop\/products\/X13067_4_335.jpg?v=1588659475"},"aspect_ratio":1.0,"height":1000,"media_type":"image","src":"\/\/www.diymore.cc\/cdn\/shop\/products\/X13067_4_335.jpg?v=1588659475","width":1000},{"alt":"Digital Mh1210W Temperature Humidity Hygrometer Thermostat Controller 10A Sensor Dc 9-72V","id":6678960341063,"position":6,"preview_image":{"aspect_ratio":1.0,"height":1000,"width":1000,"src":"\/\/www.diymore.cc\/cdn\/shop\/products\/X13067_5_155.jpg?v=1588659475"},"aspect_ratio":1.0,"height":1000,"media_type":"image","src":"\/\/www.diymore.cc\/cdn\/shop\/products\/X13067_5_155.jpg?v=1588659475","width":1000},{"alt":"Digital Mh1210W Temperature Humidity Hygrometer Thermostat Controller 10A Sensor Dc 9-72V","id":6678960373831,"position":7,"preview_image":{"aspect_ratio":1.0,"height":1000,"width":1000,"src":"\/\/www.diymore.cc\/cdn\/shop\/products\/X13067_6_121.jpg?v=1588659475"},"aspect_ratio":1.0,"height":1000,"media_type":"image","src":"\/\/www.diymore.cc\/cdn\/shop\/products\/X13067_6_121.jpg?v=1588659475","width":1000},{"alt":"Digital Mh1210W Temperature Humidity Hygrometer Thermostat Controller 10A Sensor Dc 9-72V","id":6678960406599,"position":8,"preview_image":{"aspect_ratio":1.0,"height":1000,"width":1000,"src":"\/\/www.diymore.cc\/cdn\/shop\/products\/X13067_7_553.jpg?v=1588659475"},"aspect_ratio":1.0,"height":1000,"media_type":"image","src":"\/\/www.diymore.cc\/cdn\/shop\/products\/X13067_7_553.jpg?v=1588659475","width":1000},{"alt":"Digital Mh1210W Temperature Humidity Hygrometer Thermostat Controller 10A Sensor Dc 9-72V","id":6678960504903,"position":9,"preview_image":{"aspect_ratio":1.0,"height":1000,"width":1000,"src":"\/\/www.diymore.cc\/cdn\/shop\/products\/X13067_8_484.jpg?v=1588659475"},"aspect_ratio":1.0,"height":1000,"media_type":"image","src":"\/\/www.diymore.cc\/cdn\/shop\/products\/X13067_8_484.jpg?v=1588659475","width":1000}],"requires_selling_plan":false,"selling_plan_groups":[],"content":"\u003cp\u003e\u003cspan style=\"font-size: 18px; font-family: times new roman, times;\"\u003e\u003cstrong\u003e\u003cb\u003eTechnical Parameters:\u003c\/b\u003e\u003c\/strong\u003e\u003c\/span\u003e\u003c\/p\u003e\n\u003col\u003e\n\u003cli\u003e\u003cspan style=\"font-family: times new roman, times; font-size: 18px;\"\u003e The working voltage is referenced on the product casing;\u003c\/span\u003e\u003c\/li\u003e\n\u003cli\u003e\u003cspan style=\"font-family: times new roman, times; font-size: 18px;\"\u003e -40°C ~120°C: Measurement error ± 0. 5 ° C\u003c\/span\u003e\u003c\/li\u003e\n\u003cli\u003e\u003cspan style=\"font-family: times new roman, times; font-size: 18px;\"\u003e -40°C~120°C: Temperature control accuracy: 1C display accuracy 0. 1°C\u003c\/span\u003e\u003c\/li\u003e\n\u003cli\u003e\u003cspan style=\"font-family: times new roman, times; font-size: 18px;\"\u003e NTC25°C=10K B3435\u003cspan style=\"font-size: 18px;\"\u003e± \u003c\/span\u003e 1% (1 meter long, regardless of positive or negative)\u003c\/span\u003e\u003c\/li\u003e\n\u003cli\u003e\u003cspan style=\"font-family: times new roman, times; font-size: 18px;\"\u003e Power supply voltage: DC version is DC12~72V\u003cbr\u003e\u003c\/span\u003e\u003c\/li\u003e\n\u003cli\u003e\u003cspan style=\"font-family: times new roman, times; font-size: 18px;\"\u003e Working environment: Temperature: -20 ° C ~ 70 ° C, humidity: 90% RH no condensation\u003c\/span\u003e\u003c\/li\u003e\n\u003cli\u003e\u003cspan style=\"font-family: times new roman, times; font-size: 18px;\"\u003e Product size: 75*85*35 (width, depth, height) mm\u003c\/span\u003e\u003c\/li\u003e\n\u003c\/ol\u003e\n\u003cp\u003e\u003cspan style=\"font-family: times new roman, times; font-size: 18px;\"\u003e\u003cstrong\u003e\u003cb\u003eInstructions:\u003c\/b\u003e\u003c\/strong\u003e\u003c\/span\u003e\u003c\/p\u003e\n\u003cp\u003e\u003cspan style=\"font-family: times new roman, times; font-size: 18px;\"\u003ePress the S key for 3 seconds to enter the program menu code mode, which displays the code HC. Press the △ or ▽ key to cycle through the HC-CP-LA-PU-CA parameters. To enter a code, press the S key, press the △ or ▽ key to change the desired value and press SET to save and exit. . Control temperature setting: Short press S key (not more than 2 seconds) to display the factory default control temperature. Press △ or ▽ key to change the value well to save automatically. (Press and hold the △ or ▽ key for 2 seconds to quickly adjust the value.)\u003c\/span\u003e\u003c\/p\u003e\n\u003cp\u003e\u003cspan style=\"font-size: 18px; font-family: times new roman, times;\"\u003e\u003cstrong\u003eHeating control:\u003c\/strong\u003e\u003c\/span\u003e\u003c\/p\u003e\n\u003cp\u003e\u003cspan style=\"font-family: times new roman, times; font-size: 18px;\"\u003eWhen the temperature control method (code HC) is set to H, for example, the set control temperature value is 28 ° C, and the temperature difference is 2 ° C. When the ambient temperature value ≥ the set temperature value (28 °C), the relay opens and closes the output load; when the ambient temperature value ≤ the set temperature value (28 ° C) - the return temperature (2 ° C) and the \"delay\" is set After the start time, the relay pulls up to start the output load; (if the delay function is not needed, the delay start (code PU) can be set to 0).\u003c\/span\u003e\u003c\/p\u003e\n\u003cp\u003e\u003cspan style=\"font-family: times new roman, times; font-size: 18px;\"\u003e\u003cstrong\u003e\u003cb\u003eCooling mode:\u003c\/b\u003e\u003c\/strong\u003e\u003c\/span\u003e\u003c\/p\u003e\n\u003cp\u003e\u003cspan style=\"font-family: times new roman, times; font-size: 18px;\"\u003eWhen the temperature control method (code HC) is set to C, for example, the set control temperature value is 28 ° C, and the temperature difference is 2 ° C.\u003c\/span\u003e\u003c\/p\u003e\n\u003cp\u003e \u003c\/p\u003e\n\u003cp\u003e\u003cspan style=\"font-family: times new roman, times;\"\u003eWhen the ambient temperature value ≤ set temperature value (28 °C), the relay opens and closes the output load; when the ambient temperature value ≥ set temperature value (28 °C) + hysteresis temperature (2 ° C) and the \"delay start\" is set After the time, the relay is sucked and the output load is started: (It is recommended that the delay start time is the default time to protect the compressor. If no delay is required, the code (PU) is set to 0)\u003c\/span\u003e\u003c\/p\u003e\n\u003cp\u003e \u003c\/p\u003e\n\u003cp\u003e\u003cspan style=\"font-family: times new roman, times;\"\u003e\u003cstrong\u003e\u003cb\u003eNote:\u003c\/b\u003e\u003c\/strong\u003e LA minimum lower limit and HA upper limit non-control temperature parameter adjustment, if changed, reduce control temperature range\u003c\/span\u003e\u003c\/p\u003e\n\u003cp\u003e\u003cspan style=\"font-family: times new roman, times;\"\u003e\u003cstrong\u003ePower button instructions:\u003c\/strong\u003e\u003c\/span\u003e\u003c\/p\u003e\n\u003cp\u003e\u003cspan style=\"font-family: times new roman, times;\"\u003e1 long press the power button for 5 seconds to shut down, short press the power button to boot\u003c\/span\u003e\u003c\/p\u003e\n\u003cp\u003e\u003cspan style=\"font-family: times new roman, times;\"\u003e2 In the temperature setting interface and mode setting interface, short press the power button to quickly save the settings and exit the setting interface.\u003c\/span\u003e\u003c\/p\u003e\n\u003cp\u003e\u003cspan style=\"font-family: times new roman, times;\"\u003eRestore the factory default value: After pressing the “▲” button for 5 seconds, all the set parameters of the user will be restored to the factory default values.\u003c\/span\u003e\u003c\/p\u003e\n\u003cp\u003e\u003cspan style=\"font-family: times new roman, times;\"\u003eParameter lock: Press the ▼ key for 3 seconds to flash “0FF” to indicate that the user has set the parameter to be locked. In this way, the same operation flashes “ON” to indicate that the user has set the parameter lock to be released. (The user can only view and cannot modify after the parameter is locked, but the control degree adjustment is still valid)\u003c\/span\u003e\u003c\/p\u003e\n\u003cp\u003e\u003cspan style=\"font-family: times new roman, times;\"\u003e\u003cstrong\u003eFault prompt:\u003c\/strong\u003e\u003c\/span\u003e\u003c\/p\u003e\n\u003cp\u003e\u003cspan style=\"font-family: times new roman, times;\"\u003eWhen the sensor is short-circuited or when the ambient temperature is detected above the upper temperature limit of 120 degrees, the flashing indicates that the HHH well closes the output load. When the sensor is open or detects that the ambient temperature is below the lower temperature limit of -40 degrees, the LLL is flashed and the output load is turned off.\u003c\/span\u003e\u003c\/p\u003e\n\u003cp\u003e\u003cspan style=\"font-family: times new roman, times;\"\u003e\u003cstrong\u003e\u003cb\u003ePrecautions:\u003c\/b\u003e\u003c\/strong\u003e\u003c\/span\u003e\u003c\/p\u003e\n\u003col\u003e\n\u003cli\u003e\u003cspan style=\"font-family: times new roman, times;\"\u003eIn order to prevent high-frequency interference, the sensing time line during installation cannot be bundled with the power supply line and the negative-voltage equipment line, and separate wiring is required.\u003c\/span\u003e\u003c\/li\u003e\n\u003cli\u003e\u003cspan style=\"font-family: times new roman, times;\"\u003eThe power supply and the host shall indicate the voltage--cause, the deviation of the rated voltage value is not more than 1% of 0%. The sensor, power line and load output interface are strictly distinguished during installation.\u003c\/span\u003e\u003c\/li\u003e\n\u003cli\u003e\u003cspan style=\"font-family: times new roman, times;\"\u003eThe thermostat main unit cannot be installed in places where dripping water, old people, and children are within easy reach.\u003c\/span\u003e\u003c\/li\u003e\n\u003cli\u003e\u003cspan style=\"font-family: times new roman, times;\"\u003eAfter wiring, check whether the line is correct and then energize, so as to avoid accidentally burning the temperature controller and load equipment. After installation, apply the protective cover to cover. Installation wiring diagram\u003c\/span\u003e\u003c\/li\u003e\n\u003c\/ol\u003e\n\u003cp\u003e\u003cspan style=\"font-family: times new roman, times;\"\u003e When installing the wiring, please make sure that the working voltage of the load itself and the voltage marked by the thermostat are the same voltage value, otherwise you cannot connect according to this figure.\u003c\/span\u003e\u003c\/p\u003e\n\u003cp\u003e\u003cspan style=\"font-size: 18px;\"\u003e\u003cspan style=\"font-size: 18px; font-family: times new roman, times;\"\u003e\u003cstrong\u003ePackage Included:\u003c\/strong\u003e\u003cstrong\u003e\u003c\/strong\u003e\u003c\/span\u003e\u003c\/span\u003e\u003c\/p\u003e\n\u003cp\u003e\u003cspan style=\"font-size: 18px;\"\u003e\u003cspan style=\"font-size: 18px; font-family: times new roman, times;\"\u003e1PCS*Digital MH1210W Temperature Humidity Hygrometer Thermostat Controller 10A Sensor\u003c\/span\u003e\u003c\/span\u003e\u003c\/p\u003e\n\u003cp\u003e \u003c\/p\u003e"}
 -
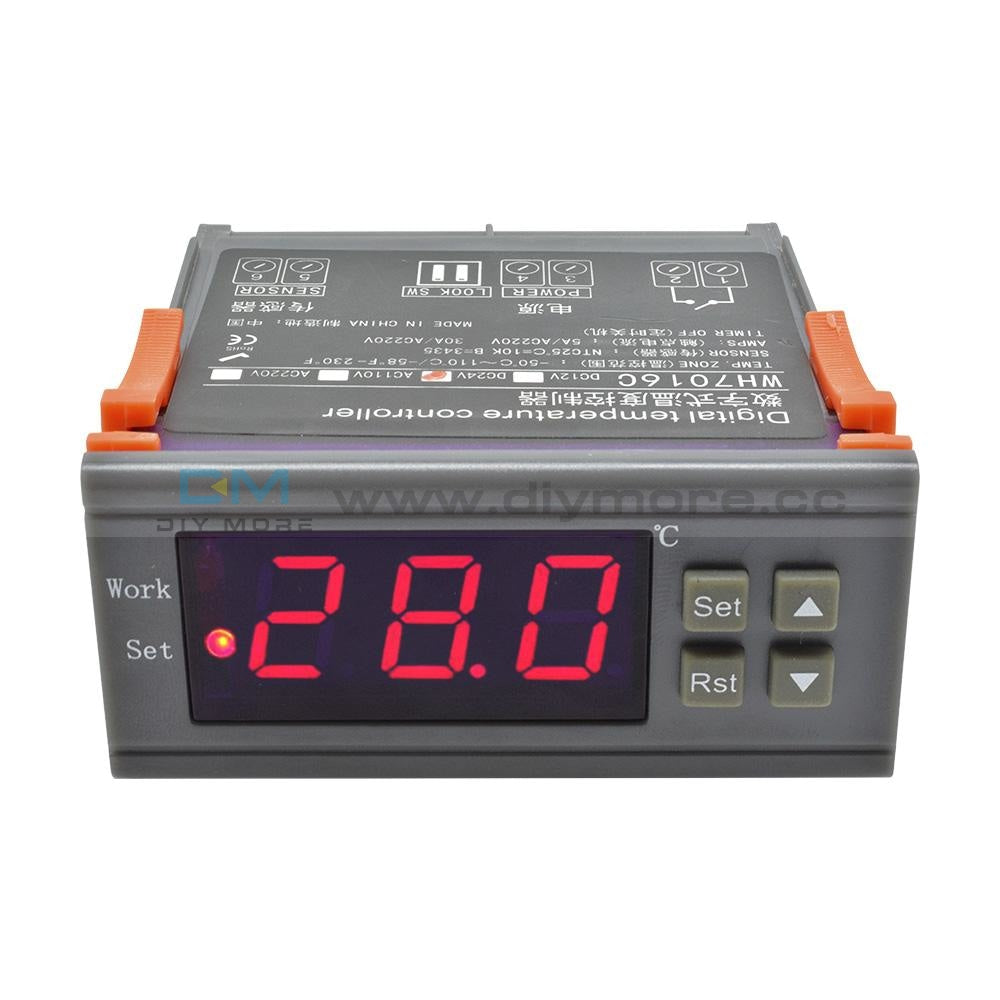
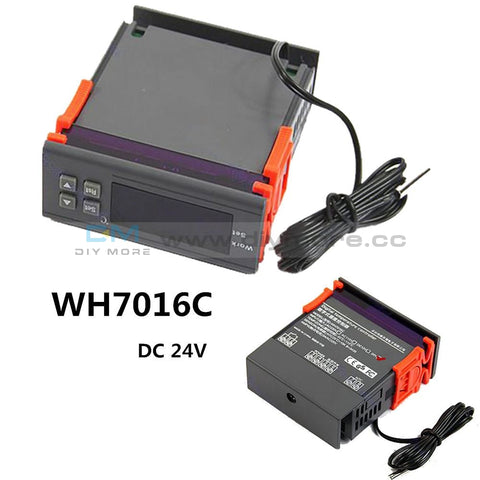 Translation missing: en.products.product.regular_price $5.99{"id":2326224502842,"title":"Digital MH1210W Temperature Humidity Hygrometer Thermostat Controller 10A Sensor","handle":"digital-mh1210w-temperature-humidity-hygrometer-thermostat-controller-10a-sensor-dc-9-72v","description":"\u003cp\u003e\u003cspan style=\"font-size: 18px; font-family: times new roman, times;\"\u003e\u003cstrong\u003e\u003cb\u003eTechnical Parameters:\u003c\/b\u003e\u003c\/strong\u003e\u003c\/span\u003e\u003c\/p\u003e\n\u003col\u003e\n\u003cli\u003e\u003cspan style=\"font-family: times new roman, times; font-size: 18px;\"\u003e The working voltage is referenced on the product casing;\u003c\/span\u003e\u003c\/li\u003e\n\u003cli\u003e\u003cspan style=\"font-family: times new roman, times; font-size: 18px;\"\u003e -40°C ~120°C: Measurement error ± 0. 5 ° C\u003c\/span\u003e\u003c\/li\u003e\n\u003cli\u003e\u003cspan style=\"font-family: times new roman, times; font-size: 18px;\"\u003e -40°C~120°C: Temperature control accuracy: 1C display accuracy 0. 1°C\u003c\/span\u003e\u003c\/li\u003e\n\u003cli\u003e\u003cspan style=\"font-family: times new roman, times; font-size: 18px;\"\u003e NTC25°C=10K B3435\u003cspan style=\"font-size: 18px;\"\u003e± \u003c\/span\u003e 1% (1 meter long, regardless of positive or negative)\u003c\/span\u003e\u003c\/li\u003e\n\u003cli\u003e\u003cspan style=\"font-family: times new roman, times; font-size: 18px;\"\u003e Power supply voltage: DC version is DC12~72V\u003cbr\u003e\u003c\/span\u003e\u003c\/li\u003e\n\u003cli\u003e\u003cspan style=\"font-family: times new roman, times; font-size: 18px;\"\u003e Working environment: Temperature: -20 ° C ~ 70 ° C, humidity: 90% RH no condensation\u003c\/span\u003e\u003c\/li\u003e\n\u003cli\u003e\u003cspan style=\"font-family: times new roman, times; font-size: 18px;\"\u003e Product size: 75*85*35 (width, depth, height) mm\u003c\/span\u003e\u003c\/li\u003e\n\u003c\/ol\u003e\n\u003cp\u003e\u003cspan style=\"font-family: times new roman, times; font-size: 18px;\"\u003e\u003cstrong\u003e\u003cb\u003eInstructions:\u003c\/b\u003e\u003c\/strong\u003e\u003c\/span\u003e\u003c\/p\u003e\n\u003cp\u003e\u003cspan style=\"font-family: times new roman, times; font-size: 18px;\"\u003ePress the S key for 3 seconds to enter the program menu code mode, which displays the code HC. Press the △ or ▽ key to cycle through the HC-CP-LA-PU-CA parameters. To enter a code, press the S key, press the △ or ▽ key to change the desired value and press SET to save and exit. . Control temperature setting: Short press S key (not more than 2 seconds) to display the factory default control temperature. Press △ or ▽ key to change the value well to save automatically. (Press and hold the △ or ▽ key for 2 seconds to quickly adjust the value.)\u003c\/span\u003e\u003c\/p\u003e\n\u003cp\u003e\u003cspan style=\"font-size: 18px; font-family: times new roman, times;\"\u003e\u003cstrong\u003eHeating control:\u003c\/strong\u003e\u003c\/span\u003e\u003c\/p\u003e\n\u003cp\u003e\u003cspan style=\"font-family: times new roman, times; font-size: 18px;\"\u003eWhen the temperature control method (code HC) is set to H, for example, the set control temperature value is 28 ° C, and the temperature difference is 2 ° C. When the ambient temperature value ≥ the set temperature value (28 °C), the relay opens and closes the output load; when the ambient temperature value ≤ the set temperature value (28 ° C) - the return temperature (2 ° C) and the \"delay\" is set After the start time, the relay pulls up to start the output load; (if the delay function is not needed, the delay start (code PU) can be set to 0).\u003c\/span\u003e\u003c\/p\u003e\n\u003cp\u003e\u003cspan style=\"font-family: times new roman, times; font-size: 18px;\"\u003e\u003cstrong\u003e\u003cb\u003eCooling mode:\u003c\/b\u003e\u003c\/strong\u003e\u003c\/span\u003e\u003c\/p\u003e\n\u003cp\u003e\u003cspan style=\"font-family: times new roman, times; font-size: 18px;\"\u003eWhen the temperature control method (code HC) is set to C, for example, the set control temperature value is 28 ° C, and the temperature difference is 2 ° C.\u003c\/span\u003e\u003c\/p\u003e\n\u003cp\u003e \u003c\/p\u003e\n\u003cp\u003e\u003cspan style=\"font-family: times new roman, times;\"\u003eWhen the ambient temperature value ≤ set temperature value (28 °C), the relay opens and closes the output load; when the ambient temperature value ≥ set temperature value (28 °C) + hysteresis temperature (2 ° C) and the \"delay start\" is set After the time, the relay is sucked and the output load is started: (It is recommended that the delay start time is the default time to protect the compressor. If no delay is required, the code (PU) is set to 0)\u003c\/span\u003e\u003c\/p\u003e\n\u003cp\u003e \u003c\/p\u003e\n\u003cp\u003e\u003cspan style=\"font-family: times new roman, times;\"\u003e\u003cstrong\u003e\u003cb\u003eNote:\u003c\/b\u003e\u003c\/strong\u003e LA minimum lower limit and HA upper limit non-control temperature parameter adjustment, if changed, reduce control temperature range\u003c\/span\u003e\u003c\/p\u003e\n\u003cp\u003e\u003cspan style=\"font-family: times new roman, times;\"\u003e\u003cstrong\u003ePower button instructions:\u003c\/strong\u003e\u003c\/span\u003e\u003c\/p\u003e\n\u003cp\u003e\u003cspan style=\"font-family: times new roman, times;\"\u003e1 long press the power button for 5 seconds to shut down, short press the power button to boot\u003c\/span\u003e\u003c\/p\u003e\n\u003cp\u003e\u003cspan style=\"font-family: times new roman, times;\"\u003e2 In the temperature setting interface and mode setting interface, short press the power button to quickly save the settings and exit the setting interface.\u003c\/span\u003e\u003c\/p\u003e\n\u003cp\u003e\u003cspan style=\"font-family: times new roman, times;\"\u003eRestore the factory default value: After pressing the “▲” button for 5 seconds, all the set parameters of the user will be restored to the factory default values.\u003c\/span\u003e\u003c\/p\u003e\n\u003cp\u003e\u003cspan style=\"font-family: times new roman, times;\"\u003eParameter lock: Press the ▼ key for 3 seconds to flash “0FF” to indicate that the user has set the parameter to be locked. In this way, the same operation flashes “ON” to indicate that the user has set the parameter lock to be released. (The user can only view and cannot modify after the parameter is locked, but the control degree adjustment is still valid)\u003c\/span\u003e\u003c\/p\u003e\n\u003cp\u003e\u003cspan style=\"font-family: times new roman, times;\"\u003e\u003cstrong\u003eFault prompt:\u003c\/strong\u003e\u003c\/span\u003e\u003c\/p\u003e\n\u003cp\u003e\u003cspan style=\"font-family: times new roman, times;\"\u003eWhen the sensor is short-circuited or when the ambient temperature is detected above the upper temperature limit of 120 degrees, the flashing indicates that the HHH well closes the output load. When the sensor is open or detects that the ambient temperature is below the lower temperature limit of -40 degrees, the LLL is flashed and the output load is turned off.\u003c\/span\u003e\u003c\/p\u003e\n\u003cp\u003e\u003cspan style=\"font-family: times new roman, times;\"\u003e\u003cstrong\u003e\u003cb\u003ePrecautions:\u003c\/b\u003e\u003c\/strong\u003e\u003c\/span\u003e\u003c\/p\u003e\n\u003col\u003e\n\u003cli\u003e\u003cspan style=\"font-family: times new roman, times;\"\u003eIn order to prevent high-frequency interference, the sensing time line during installation cannot be bundled with the power supply line and the negative-voltage equipment line, and separate wiring is required.\u003c\/span\u003e\u003c\/li\u003e\n\u003cli\u003e\u003cspan style=\"font-family: times new roman, times;\"\u003eThe power supply and the host shall indicate the voltage--cause, the deviation of the rated voltage value is not more than 1% of 0%. The sensor, power line and load output interface are strictly distinguished during installation.\u003c\/span\u003e\u003c\/li\u003e\n\u003cli\u003e\u003cspan style=\"font-family: times new roman, times;\"\u003eThe thermostat main unit cannot be installed in places where dripping water, old people, and children are within easy reach.\u003c\/span\u003e\u003c\/li\u003e\n\u003cli\u003e\u003cspan style=\"font-family: times new roman, times;\"\u003eAfter wiring, check whether the line is correct and then energize, so as to avoid accidentally burning the temperature controller and load equipment. After installation, apply the protective cover to cover. Installation wiring diagram\u003c\/span\u003e\u003c\/li\u003e\n\u003c\/ol\u003e\n\u003cp\u003e\u003cspan style=\"font-family: times new roman, times;\"\u003e When installing the wiring, please make sure that the working voltage of the load itself and the voltage marked by the thermostat are the same voltage value, otherwise you cannot connect according to this figure.\u003c\/span\u003e\u003c\/p\u003e\n\u003cp\u003e\u003cspan style=\"font-size: 18px;\"\u003e\u003cspan style=\"font-size: 18px; font-family: times new roman, times;\"\u003e\u003cstrong\u003ePackage Included:\u003c\/strong\u003e\u003cstrong\u003e\u003c\/strong\u003e\u003c\/span\u003e\u003c\/span\u003e\u003c\/p\u003e\n\u003cp\u003e\u003cspan style=\"font-size: 18px;\"\u003e\u003cspan style=\"font-size: 18px; font-family: times new roman, times;\"\u003e1PCS*Digital MH1210W Temperature Humidity Hygrometer Thermostat Controller 10A Sensor\u003c\/span\u003e\u003c\/span\u003e\u003c\/p\u003e\n\u003cp\u003e \u003c\/p\u003e","published_at":"2019-03-04T16:12:08+08:00","created_at":"2019-03-04T16:28:29+08:00","vendor":"diymore","type":"Thermostat","tags":["Display","Relay","STC 1000","STC1000"],"price":1099,"price_min":1099,"price_max":1099,"available":true,"price_varies":false,"compare_at_price":null,"compare_at_price_min":0,"compare_at_price_max":0,"compare_at_price_varies":false,"variants":[{"id":22773885304890,"title":"Default Title","option1":"Default Title","option2":null,"option3":null,"sku":"X13067","requires_shipping":true,"taxable":false,"featured_image":null,"available":true,"name":"Digital MH1210W Temperature Humidity Hygrometer Thermostat Controller 10A Sensor","public_title":null,"options":["Default Title"],"price":1099,"weight":94,"compare_at_price":null,"inventory_management":null,"barcode":"","requires_selling_plan":false,"selling_plan_allocations":[]}],"images":["\/\/www.diymore.cc\/cdn\/shop\/products\/X13067_1_860.jpg?v=1588659475","\/\/www.diymore.cc\/cdn\/shop\/products\/X13067_12_794.jpg?v=1588659475","\/\/www.diymore.cc\/cdn\/shop\/products\/X13067_2_377.jpg?v=1588659475","\/\/www.diymore.cc\/cdn\/shop\/products\/X13067_3_847.jpg?v=1588659475","\/\/www.diymore.cc\/cdn\/shop\/products\/X13067_4_335.jpg?v=1588659475","\/\/www.diymore.cc\/cdn\/shop\/products\/X13067_5_155.jpg?v=1588659475","\/\/www.diymore.cc\/cdn\/shop\/products\/X13067_6_121.jpg?v=1588659475","\/\/www.diymore.cc\/cdn\/shop\/products\/X13067_7_553.jpg?v=1588659475","\/\/www.diymore.cc\/cdn\/shop\/products\/X13067_8_484.jpg?v=1588659475"],"featured_image":"\/\/www.diymore.cc\/cdn\/shop\/products\/X13067_1_860.jpg?v=1588659475","options":["Title"],"media":[{"alt":"Digital Mh1210W Temperature Humidity Hygrometer Thermostat Controller 10A Sensor Dc 9-72V","id":6678959947847,"position":1,"preview_image":{"aspect_ratio":1.0,"height":1000,"width":1000,"src":"\/\/www.diymore.cc\/cdn\/shop\/products\/X13067_1_860.jpg?v=1588659475"},"aspect_ratio":1.0,"height":1000,"media_type":"image","src":"\/\/www.diymore.cc\/cdn\/shop\/products\/X13067_1_860.jpg?v=1588659475","width":1000},{"alt":"Digital Mh1210W Temperature Humidity Hygrometer Thermostat Controller 10A Sensor Dc 9-72V","id":6678960078919,"position":2,"preview_image":{"aspect_ratio":1.0,"height":1000,"width":1000,"src":"\/\/www.diymore.cc\/cdn\/shop\/products\/X13067_12_794.jpg?v=1588659475"},"aspect_ratio":1.0,"height":1000,"media_type":"image","src":"\/\/www.diymore.cc\/cdn\/shop\/products\/X13067_12_794.jpg?v=1588659475","width":1000},{"alt":"Digital Mh1210W Temperature Humidity Hygrometer Thermostat Controller 10A Sensor Dc 9-72V","id":6678960111687,"position":3,"preview_image":{"aspect_ratio":1.0,"height":1000,"width":1000,"src":"\/\/www.diymore.cc\/cdn\/shop\/products\/X13067_2_377.jpg?v=1588659475"},"aspect_ratio":1.0,"height":1000,"media_type":"image","src":"\/\/www.diymore.cc\/cdn\/shop\/products\/X13067_2_377.jpg?v=1588659475","width":1000},{"alt":"Digital Mh1210W Temperature Humidity Hygrometer Thermostat Controller 10A Sensor Dc 9-72V","id":6678960144455,"position":4,"preview_image":{"aspect_ratio":1.0,"height":1000,"width":1000,"src":"\/\/www.diymore.cc\/cdn\/shop\/products\/X13067_3_847.jpg?v=1588659475"},"aspect_ratio":1.0,"height":1000,"media_type":"image","src":"\/\/www.diymore.cc\/cdn\/shop\/products\/X13067_3_847.jpg?v=1588659475","width":1000},{"alt":"Digital Mh1210W Temperature Humidity Hygrometer Thermostat Controller 10A Sensor Dc 9-72V","id":6678960177223,"position":5,"preview_image":{"aspect_ratio":1.0,"height":1000,"width":1000,"src":"\/\/www.diymore.cc\/cdn\/shop\/products\/X13067_4_335.jpg?v=1588659475"},"aspect_ratio":1.0,"height":1000,"media_type":"image","src":"\/\/www.diymore.cc\/cdn\/shop\/products\/X13067_4_335.jpg?v=1588659475","width":1000},{"alt":"Digital Mh1210W Temperature Humidity Hygrometer Thermostat Controller 10A Sensor Dc 9-72V","id":6678960341063,"position":6,"preview_image":{"aspect_ratio":1.0,"height":1000,"width":1000,"src":"\/\/www.diymore.cc\/cdn\/shop\/products\/X13067_5_155.jpg?v=1588659475"},"aspect_ratio":1.0,"height":1000,"media_type":"image","src":"\/\/www.diymore.cc\/cdn\/shop\/products\/X13067_5_155.jpg?v=1588659475","width":1000},{"alt":"Digital Mh1210W Temperature Humidity Hygrometer Thermostat Controller 10A Sensor Dc 9-72V","id":6678960373831,"position":7,"preview_image":{"aspect_ratio":1.0,"height":1000,"width":1000,"src":"\/\/www.diymore.cc\/cdn\/shop\/products\/X13067_6_121.jpg?v=1588659475"},"aspect_ratio":1.0,"height":1000,"media_type":"image","src":"\/\/www.diymore.cc\/cdn\/shop\/products\/X13067_6_121.jpg?v=1588659475","width":1000},{"alt":"Digital Mh1210W Temperature Humidity Hygrometer Thermostat Controller 10A Sensor Dc 9-72V","id":6678960406599,"position":8,"preview_image":{"aspect_ratio":1.0,"height":1000,"width":1000,"src":"\/\/www.diymore.cc\/cdn\/shop\/products\/X13067_7_553.jpg?v=1588659475"},"aspect_ratio":1.0,"height":1000,"media_type":"image","src":"\/\/www.diymore.cc\/cdn\/shop\/products\/X13067_7_553.jpg?v=1588659475","width":1000},{"alt":"Digital Mh1210W Temperature Humidity Hygrometer Thermostat Controller 10A Sensor Dc 9-72V","id":6678960504903,"position":9,"preview_image":{"aspect_ratio":1.0,"height":1000,"width":1000,"src":"\/\/www.diymore.cc\/cdn\/shop\/products\/X13067_8_484.jpg?v=1588659475"},"aspect_ratio":1.0,"height":1000,"media_type":"image","src":"\/\/www.diymore.cc\/cdn\/shop\/products\/X13067_8_484.jpg?v=1588659475","width":1000}],"requires_selling_plan":false,"selling_plan_groups":[],"content":"\u003cp\u003e\u003cspan style=\"font-size: 18px; font-family: times new roman, times;\"\u003e\u003cstrong\u003e\u003cb\u003eTechnical Parameters:\u003c\/b\u003e\u003c\/strong\u003e\u003c\/span\u003e\u003c\/p\u003e\n\u003col\u003e\n\u003cli\u003e\u003cspan style=\"font-family: times new roman, times; font-size: 18px;\"\u003e The working voltage is referenced on the product casing;\u003c\/span\u003e\u003c\/li\u003e\n\u003cli\u003e\u003cspan style=\"font-family: times new roman, times; font-size: 18px;\"\u003e -40°C ~120°C: Measurement error ± 0. 5 ° C\u003c\/span\u003e\u003c\/li\u003e\n\u003cli\u003e\u003cspan style=\"font-family: times new roman, times; font-size: 18px;\"\u003e -40°C~120°C: Temperature control accuracy: 1C display accuracy 0. 1°C\u003c\/span\u003e\u003c\/li\u003e\n\u003cli\u003e\u003cspan style=\"font-family: times new roman, times; font-size: 18px;\"\u003e NTC25°C=10K B3435\u003cspan style=\"font-size: 18px;\"\u003e± \u003c\/span\u003e 1% (1 meter long, regardless of positive or negative)\u003c\/span\u003e\u003c\/li\u003e\n\u003cli\u003e\u003cspan style=\"font-family: times new roman, times; font-size: 18px;\"\u003e Power supply voltage: DC version is DC12~72V\u003cbr\u003e\u003c\/span\u003e\u003c\/li\u003e\n\u003cli\u003e\u003cspan style=\"font-family: times new roman, times; font-size: 18px;\"\u003e Working environment: Temperature: -20 ° C ~ 70 ° C, humidity: 90% RH no condensation\u003c\/span\u003e\u003c\/li\u003e\n\u003cli\u003e\u003cspan style=\"font-family: times new roman, times; font-size: 18px;\"\u003e Product size: 75*85*35 (width, depth, height) mm\u003c\/span\u003e\u003c\/li\u003e\n\u003c\/ol\u003e\n\u003cp\u003e\u003cspan style=\"font-family: times new roman, times; font-size: 18px;\"\u003e\u003cstrong\u003e\u003cb\u003eInstructions:\u003c\/b\u003e\u003c\/strong\u003e\u003c\/span\u003e\u003c\/p\u003e\n\u003cp\u003e\u003cspan style=\"font-family: times new roman, times; font-size: 18px;\"\u003ePress the S key for 3 seconds to enter the program menu code mode, which displays the code HC. Press the △ or ▽ key to cycle through the HC-CP-LA-PU-CA parameters. To enter a code, press the S key, press the △ or ▽ key to change the desired value and press SET to save and exit. . Control temperature setting: Short press S key (not more than 2 seconds) to display the factory default control temperature. Press △ or ▽ key to change the value well to save automatically. (Press and hold the △ or ▽ key for 2 seconds to quickly adjust the value.)\u003c\/span\u003e\u003c\/p\u003e\n\u003cp\u003e\u003cspan style=\"font-size: 18px; font-family: times new roman, times;\"\u003e\u003cstrong\u003eHeating control:\u003c\/strong\u003e\u003c\/span\u003e\u003c\/p\u003e\n\u003cp\u003e\u003cspan style=\"font-family: times new roman, times; font-size: 18px;\"\u003eWhen the temperature control method (code HC) is set to H, for example, the set control temperature value is 28 ° C, and the temperature difference is 2 ° C. When the ambient temperature value ≥ the set temperature value (28 °C), the relay opens and closes the output load; when the ambient temperature value ≤ the set temperature value (28 ° C) - the return temperature (2 ° C) and the \"delay\" is set After the start time, the relay pulls up to start the output load; (if the delay function is not needed, the delay start (code PU) can be set to 0).\u003c\/span\u003e\u003c\/p\u003e\n\u003cp\u003e\u003cspan style=\"font-family: times new roman, times; font-size: 18px;\"\u003e\u003cstrong\u003e\u003cb\u003eCooling mode:\u003c\/b\u003e\u003c\/strong\u003e\u003c\/span\u003e\u003c\/p\u003e\n\u003cp\u003e\u003cspan style=\"font-family: times new roman, times; font-size: 18px;\"\u003eWhen the temperature control method (code HC) is set to C, for example, the set control temperature value is 28 ° C, and the temperature difference is 2 ° C.\u003c\/span\u003e\u003c\/p\u003e\n\u003cp\u003e \u003c\/p\u003e\n\u003cp\u003e\u003cspan style=\"font-family: times new roman, times;\"\u003eWhen the ambient temperature value ≤ set temperature value (28 °C), the relay opens and closes the output load; when the ambient temperature value ≥ set temperature value (28 °C) + hysteresis temperature (2 ° C) and the \"delay start\" is set After the time, the relay is sucked and the output load is started: (It is recommended that the delay start time is the default time to protect the compressor. If no delay is required, the code (PU) is set to 0)\u003c\/span\u003e\u003c\/p\u003e\n\u003cp\u003e \u003c\/p\u003e\n\u003cp\u003e\u003cspan style=\"font-family: times new roman, times;\"\u003e\u003cstrong\u003e\u003cb\u003eNote:\u003c\/b\u003e\u003c\/strong\u003e LA minimum lower limit and HA upper limit non-control temperature parameter adjustment, if changed, reduce control temperature range\u003c\/span\u003e\u003c\/p\u003e\n\u003cp\u003e\u003cspan style=\"font-family: times new roman, times;\"\u003e\u003cstrong\u003ePower button instructions:\u003c\/strong\u003e\u003c\/span\u003e\u003c\/p\u003e\n\u003cp\u003e\u003cspan style=\"font-family: times new roman, times;\"\u003e1 long press the power button for 5 seconds to shut down, short press the power button to boot\u003c\/span\u003e\u003c\/p\u003e\n\u003cp\u003e\u003cspan style=\"font-family: times new roman, times;\"\u003e2 In the temperature setting interface and mode setting interface, short press the power button to quickly save the settings and exit the setting interface.\u003c\/span\u003e\u003c\/p\u003e\n\u003cp\u003e\u003cspan style=\"font-family: times new roman, times;\"\u003eRestore the factory default value: After pressing the “▲” button for 5 seconds, all the set parameters of the user will be restored to the factory default values.\u003c\/span\u003e\u003c\/p\u003e\n\u003cp\u003e\u003cspan style=\"font-family: times new roman, times;\"\u003eParameter lock: Press the ▼ key for 3 seconds to flash “0FF” to indicate that the user has set the parameter to be locked. In this way, the same operation flashes “ON” to indicate that the user has set the parameter lock to be released. (The user can only view and cannot modify after the parameter is locked, but the control degree adjustment is still valid)\u003c\/span\u003e\u003c\/p\u003e\n\u003cp\u003e\u003cspan style=\"font-family: times new roman, times;\"\u003e\u003cstrong\u003eFault prompt:\u003c\/strong\u003e\u003c\/span\u003e\u003c\/p\u003e\n\u003cp\u003e\u003cspan style=\"font-family: times new roman, times;\"\u003eWhen the sensor is short-circuited or when the ambient temperature is detected above the upper temperature limit of 120 degrees, the flashing indicates that the HHH well closes the output load. When the sensor is open or detects that the ambient temperature is below the lower temperature limit of -40 degrees, the LLL is flashed and the output load is turned off.\u003c\/span\u003e\u003c\/p\u003e\n\u003cp\u003e\u003cspan style=\"font-family: times new roman, times;\"\u003e\u003cstrong\u003e\u003cb\u003ePrecautions:\u003c\/b\u003e\u003c\/strong\u003e\u003c\/span\u003e\u003c\/p\u003e\n\u003col\u003e\n\u003cli\u003e\u003cspan style=\"font-family: times new roman, times;\"\u003eIn order to prevent high-frequency interference, the sensing time line during installation cannot be bundled with the power supply line and the negative-voltage equipment line, and separate wiring is required.\u003c\/span\u003e\u003c\/li\u003e\n\u003cli\u003e\u003cspan style=\"font-family: times new roman, times;\"\u003eThe power supply and the host shall indicate the voltage--cause, the deviation of the rated voltage value is not more than 1% of 0%. The sensor, power line and load output interface are strictly distinguished during installation.\u003c\/span\u003e\u003c\/li\u003e\n\u003cli\u003e\u003cspan style=\"font-family: times new roman, times;\"\u003eThe thermostat main unit cannot be installed in places where dripping water, old people, and children are within easy reach.\u003c\/span\u003e\u003c\/li\u003e\n\u003cli\u003e\u003cspan style=\"font-family: times new roman, times;\"\u003eAfter wiring, check whether the line is correct and then energize, so as to avoid accidentally burning the temperature controller and load equipment. After installation, apply the protective cover to cover. Installation wiring diagram\u003c\/span\u003e\u003c\/li\u003e\n\u003c\/ol\u003e\n\u003cp\u003e\u003cspan style=\"font-family: times new roman, times;\"\u003e When installing the wiring, please make sure that the working voltage of the load itself and the voltage marked by the thermostat are the same voltage value, otherwise you cannot connect according to this figure.\u003c\/span\u003e\u003c\/p\u003e\n\u003cp\u003e\u003cspan style=\"font-size: 18px;\"\u003e\u003cspan style=\"font-size: 18px; font-family: times new roman, times;\"\u003e\u003cstrong\u003ePackage Included:\u003c\/strong\u003e\u003cstrong\u003e\u003c\/strong\u003e\u003c\/span\u003e\u003c\/span\u003e\u003c\/p\u003e\n\u003cp\u003e\u003cspan style=\"font-size: 18px;\"\u003e\u003cspan style=\"font-size: 18px; font-family: times new roman, times;\"\u003e1PCS*Digital MH1210W Temperature Humidity Hygrometer Thermostat Controller 10A Sensor\u003c\/span\u003e\u003c\/span\u003e\u003c\/p\u003e\n\u003cp\u003e \u003c\/p\u003e"}
 -

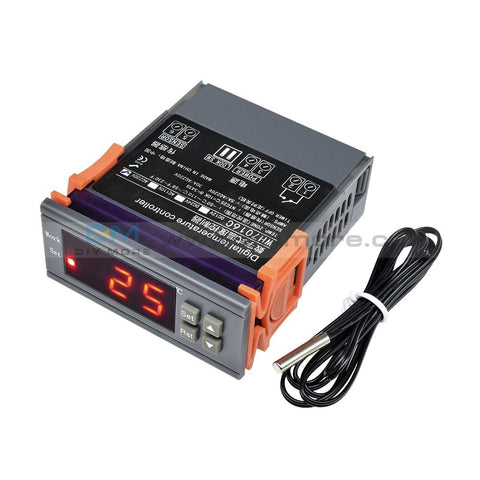 Translation missing: en.products.product.regular_price $9.99{"id":2326224502842,"title":"Digital MH1210W Temperature Humidity Hygrometer Thermostat Controller 10A Sensor","handle":"digital-mh1210w-temperature-humidity-hygrometer-thermostat-controller-10a-sensor-dc-9-72v","description":"\u003cp\u003e\u003cspan style=\"font-size: 18px; font-family: times new roman, times;\"\u003e\u003cstrong\u003e\u003cb\u003eTechnical Parameters:\u003c\/b\u003e\u003c\/strong\u003e\u003c\/span\u003e\u003c\/p\u003e\n\u003col\u003e\n\u003cli\u003e\u003cspan style=\"font-family: times new roman, times; font-size: 18px;\"\u003e The working voltage is referenced on the product casing;\u003c\/span\u003e\u003c\/li\u003e\n\u003cli\u003e\u003cspan style=\"font-family: times new roman, times; font-size: 18px;\"\u003e -40°C ~120°C: Measurement error ± 0. 5 ° C\u003c\/span\u003e\u003c\/li\u003e\n\u003cli\u003e\u003cspan style=\"font-family: times new roman, times; font-size: 18px;\"\u003e -40°C~120°C: Temperature control accuracy: 1C display accuracy 0. 1°C\u003c\/span\u003e\u003c\/li\u003e\n\u003cli\u003e\u003cspan style=\"font-family: times new roman, times; font-size: 18px;\"\u003e NTC25°C=10K B3435\u003cspan style=\"font-size: 18px;\"\u003e± \u003c\/span\u003e 1% (1 meter long, regardless of positive or negative)\u003c\/span\u003e\u003c\/li\u003e\n\u003cli\u003e\u003cspan style=\"font-family: times new roman, times; font-size: 18px;\"\u003e Power supply voltage: DC version is DC12~72V\u003cbr\u003e\u003c\/span\u003e\u003c\/li\u003e\n\u003cli\u003e\u003cspan style=\"font-family: times new roman, times; font-size: 18px;\"\u003e Working environment: Temperature: -20 ° C ~ 70 ° C, humidity: 90% RH no condensation\u003c\/span\u003e\u003c\/li\u003e\n\u003cli\u003e\u003cspan style=\"font-family: times new roman, times; font-size: 18px;\"\u003e Product size: 75*85*35 (width, depth, height) mm\u003c\/span\u003e\u003c\/li\u003e\n\u003c\/ol\u003e\n\u003cp\u003e\u003cspan style=\"font-family: times new roman, times; font-size: 18px;\"\u003e\u003cstrong\u003e\u003cb\u003eInstructions:\u003c\/b\u003e\u003c\/strong\u003e\u003c\/span\u003e\u003c\/p\u003e\n\u003cp\u003e\u003cspan style=\"font-family: times new roman, times; font-size: 18px;\"\u003ePress the S key for 3 seconds to enter the program menu code mode, which displays the code HC. Press the △ or ▽ key to cycle through the HC-CP-LA-PU-CA parameters. To enter a code, press the S key, press the △ or ▽ key to change the desired value and press SET to save and exit. . Control temperature setting: Short press S key (not more than 2 seconds) to display the factory default control temperature. Press △ or ▽ key to change the value well to save automatically. (Press and hold the △ or ▽ key for 2 seconds to quickly adjust the value.)\u003c\/span\u003e\u003c\/p\u003e\n\u003cp\u003e\u003cspan style=\"font-size: 18px; font-family: times new roman, times;\"\u003e\u003cstrong\u003eHeating control:\u003c\/strong\u003e\u003c\/span\u003e\u003c\/p\u003e\n\u003cp\u003e\u003cspan style=\"font-family: times new roman, times; font-size: 18px;\"\u003eWhen the temperature control method (code HC) is set to H, for example, the set control temperature value is 28 ° C, and the temperature difference is 2 ° C. When the ambient temperature value ≥ the set temperature value (28 °C), the relay opens and closes the output load; when the ambient temperature value ≤ the set temperature value (28 ° C) - the return temperature (2 ° C) and the \"delay\" is set After the start time, the relay pulls up to start the output load; (if the delay function is not needed, the delay start (code PU) can be set to 0).\u003c\/span\u003e\u003c\/p\u003e\n\u003cp\u003e\u003cspan style=\"font-family: times new roman, times; font-size: 18px;\"\u003e\u003cstrong\u003e\u003cb\u003eCooling mode:\u003c\/b\u003e\u003c\/strong\u003e\u003c\/span\u003e\u003c\/p\u003e\n\u003cp\u003e\u003cspan style=\"font-family: times new roman, times; font-size: 18px;\"\u003eWhen the temperature control method (code HC) is set to C, for example, the set control temperature value is 28 ° C, and the temperature difference is 2 ° C.\u003c\/span\u003e\u003c\/p\u003e\n\u003cp\u003e \u003c\/p\u003e\n\u003cp\u003e\u003cspan style=\"font-family: times new roman, times;\"\u003eWhen the ambient temperature value ≤ set temperature value (28 °C), the relay opens and closes the output load; when the ambient temperature value ≥ set temperature value (28 °C) + hysteresis temperature (2 ° C) and the \"delay start\" is set After the time, the relay is sucked and the output load is started: (It is recommended that the delay start time is the default time to protect the compressor. If no delay is required, the code (PU) is set to 0)\u003c\/span\u003e\u003c\/p\u003e\n\u003cp\u003e \u003c\/p\u003e\n\u003cp\u003e\u003cspan style=\"font-family: times new roman, times;\"\u003e\u003cstrong\u003e\u003cb\u003eNote:\u003c\/b\u003e\u003c\/strong\u003e LA minimum lower limit and HA upper limit non-control temperature parameter adjustment, if changed, reduce control temperature range\u003c\/span\u003e\u003c\/p\u003e\n\u003cp\u003e\u003cspan style=\"font-family: times new roman, times;\"\u003e\u003cstrong\u003ePower button instructions:\u003c\/strong\u003e\u003c\/span\u003e\u003c\/p\u003e\n\u003cp\u003e\u003cspan style=\"font-family: times new roman, times;\"\u003e1 long press the power button for 5 seconds to shut down, short press the power button to boot\u003c\/span\u003e\u003c\/p\u003e\n\u003cp\u003e\u003cspan style=\"font-family: times new roman, times;\"\u003e2 In the temperature setting interface and mode setting interface, short press the power button to quickly save the settings and exit the setting interface.\u003c\/span\u003e\u003c\/p\u003e\n\u003cp\u003e\u003cspan style=\"font-family: times new roman, times;\"\u003eRestore the factory default value: After pressing the “▲” button for 5 seconds, all the set parameters of the user will be restored to the factory default values.\u003c\/span\u003e\u003c\/p\u003e\n\u003cp\u003e\u003cspan style=\"font-family: times new roman, times;\"\u003eParameter lock: Press the ▼ key for 3 seconds to flash “0FF” to indicate that the user has set the parameter to be locked. In this way, the same operation flashes “ON” to indicate that the user has set the parameter lock to be released. (The user can only view and cannot modify after the parameter is locked, but the control degree adjustment is still valid)\u003c\/span\u003e\u003c\/p\u003e\n\u003cp\u003e\u003cspan style=\"font-family: times new roman, times;\"\u003e\u003cstrong\u003eFault prompt:\u003c\/strong\u003e\u003c\/span\u003e\u003c\/p\u003e\n\u003cp\u003e\u003cspan style=\"font-family: times new roman, times;\"\u003eWhen the sensor is short-circuited or when the ambient temperature is detected above the upper temperature limit of 120 degrees, the flashing indicates that the HHH well closes the output load. When the sensor is open or detects that the ambient temperature is below the lower temperature limit of -40 degrees, the LLL is flashed and the output load is turned off.\u003c\/span\u003e\u003c\/p\u003e\n\u003cp\u003e\u003cspan style=\"font-family: times new roman, times;\"\u003e\u003cstrong\u003e\u003cb\u003ePrecautions:\u003c\/b\u003e\u003c\/strong\u003e\u003c\/span\u003e\u003c\/p\u003e\n\u003col\u003e\n\u003cli\u003e\u003cspan style=\"font-family: times new roman, times;\"\u003eIn order to prevent high-frequency interference, the sensing time line during installation cannot be bundled with the power supply line and the negative-voltage equipment line, and separate wiring is required.\u003c\/span\u003e\u003c\/li\u003e\n\u003cli\u003e\u003cspan style=\"font-family: times new roman, times;\"\u003eThe power supply and the host shall indicate the voltage--cause, the deviation of the rated voltage value is not more than 1% of 0%. The sensor, power line and load output interface are strictly distinguished during installation.\u003c\/span\u003e\u003c\/li\u003e\n\u003cli\u003e\u003cspan style=\"font-family: times new roman, times;\"\u003eThe thermostat main unit cannot be installed in places where dripping water, old people, and children are within easy reach.\u003c\/span\u003e\u003c\/li\u003e\n\u003cli\u003e\u003cspan style=\"font-family: times new roman, times;\"\u003eAfter wiring, check whether the line is correct and then energize, so as to avoid accidentally burning the temperature controller and load equipment. After installation, apply the protective cover to cover. Installation wiring diagram\u003c\/span\u003e\u003c\/li\u003e\n\u003c\/ol\u003e\n\u003cp\u003e\u003cspan style=\"font-family: times new roman, times;\"\u003e When installing the wiring, please make sure that the working voltage of the load itself and the voltage marked by the thermostat are the same voltage value, otherwise you cannot connect according to this figure.\u003c\/span\u003e\u003c\/p\u003e\n\u003cp\u003e\u003cspan style=\"font-size: 18px;\"\u003e\u003cspan style=\"font-size: 18px; font-family: times new roman, times;\"\u003e\u003cstrong\u003ePackage Included:\u003c\/strong\u003e\u003cstrong\u003e\u003c\/strong\u003e\u003c\/span\u003e\u003c\/span\u003e\u003c\/p\u003e\n\u003cp\u003e\u003cspan style=\"font-size: 18px;\"\u003e\u003cspan style=\"font-size: 18px; font-family: times new roman, times;\"\u003e1PCS*Digital MH1210W Temperature Humidity Hygrometer Thermostat Controller 10A Sensor\u003c\/span\u003e\u003c\/span\u003e\u003c\/p\u003e\n\u003cp\u003e \u003c\/p\u003e","published_at":"2019-03-04T16:12:08+08:00","created_at":"2019-03-04T16:28:29+08:00","vendor":"diymore","type":"Thermostat","tags":["Display","Relay","STC 1000","STC1000"],"price":1099,"price_min":1099,"price_max":1099,"available":true,"price_varies":false,"compare_at_price":null,"compare_at_price_min":0,"compare_at_price_max":0,"compare_at_price_varies":false,"variants":[{"id":22773885304890,"title":"Default Title","option1":"Default Title","option2":null,"option3":null,"sku":"X13067","requires_shipping":true,"taxable":false,"featured_image":null,"available":true,"name":"Digital MH1210W Temperature Humidity Hygrometer Thermostat Controller 10A Sensor","public_title":null,"options":["Default Title"],"price":1099,"weight":94,"compare_at_price":null,"inventory_management":null,"barcode":"","requires_selling_plan":false,"selling_plan_allocations":[]}],"images":["\/\/www.diymore.cc\/cdn\/shop\/products\/X13067_1_860.jpg?v=1588659475","\/\/www.diymore.cc\/cdn\/shop\/products\/X13067_12_794.jpg?v=1588659475","\/\/www.diymore.cc\/cdn\/shop\/products\/X13067_2_377.jpg?v=1588659475","\/\/www.diymore.cc\/cdn\/shop\/products\/X13067_3_847.jpg?v=1588659475","\/\/www.diymore.cc\/cdn\/shop\/products\/X13067_4_335.jpg?v=1588659475","\/\/www.diymore.cc\/cdn\/shop\/products\/X13067_5_155.jpg?v=1588659475","\/\/www.diymore.cc\/cdn\/shop\/products\/X13067_6_121.jpg?v=1588659475","\/\/www.diymore.cc\/cdn\/shop\/products\/X13067_7_553.jpg?v=1588659475","\/\/www.diymore.cc\/cdn\/shop\/products\/X13067_8_484.jpg?v=1588659475"],"featured_image":"\/\/www.diymore.cc\/cdn\/shop\/products\/X13067_1_860.jpg?v=1588659475","options":["Title"],"media":[{"alt":"Digital Mh1210W Temperature Humidity Hygrometer Thermostat Controller 10A Sensor Dc 9-72V","id":6678959947847,"position":1,"preview_image":{"aspect_ratio":1.0,"height":1000,"width":1000,"src":"\/\/www.diymore.cc\/cdn\/shop\/products\/X13067_1_860.jpg?v=1588659475"},"aspect_ratio":1.0,"height":1000,"media_type":"image","src":"\/\/www.diymore.cc\/cdn\/shop\/products\/X13067_1_860.jpg?v=1588659475","width":1000},{"alt":"Digital Mh1210W Temperature Humidity Hygrometer Thermostat Controller 10A Sensor Dc 9-72V","id":6678960078919,"position":2,"preview_image":{"aspect_ratio":1.0,"height":1000,"width":1000,"src":"\/\/www.diymore.cc\/cdn\/shop\/products\/X13067_12_794.jpg?v=1588659475"},"aspect_ratio":1.0,"height":1000,"media_type":"image","src":"\/\/www.diymore.cc\/cdn\/shop\/products\/X13067_12_794.jpg?v=1588659475","width":1000},{"alt":"Digital Mh1210W Temperature Humidity Hygrometer Thermostat Controller 10A Sensor Dc 9-72V","id":6678960111687,"position":3,"preview_image":{"aspect_ratio":1.0,"height":1000,"width":1000,"src":"\/\/www.diymore.cc\/cdn\/shop\/products\/X13067_2_377.jpg?v=1588659475"},"aspect_ratio":1.0,"height":1000,"media_type":"image","src":"\/\/www.diymore.cc\/cdn\/shop\/products\/X13067_2_377.jpg?v=1588659475","width":1000},{"alt":"Digital Mh1210W Temperature Humidity Hygrometer Thermostat Controller 10A Sensor Dc 9-72V","id":6678960144455,"position":4,"preview_image":{"aspect_ratio":1.0,"height":1000,"width":1000,"src":"\/\/www.diymore.cc\/cdn\/shop\/products\/X13067_3_847.jpg?v=1588659475"},"aspect_ratio":1.0,"height":1000,"media_type":"image","src":"\/\/www.diymore.cc\/cdn\/shop\/products\/X13067_3_847.jpg?v=1588659475","width":1000},{"alt":"Digital Mh1210W Temperature Humidity Hygrometer Thermostat Controller 10A Sensor Dc 9-72V","id":6678960177223,"position":5,"preview_image":{"aspect_ratio":1.0,"height":1000,"width":1000,"src":"\/\/www.diymore.cc\/cdn\/shop\/products\/X13067_4_335.jpg?v=1588659475"},"aspect_ratio":1.0,"height":1000,"media_type":"image","src":"\/\/www.diymore.cc\/cdn\/shop\/products\/X13067_4_335.jpg?v=1588659475","width":1000},{"alt":"Digital Mh1210W Temperature Humidity Hygrometer Thermostat Controller 10A Sensor Dc 9-72V","id":6678960341063,"position":6,"preview_image":{"aspect_ratio":1.0,"height":1000,"width":1000,"src":"\/\/www.diymore.cc\/cdn\/shop\/products\/X13067_5_155.jpg?v=1588659475"},"aspect_ratio":1.0,"height":1000,"media_type":"image","src":"\/\/www.diymore.cc\/cdn\/shop\/products\/X13067_5_155.jpg?v=1588659475","width":1000},{"alt":"Digital Mh1210W Temperature Humidity Hygrometer Thermostat Controller 10A Sensor Dc 9-72V","id":6678960373831,"position":7,"preview_image":{"aspect_ratio":1.0,"height":1000,"width":1000,"src":"\/\/www.diymore.cc\/cdn\/shop\/products\/X13067_6_121.jpg?v=1588659475"},"aspect_ratio":1.0,"height":1000,"media_type":"image","src":"\/\/www.diymore.cc\/cdn\/shop\/products\/X13067_6_121.jpg?v=1588659475","width":1000},{"alt":"Digital Mh1210W Temperature Humidity Hygrometer Thermostat Controller 10A Sensor Dc 9-72V","id":6678960406599,"position":8,"preview_image":{"aspect_ratio":1.0,"height":1000,"width":1000,"src":"\/\/www.diymore.cc\/cdn\/shop\/products\/X13067_7_553.jpg?v=1588659475"},"aspect_ratio":1.0,"height":1000,"media_type":"image","src":"\/\/www.diymore.cc\/cdn\/shop\/products\/X13067_7_553.jpg?v=1588659475","width":1000},{"alt":"Digital Mh1210W Temperature Humidity Hygrometer Thermostat Controller 10A Sensor Dc 9-72V","id":6678960504903,"position":9,"preview_image":{"aspect_ratio":1.0,"height":1000,"width":1000,"src":"\/\/www.diymore.cc\/cdn\/shop\/products\/X13067_8_484.jpg?v=1588659475"},"aspect_ratio":1.0,"height":1000,"media_type":"image","src":"\/\/www.diymore.cc\/cdn\/shop\/products\/X13067_8_484.jpg?v=1588659475","width":1000}],"requires_selling_plan":false,"selling_plan_groups":[],"content":"\u003cp\u003e\u003cspan style=\"font-size: 18px; font-family: times new roman, times;\"\u003e\u003cstrong\u003e\u003cb\u003eTechnical Parameters:\u003c\/b\u003e\u003c\/strong\u003e\u003c\/span\u003e\u003c\/p\u003e\n\u003col\u003e\n\u003cli\u003e\u003cspan style=\"font-family: times new roman, times; font-size: 18px;\"\u003e The working voltage is referenced on the product casing;\u003c\/span\u003e\u003c\/li\u003e\n\u003cli\u003e\u003cspan style=\"font-family: times new roman, times; font-size: 18px;\"\u003e -40°C ~120°C: Measurement error ± 0. 5 ° C\u003c\/span\u003e\u003c\/li\u003e\n\u003cli\u003e\u003cspan style=\"font-family: times new roman, times; font-size: 18px;\"\u003e -40°C~120°C: Temperature control accuracy: 1C display accuracy 0. 1°C\u003c\/span\u003e\u003c\/li\u003e\n\u003cli\u003e\u003cspan style=\"font-family: times new roman, times; font-size: 18px;\"\u003e NTC25°C=10K B3435\u003cspan style=\"font-size: 18px;\"\u003e± \u003c\/span\u003e 1% (1 meter long, regardless of positive or negative)\u003c\/span\u003e\u003c\/li\u003e\n\u003cli\u003e\u003cspan style=\"font-family: times new roman, times; font-size: 18px;\"\u003e Power supply voltage: DC version is DC12~72V\u003cbr\u003e\u003c\/span\u003e\u003c\/li\u003e\n\u003cli\u003e\u003cspan style=\"font-family: times new roman, times; font-size: 18px;\"\u003e Working environment: Temperature: -20 ° C ~ 70 ° C, humidity: 90% RH no condensation\u003c\/span\u003e\u003c\/li\u003e\n\u003cli\u003e\u003cspan style=\"font-family: times new roman, times; font-size: 18px;\"\u003e Product size: 75*85*35 (width, depth, height) mm\u003c\/span\u003e\u003c\/li\u003e\n\u003c\/ol\u003e\n\u003cp\u003e\u003cspan style=\"font-family: times new roman, times; font-size: 18px;\"\u003e\u003cstrong\u003e\u003cb\u003eInstructions:\u003c\/b\u003e\u003c\/strong\u003e\u003c\/span\u003e\u003c\/p\u003e\n\u003cp\u003e\u003cspan style=\"font-family: times new roman, times; font-size: 18px;\"\u003ePress the S key for 3 seconds to enter the program menu code mode, which displays the code HC. Press the △ or ▽ key to cycle through the HC-CP-LA-PU-CA parameters. To enter a code, press the S key, press the △ or ▽ key to change the desired value and press SET to save and exit. . Control temperature setting: Short press S key (not more than 2 seconds) to display the factory default control temperature. Press △ or ▽ key to change the value well to save automatically. (Press and hold the △ or ▽ key for 2 seconds to quickly adjust the value.)\u003c\/span\u003e\u003c\/p\u003e\n\u003cp\u003e\u003cspan style=\"font-size: 18px; font-family: times new roman, times;\"\u003e\u003cstrong\u003eHeating control:\u003c\/strong\u003e\u003c\/span\u003e\u003c\/p\u003e\n\u003cp\u003e\u003cspan style=\"font-family: times new roman, times; font-size: 18px;\"\u003eWhen the temperature control method (code HC) is set to H, for example, the set control temperature value is 28 ° C, and the temperature difference is 2 ° C. When the ambient temperature value ≥ the set temperature value (28 °C), the relay opens and closes the output load; when the ambient temperature value ≤ the set temperature value (28 ° C) - the return temperature (2 ° C) and the \"delay\" is set After the start time, the relay pulls up to start the output load; (if the delay function is not needed, the delay start (code PU) can be set to 0).\u003c\/span\u003e\u003c\/p\u003e\n\u003cp\u003e\u003cspan style=\"font-family: times new roman, times; font-size: 18px;\"\u003e\u003cstrong\u003e\u003cb\u003eCooling mode:\u003c\/b\u003e\u003c\/strong\u003e\u003c\/span\u003e\u003c\/p\u003e\n\u003cp\u003e\u003cspan style=\"font-family: times new roman, times; font-size: 18px;\"\u003eWhen the temperature control method (code HC) is set to C, for example, the set control temperature value is 28 ° C, and the temperature difference is 2 ° C.\u003c\/span\u003e\u003c\/p\u003e\n\u003cp\u003e \u003c\/p\u003e\n\u003cp\u003e\u003cspan style=\"font-family: times new roman, times;\"\u003eWhen the ambient temperature value ≤ set temperature value (28 °C), the relay opens and closes the output load; when the ambient temperature value ≥ set temperature value (28 °C) + hysteresis temperature (2 ° C) and the \"delay start\" is set After the time, the relay is sucked and the output load is started: (It is recommended that the delay start time is the default time to protect the compressor. If no delay is required, the code (PU) is set to 0)\u003c\/span\u003e\u003c\/p\u003e\n\u003cp\u003e \u003c\/p\u003e\n\u003cp\u003e\u003cspan style=\"font-family: times new roman, times;\"\u003e\u003cstrong\u003e\u003cb\u003eNote:\u003c\/b\u003e\u003c\/strong\u003e LA minimum lower limit and HA upper limit non-control temperature parameter adjustment, if changed, reduce control temperature range\u003c\/span\u003e\u003c\/p\u003e\n\u003cp\u003e\u003cspan style=\"font-family: times new roman, times;\"\u003e\u003cstrong\u003ePower button instructions:\u003c\/strong\u003e\u003c\/span\u003e\u003c\/p\u003e\n\u003cp\u003e\u003cspan style=\"font-family: times new roman, times;\"\u003e1 long press the power button for 5 seconds to shut down, short press the power button to boot\u003c\/span\u003e\u003c\/p\u003e\n\u003cp\u003e\u003cspan style=\"font-family: times new roman, times;\"\u003e2 In the temperature setting interface and mode setting interface, short press the power button to quickly save the settings and exit the setting interface.\u003c\/span\u003e\u003c\/p\u003e\n\u003cp\u003e\u003cspan style=\"font-family: times new roman, times;\"\u003eRestore the factory default value: After pressing the “▲” button for 5 seconds, all the set parameters of the user will be restored to the factory default values.\u003c\/span\u003e\u003c\/p\u003e\n\u003cp\u003e\u003cspan style=\"font-family: times new roman, times;\"\u003eParameter lock: Press the ▼ key for 3 seconds to flash “0FF” to indicate that the user has set the parameter to be locked. In this way, the same operation flashes “ON” to indicate that the user has set the parameter lock to be released. (The user can only view and cannot modify after the parameter is locked, but the control degree adjustment is still valid)\u003c\/span\u003e\u003c\/p\u003e\n\u003cp\u003e\u003cspan style=\"font-family: times new roman, times;\"\u003e\u003cstrong\u003eFault prompt:\u003c\/strong\u003e\u003c\/span\u003e\u003c\/p\u003e\n\u003cp\u003e\u003cspan style=\"font-family: times new roman, times;\"\u003eWhen the sensor is short-circuited or when the ambient temperature is detected above the upper temperature limit of 120 degrees, the flashing indicates that the HHH well closes the output load. When the sensor is open or detects that the ambient temperature is below the lower temperature limit of -40 degrees, the LLL is flashed and the output load is turned off.\u003c\/span\u003e\u003c\/p\u003e\n\u003cp\u003e\u003cspan style=\"font-family: times new roman, times;\"\u003e\u003cstrong\u003e\u003cb\u003ePrecautions:\u003c\/b\u003e\u003c\/strong\u003e\u003c\/span\u003e\u003c\/p\u003e\n\u003col\u003e\n\u003cli\u003e\u003cspan style=\"font-family: times new roman, times;\"\u003eIn order to prevent high-frequency interference, the sensing time line during installation cannot be bundled with the power supply line and the negative-voltage equipment line, and separate wiring is required.\u003c\/span\u003e\u003c\/li\u003e\n\u003cli\u003e\u003cspan style=\"font-family: times new roman, times;\"\u003eThe power supply and the host shall indicate the voltage--cause, the deviation of the rated voltage value is not more than 1% of 0%. The sensor, power line and load output interface are strictly distinguished during installation.\u003c\/span\u003e\u003c\/li\u003e\n\u003cli\u003e\u003cspan style=\"font-family: times new roman, times;\"\u003eThe thermostat main unit cannot be installed in places where dripping water, old people, and children are within easy reach.\u003c\/span\u003e\u003c\/li\u003e\n\u003cli\u003e\u003cspan style=\"font-family: times new roman, times;\"\u003eAfter wiring, check whether the line is correct and then energize, so as to avoid accidentally burning the temperature controller and load equipment. After installation, apply the protective cover to cover. Installation wiring diagram\u003c\/span\u003e\u003c\/li\u003e\n\u003c\/ol\u003e\n\u003cp\u003e\u003cspan style=\"font-family: times new roman, times;\"\u003e When installing the wiring, please make sure that the working voltage of the load itself and the voltage marked by the thermostat are the same voltage value, otherwise you cannot connect according to this figure.\u003c\/span\u003e\u003c\/p\u003e\n\u003cp\u003e\u003cspan style=\"font-size: 18px;\"\u003e\u003cspan style=\"font-size: 18px; font-family: times new roman, times;\"\u003e\u003cstrong\u003ePackage Included:\u003c\/strong\u003e\u003cstrong\u003e\u003c\/strong\u003e\u003c\/span\u003e\u003c\/span\u003e\u003c\/p\u003e\n\u003cp\u003e\u003cspan style=\"font-size: 18px;\"\u003e\u003cspan style=\"font-size: 18px; font-family: times new roman, times;\"\u003e1PCS*Digital MH1210W Temperature Humidity Hygrometer Thermostat Controller 10A Sensor\u003c\/span\u003e\u003c\/span\u003e\u003c\/p\u003e\n\u003cp\u003e \u003c\/p\u003e"}
 -
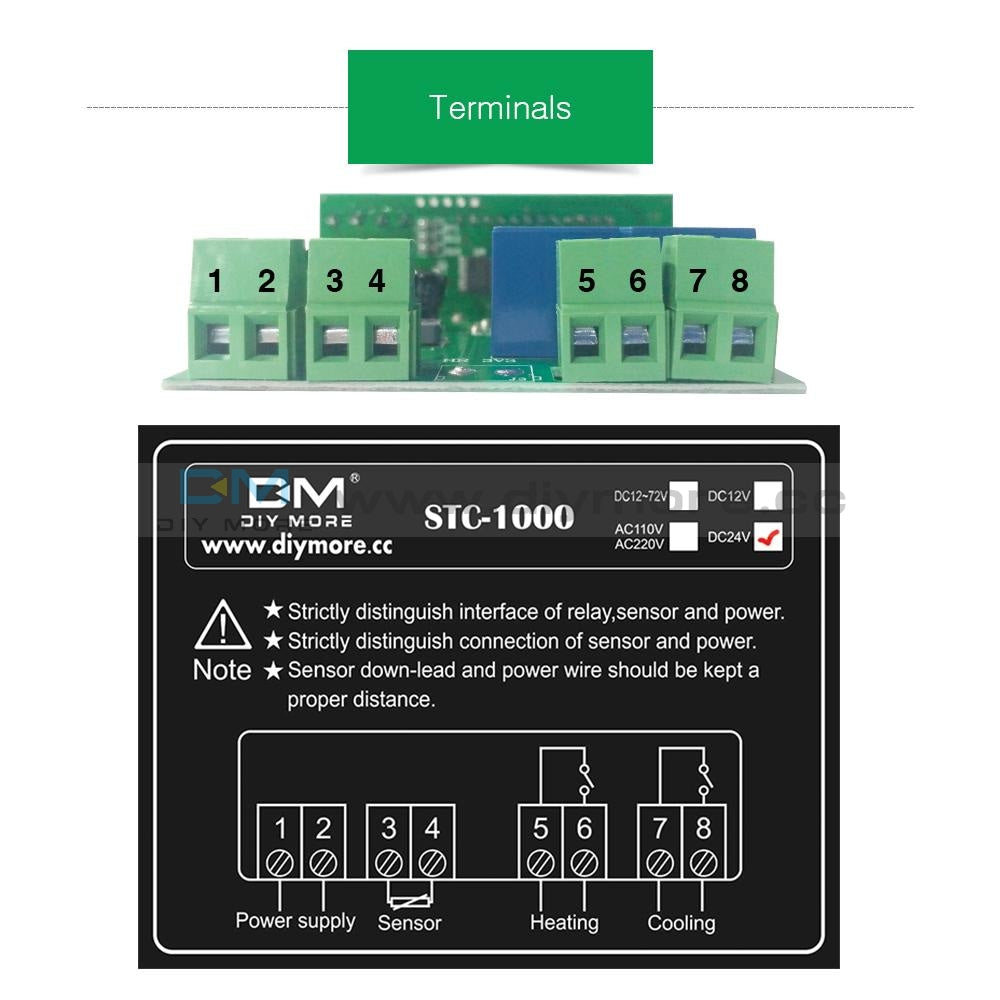
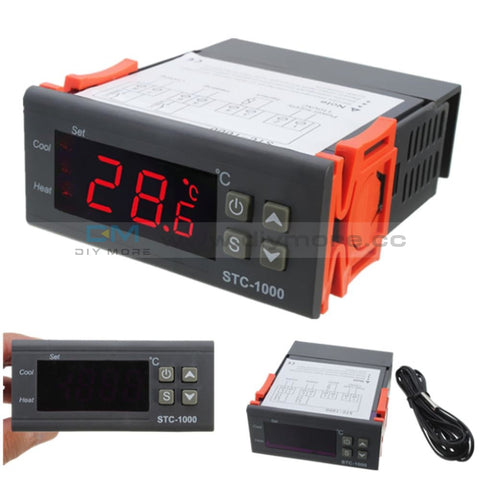 Translation missing: en.products.product.regular_price $6.99{"id":2326224502842,"title":"Digital MH1210W Temperature Humidity Hygrometer Thermostat Controller 10A Sensor","handle":"digital-mh1210w-temperature-humidity-hygrometer-thermostat-controller-10a-sensor-dc-9-72v","description":"\u003cp\u003e\u003cspan style=\"font-size: 18px; font-family: times new roman, times;\"\u003e\u003cstrong\u003e\u003cb\u003eTechnical Parameters:\u003c\/b\u003e\u003c\/strong\u003e\u003c\/span\u003e\u003c\/p\u003e\n\u003col\u003e\n\u003cli\u003e\u003cspan style=\"font-family: times new roman, times; font-size: 18px;\"\u003e The working voltage is referenced on the product casing;\u003c\/span\u003e\u003c\/li\u003e\n\u003cli\u003e\u003cspan style=\"font-family: times new roman, times; font-size: 18px;\"\u003e -40°C ~120°C: Measurement error ± 0. 5 ° C\u003c\/span\u003e\u003c\/li\u003e\n\u003cli\u003e\u003cspan style=\"font-family: times new roman, times; font-size: 18px;\"\u003e -40°C~120°C: Temperature control accuracy: 1C display accuracy 0. 1°C\u003c\/span\u003e\u003c\/li\u003e\n\u003cli\u003e\u003cspan style=\"font-family: times new roman, times; font-size: 18px;\"\u003e NTC25°C=10K B3435\u003cspan style=\"font-size: 18px;\"\u003e± \u003c\/span\u003e 1% (1 meter long, regardless of positive or negative)\u003c\/span\u003e\u003c\/li\u003e\n\u003cli\u003e\u003cspan style=\"font-family: times new roman, times; font-size: 18px;\"\u003e Power supply voltage: DC version is DC12~72V\u003cbr\u003e\u003c\/span\u003e\u003c\/li\u003e\n\u003cli\u003e\u003cspan style=\"font-family: times new roman, times; font-size: 18px;\"\u003e Working environment: Temperature: -20 ° C ~ 70 ° C, humidity: 90% RH no condensation\u003c\/span\u003e\u003c\/li\u003e\n\u003cli\u003e\u003cspan style=\"font-family: times new roman, times; font-size: 18px;\"\u003e Product size: 75*85*35 (width, depth, height) mm\u003c\/span\u003e\u003c\/li\u003e\n\u003c\/ol\u003e\n\u003cp\u003e\u003cspan style=\"font-family: times new roman, times; font-size: 18px;\"\u003e\u003cstrong\u003e\u003cb\u003eInstructions:\u003c\/b\u003e\u003c\/strong\u003e\u003c\/span\u003e\u003c\/p\u003e\n\u003cp\u003e\u003cspan style=\"font-family: times new roman, times; font-size: 18px;\"\u003ePress the S key for 3 seconds to enter the program menu code mode, which displays the code HC. Press the △ or ▽ key to cycle through the HC-CP-LA-PU-CA parameters. To enter a code, press the S key, press the △ or ▽ key to change the desired value and press SET to save and exit. . Control temperature setting: Short press S key (not more than 2 seconds) to display the factory default control temperature. Press △ or ▽ key to change the value well to save automatically. (Press and hold the △ or ▽ key for 2 seconds to quickly adjust the value.)\u003c\/span\u003e\u003c\/p\u003e\n\u003cp\u003e\u003cspan style=\"font-size: 18px; font-family: times new roman, times;\"\u003e\u003cstrong\u003eHeating control:\u003c\/strong\u003e\u003c\/span\u003e\u003c\/p\u003e\n\u003cp\u003e\u003cspan style=\"font-family: times new roman, times; font-size: 18px;\"\u003eWhen the temperature control method (code HC) is set to H, for example, the set control temperature value is 28 ° C, and the temperature difference is 2 ° C. When the ambient temperature value ≥ the set temperature value (28 °C), the relay opens and closes the output load; when the ambient temperature value ≤ the set temperature value (28 ° C) - the return temperature (2 ° C) and the \"delay\" is set After the start time, the relay pulls up to start the output load; (if the delay function is not needed, the delay start (code PU) can be set to 0).\u003c\/span\u003e\u003c\/p\u003e\n\u003cp\u003e\u003cspan style=\"font-family: times new roman, times; font-size: 18px;\"\u003e\u003cstrong\u003e\u003cb\u003eCooling mode:\u003c\/b\u003e\u003c\/strong\u003e\u003c\/span\u003e\u003c\/p\u003e\n\u003cp\u003e\u003cspan style=\"font-family: times new roman, times; font-size: 18px;\"\u003eWhen the temperature control method (code HC) is set to C, for example, the set control temperature value is 28 ° C, and the temperature difference is 2 ° C.\u003c\/span\u003e\u003c\/p\u003e\n\u003cp\u003e \u003c\/p\u003e\n\u003cp\u003e\u003cspan style=\"font-family: times new roman, times;\"\u003eWhen the ambient temperature value ≤ set temperature value (28 °C), the relay opens and closes the output load; when the ambient temperature value ≥ set temperature value (28 °C) + hysteresis temperature (2 ° C) and the \"delay start\" is set After the time, the relay is sucked and the output load is started: (It is recommended that the delay start time is the default time to protect the compressor. If no delay is required, the code (PU) is set to 0)\u003c\/span\u003e\u003c\/p\u003e\n\u003cp\u003e \u003c\/p\u003e\n\u003cp\u003e\u003cspan style=\"font-family: times new roman, times;\"\u003e\u003cstrong\u003e\u003cb\u003eNote:\u003c\/b\u003e\u003c\/strong\u003e LA minimum lower limit and HA upper limit non-control temperature parameter adjustment, if changed, reduce control temperature range\u003c\/span\u003e\u003c\/p\u003e\n\u003cp\u003e\u003cspan style=\"font-family: times new roman, times;\"\u003e\u003cstrong\u003ePower button instructions:\u003c\/strong\u003e\u003c\/span\u003e\u003c\/p\u003e\n\u003cp\u003e\u003cspan style=\"font-family: times new roman, times;\"\u003e1 long press the power button for 5 seconds to shut down, short press the power button to boot\u003c\/span\u003e\u003c\/p\u003e\n\u003cp\u003e\u003cspan style=\"font-family: times new roman, times;\"\u003e2 In the temperature setting interface and mode setting interface, short press the power button to quickly save the settings and exit the setting interface.\u003c\/span\u003e\u003c\/p\u003e\n\u003cp\u003e\u003cspan style=\"font-family: times new roman, times;\"\u003eRestore the factory default value: After pressing the “▲” button for 5 seconds, all the set parameters of the user will be restored to the factory default values.\u003c\/span\u003e\u003c\/p\u003e\n\u003cp\u003e\u003cspan style=\"font-family: times new roman, times;\"\u003eParameter lock: Press the ▼ key for 3 seconds to flash “0FF” to indicate that the user has set the parameter to be locked. In this way, the same operation flashes “ON” to indicate that the user has set the parameter lock to be released. (The user can only view and cannot modify after the parameter is locked, but the control degree adjustment is still valid)\u003c\/span\u003e\u003c\/p\u003e\n\u003cp\u003e\u003cspan style=\"font-family: times new roman, times;\"\u003e\u003cstrong\u003eFault prompt:\u003c\/strong\u003e\u003c\/span\u003e\u003c\/p\u003e\n\u003cp\u003e\u003cspan style=\"font-family: times new roman, times;\"\u003eWhen the sensor is short-circuited or when the ambient temperature is detected above the upper temperature limit of 120 degrees, the flashing indicates that the HHH well closes the output load. When the sensor is open or detects that the ambient temperature is below the lower temperature limit of -40 degrees, the LLL is flashed and the output load is turned off.\u003c\/span\u003e\u003c\/p\u003e\n\u003cp\u003e\u003cspan style=\"font-family: times new roman, times;\"\u003e\u003cstrong\u003e\u003cb\u003ePrecautions:\u003c\/b\u003e\u003c\/strong\u003e\u003c\/span\u003e\u003c\/p\u003e\n\u003col\u003e\n\u003cli\u003e\u003cspan style=\"font-family: times new roman, times;\"\u003eIn order to prevent high-frequency interference, the sensing time line during installation cannot be bundled with the power supply line and the negative-voltage equipment line, and separate wiring is required.\u003c\/span\u003e\u003c\/li\u003e\n\u003cli\u003e\u003cspan style=\"font-family: times new roman, times;\"\u003eThe power supply and the host shall indicate the voltage--cause, the deviation of the rated voltage value is not more than 1% of 0%. The sensor, power line and load output interface are strictly distinguished during installation.\u003c\/span\u003e\u003c\/li\u003e\n\u003cli\u003e\u003cspan style=\"font-family: times new roman, times;\"\u003eThe thermostat main unit cannot be installed in places where dripping water, old people, and children are within easy reach.\u003c\/span\u003e\u003c\/li\u003e\n\u003cli\u003e\u003cspan style=\"font-family: times new roman, times;\"\u003eAfter wiring, check whether the line is correct and then energize, so as to avoid accidentally burning the temperature controller and load equipment. After installation, apply the protective cover to cover. Installation wiring diagram\u003c\/span\u003e\u003c\/li\u003e\n\u003c\/ol\u003e\n\u003cp\u003e\u003cspan style=\"font-family: times new roman, times;\"\u003e When installing the wiring, please make sure that the working voltage of the load itself and the voltage marked by the thermostat are the same voltage value, otherwise you cannot connect according to this figure.\u003c\/span\u003e\u003c\/p\u003e\n\u003cp\u003e\u003cspan style=\"font-size: 18px;\"\u003e\u003cspan style=\"font-size: 18px; font-family: times new roman, times;\"\u003e\u003cstrong\u003ePackage Included:\u003c\/strong\u003e\u003cstrong\u003e\u003c\/strong\u003e\u003c\/span\u003e\u003c\/span\u003e\u003c\/p\u003e\n\u003cp\u003e\u003cspan style=\"font-size: 18px;\"\u003e\u003cspan style=\"font-size: 18px; font-family: times new roman, times;\"\u003e1PCS*Digital MH1210W Temperature Humidity Hygrometer Thermostat Controller 10A Sensor\u003c\/span\u003e\u003c\/span\u003e\u003c\/p\u003e\n\u003cp\u003e \u003c\/p\u003e","published_at":"2019-03-04T16:12:08+08:00","created_at":"2019-03-04T16:28:29+08:00","vendor":"diymore","type":"Thermostat","tags":["Display","Relay","STC 1000","STC1000"],"price":1099,"price_min":1099,"price_max":1099,"available":true,"price_varies":false,"compare_at_price":null,"compare_at_price_min":0,"compare_at_price_max":0,"compare_at_price_varies":false,"variants":[{"id":22773885304890,"title":"Default Title","option1":"Default Title","option2":null,"option3":null,"sku":"X13067","requires_shipping":true,"taxable":false,"featured_image":null,"available":true,"name":"Digital MH1210W Temperature Humidity Hygrometer Thermostat Controller 10A Sensor","public_title":null,"options":["Default Title"],"price":1099,"weight":94,"compare_at_price":null,"inventory_management":null,"barcode":"","requires_selling_plan":false,"selling_plan_allocations":[]}],"images":["\/\/www.diymore.cc\/cdn\/shop\/products\/X13067_1_860.jpg?v=1588659475","\/\/www.diymore.cc\/cdn\/shop\/products\/X13067_12_794.jpg?v=1588659475","\/\/www.diymore.cc\/cdn\/shop\/products\/X13067_2_377.jpg?v=1588659475","\/\/www.diymore.cc\/cdn\/shop\/products\/X13067_3_847.jpg?v=1588659475","\/\/www.diymore.cc\/cdn\/shop\/products\/X13067_4_335.jpg?v=1588659475","\/\/www.diymore.cc\/cdn\/shop\/products\/X13067_5_155.jpg?v=1588659475","\/\/www.diymore.cc\/cdn\/shop\/products\/X13067_6_121.jpg?v=1588659475","\/\/www.diymore.cc\/cdn\/shop\/products\/X13067_7_553.jpg?v=1588659475","\/\/www.diymore.cc\/cdn\/shop\/products\/X13067_8_484.jpg?v=1588659475"],"featured_image":"\/\/www.diymore.cc\/cdn\/shop\/products\/X13067_1_860.jpg?v=1588659475","options":["Title"],"media":[{"alt":"Digital Mh1210W Temperature Humidity Hygrometer Thermostat Controller 10A Sensor Dc 9-72V","id":6678959947847,"position":1,"preview_image":{"aspect_ratio":1.0,"height":1000,"width":1000,"src":"\/\/www.diymore.cc\/cdn\/shop\/products\/X13067_1_860.jpg?v=1588659475"},"aspect_ratio":1.0,"height":1000,"media_type":"image","src":"\/\/www.diymore.cc\/cdn\/shop\/products\/X13067_1_860.jpg?v=1588659475","width":1000},{"alt":"Digital Mh1210W Temperature Humidity Hygrometer Thermostat Controller 10A Sensor Dc 9-72V","id":6678960078919,"position":2,"preview_image":{"aspect_ratio":1.0,"height":1000,"width":1000,"src":"\/\/www.diymore.cc\/cdn\/shop\/products\/X13067_12_794.jpg?v=1588659475"},"aspect_ratio":1.0,"height":1000,"media_type":"image","src":"\/\/www.diymore.cc\/cdn\/shop\/products\/X13067_12_794.jpg?v=1588659475","width":1000},{"alt":"Digital Mh1210W Temperature Humidity Hygrometer Thermostat Controller 10A Sensor Dc 9-72V","id":6678960111687,"position":3,"preview_image":{"aspect_ratio":1.0,"height":1000,"width":1000,"src":"\/\/www.diymore.cc\/cdn\/shop\/products\/X13067_2_377.jpg?v=1588659475"},"aspect_ratio":1.0,"height":1000,"media_type":"image","src":"\/\/www.diymore.cc\/cdn\/shop\/products\/X13067_2_377.jpg?v=1588659475","width":1000},{"alt":"Digital Mh1210W Temperature Humidity Hygrometer Thermostat Controller 10A Sensor Dc 9-72V","id":6678960144455,"position":4,"preview_image":{"aspect_ratio":1.0,"height":1000,"width":1000,"src":"\/\/www.diymore.cc\/cdn\/shop\/products\/X13067_3_847.jpg?v=1588659475"},"aspect_ratio":1.0,"height":1000,"media_type":"image","src":"\/\/www.diymore.cc\/cdn\/shop\/products\/X13067_3_847.jpg?v=1588659475","width":1000},{"alt":"Digital Mh1210W Temperature Humidity Hygrometer Thermostat Controller 10A Sensor Dc 9-72V","id":6678960177223,"position":5,"preview_image":{"aspect_ratio":1.0,"height":1000,"width":1000,"src":"\/\/www.diymore.cc\/cdn\/shop\/products\/X13067_4_335.jpg?v=1588659475"},"aspect_ratio":1.0,"height":1000,"media_type":"image","src":"\/\/www.diymore.cc\/cdn\/shop\/products\/X13067_4_335.jpg?v=1588659475","width":1000},{"alt":"Digital Mh1210W Temperature Humidity Hygrometer Thermostat Controller 10A Sensor Dc 9-72V","id":6678960341063,"position":6,"preview_image":{"aspect_ratio":1.0,"height":1000,"width":1000,"src":"\/\/www.diymore.cc\/cdn\/shop\/products\/X13067_5_155.jpg?v=1588659475"},"aspect_ratio":1.0,"height":1000,"media_type":"image","src":"\/\/www.diymore.cc\/cdn\/shop\/products\/X13067_5_155.jpg?v=1588659475","width":1000},{"alt":"Digital Mh1210W Temperature Humidity Hygrometer Thermostat Controller 10A Sensor Dc 9-72V","id":6678960373831,"position":7,"preview_image":{"aspect_ratio":1.0,"height":1000,"width":1000,"src":"\/\/www.diymore.cc\/cdn\/shop\/products\/X13067_6_121.jpg?v=1588659475"},"aspect_ratio":1.0,"height":1000,"media_type":"image","src":"\/\/www.diymore.cc\/cdn\/shop\/products\/X13067_6_121.jpg?v=1588659475","width":1000},{"alt":"Digital Mh1210W Temperature Humidity Hygrometer Thermostat Controller 10A Sensor Dc 9-72V","id":6678960406599,"position":8,"preview_image":{"aspect_ratio":1.0,"height":1000,"width":1000,"src":"\/\/www.diymore.cc\/cdn\/shop\/products\/X13067_7_553.jpg?v=1588659475"},"aspect_ratio":1.0,"height":1000,"media_type":"image","src":"\/\/www.diymore.cc\/cdn\/shop\/products\/X13067_7_553.jpg?v=1588659475","width":1000},{"alt":"Digital Mh1210W Temperature Humidity Hygrometer Thermostat Controller 10A Sensor Dc 9-72V","id":6678960504903,"position":9,"preview_image":{"aspect_ratio":1.0,"height":1000,"width":1000,"src":"\/\/www.diymore.cc\/cdn\/shop\/products\/X13067_8_484.jpg?v=1588659475"},"aspect_ratio":1.0,"height":1000,"media_type":"image","src":"\/\/www.diymore.cc\/cdn\/shop\/products\/X13067_8_484.jpg?v=1588659475","width":1000}],"requires_selling_plan":false,"selling_plan_groups":[],"content":"\u003cp\u003e\u003cspan style=\"font-size: 18px; font-family: times new roman, times;\"\u003e\u003cstrong\u003e\u003cb\u003eTechnical Parameters:\u003c\/b\u003e\u003c\/strong\u003e\u003c\/span\u003e\u003c\/p\u003e\n\u003col\u003e\n\u003cli\u003e\u003cspan style=\"font-family: times new roman, times; font-size: 18px;\"\u003e The working voltage is referenced on the product casing;\u003c\/span\u003e\u003c\/li\u003e\n\u003cli\u003e\u003cspan style=\"font-family: times new roman, times; font-size: 18px;\"\u003e -40°C ~120°C: Measurement error ± 0. 5 ° C\u003c\/span\u003e\u003c\/li\u003e\n\u003cli\u003e\u003cspan style=\"font-family: times new roman, times; font-size: 18px;\"\u003e -40°C~120°C: Temperature control accuracy: 1C display accuracy 0. 1°C\u003c\/span\u003e\u003c\/li\u003e\n\u003cli\u003e\u003cspan style=\"font-family: times new roman, times; font-size: 18px;\"\u003e NTC25°C=10K B3435\u003cspan style=\"font-size: 18px;\"\u003e± \u003c\/span\u003e 1% (1 meter long, regardless of positive or negative)\u003c\/span\u003e\u003c\/li\u003e\n\u003cli\u003e\u003cspan style=\"font-family: times new roman, times; font-size: 18px;\"\u003e Power supply voltage: DC version is DC12~72V\u003cbr\u003e\u003c\/span\u003e\u003c\/li\u003e\n\u003cli\u003e\u003cspan style=\"font-family: times new roman, times; font-size: 18px;\"\u003e Working environment: Temperature: -20 ° C ~ 70 ° C, humidity: 90% RH no condensation\u003c\/span\u003e\u003c\/li\u003e\n\u003cli\u003e\u003cspan style=\"font-family: times new roman, times; font-size: 18px;\"\u003e Product size: 75*85*35 (width, depth, height) mm\u003c\/span\u003e\u003c\/li\u003e\n\u003c\/ol\u003e\n\u003cp\u003e\u003cspan style=\"font-family: times new roman, times; font-size: 18px;\"\u003e\u003cstrong\u003e\u003cb\u003eInstructions:\u003c\/b\u003e\u003c\/strong\u003e\u003c\/span\u003e\u003c\/p\u003e\n\u003cp\u003e\u003cspan style=\"font-family: times new roman, times; font-size: 18px;\"\u003ePress the S key for 3 seconds to enter the program menu code mode, which displays the code HC. Press the △ or ▽ key to cycle through the HC-CP-LA-PU-CA parameters. To enter a code, press the S key, press the △ or ▽ key to change the desired value and press SET to save and exit. . Control temperature setting: Short press S key (not more than 2 seconds) to display the factory default control temperature. Press △ or ▽ key to change the value well to save automatically. (Press and hold the △ or ▽ key for 2 seconds to quickly adjust the value.)\u003c\/span\u003e\u003c\/p\u003e\n\u003cp\u003e\u003cspan style=\"font-size: 18px; font-family: times new roman, times;\"\u003e\u003cstrong\u003eHeating control:\u003c\/strong\u003e\u003c\/span\u003e\u003c\/p\u003e\n\u003cp\u003e\u003cspan style=\"font-family: times new roman, times; font-size: 18px;\"\u003eWhen the temperature control method (code HC) is set to H, for example, the set control temperature value is 28 ° C, and the temperature difference is 2 ° C. When the ambient temperature value ≥ the set temperature value (28 °C), the relay opens and closes the output load; when the ambient temperature value ≤ the set temperature value (28 ° C) - the return temperature (2 ° C) and the \"delay\" is set After the start time, the relay pulls up to start the output load; (if the delay function is not needed, the delay start (code PU) can be set to 0).\u003c\/span\u003e\u003c\/p\u003e\n\u003cp\u003e\u003cspan style=\"font-family: times new roman, times; font-size: 18px;\"\u003e\u003cstrong\u003e\u003cb\u003eCooling mode:\u003c\/b\u003e\u003c\/strong\u003e\u003c\/span\u003e\u003c\/p\u003e\n\u003cp\u003e\u003cspan style=\"font-family: times new roman, times; font-size: 18px;\"\u003eWhen the temperature control method (code HC) is set to C, for example, the set control temperature value is 28 ° C, and the temperature difference is 2 ° C.\u003c\/span\u003e\u003c\/p\u003e\n\u003cp\u003e \u003c\/p\u003e\n\u003cp\u003e\u003cspan style=\"font-family: times new roman, times;\"\u003eWhen the ambient temperature value ≤ set temperature value (28 °C), the relay opens and closes the output load; when the ambient temperature value ≥ set temperature value (28 °C) + hysteresis temperature (2 ° C) and the \"delay start\" is set After the time, the relay is sucked and the output load is started: (It is recommended that the delay start time is the default time to protect the compressor. If no delay is required, the code (PU) is set to 0)\u003c\/span\u003e\u003c\/p\u003e\n\u003cp\u003e \u003c\/p\u003e\n\u003cp\u003e\u003cspan style=\"font-family: times new roman, times;\"\u003e\u003cstrong\u003e\u003cb\u003eNote:\u003c\/b\u003e\u003c\/strong\u003e LA minimum lower limit and HA upper limit non-control temperature parameter adjustment, if changed, reduce control temperature range\u003c\/span\u003e\u003c\/p\u003e\n\u003cp\u003e\u003cspan style=\"font-family: times new roman, times;\"\u003e\u003cstrong\u003ePower button instructions:\u003c\/strong\u003e\u003c\/span\u003e\u003c\/p\u003e\n\u003cp\u003e\u003cspan style=\"font-family: times new roman, times;\"\u003e1 long press the power button for 5 seconds to shut down, short press the power button to boot\u003c\/span\u003e\u003c\/p\u003e\n\u003cp\u003e\u003cspan style=\"font-family: times new roman, times;\"\u003e2 In the temperature setting interface and mode setting interface, short press the power button to quickly save the settings and exit the setting interface.\u003c\/span\u003e\u003c\/p\u003e\n\u003cp\u003e\u003cspan style=\"font-family: times new roman, times;\"\u003eRestore the factory default value: After pressing the “▲” button for 5 seconds, all the set parameters of the user will be restored to the factory default values.\u003c\/span\u003e\u003c\/p\u003e\n\u003cp\u003e\u003cspan style=\"font-family: times new roman, times;\"\u003eParameter lock: Press the ▼ key for 3 seconds to flash “0FF” to indicate that the user has set the parameter to be locked. In this way, the same operation flashes “ON” to indicate that the user has set the parameter lock to be released. (The user can only view and cannot modify after the parameter is locked, but the control degree adjustment is still valid)\u003c\/span\u003e\u003c\/p\u003e\n\u003cp\u003e\u003cspan style=\"font-family: times new roman, times;\"\u003e\u003cstrong\u003eFault prompt:\u003c\/strong\u003e\u003c\/span\u003e\u003c\/p\u003e\n\u003cp\u003e\u003cspan style=\"font-family: times new roman, times;\"\u003eWhen the sensor is short-circuited or when the ambient temperature is detected above the upper temperature limit of 120 degrees, the flashing indicates that the HHH well closes the output load. When the sensor is open or detects that the ambient temperature is below the lower temperature limit of -40 degrees, the LLL is flashed and the output load is turned off.\u003c\/span\u003e\u003c\/p\u003e\n\u003cp\u003e\u003cspan style=\"font-family: times new roman, times;\"\u003e\u003cstrong\u003e\u003cb\u003ePrecautions:\u003c\/b\u003e\u003c\/strong\u003e\u003c\/span\u003e\u003c\/p\u003e\n\u003col\u003e\n\u003cli\u003e\u003cspan style=\"font-family: times new roman, times;\"\u003eIn order to prevent high-frequency interference, the sensing time line during installation cannot be bundled with the power supply line and the negative-voltage equipment line, and separate wiring is required.\u003c\/span\u003e\u003c\/li\u003e\n\u003cli\u003e\u003cspan style=\"font-family: times new roman, times;\"\u003eThe power supply and the host shall indicate the voltage--cause, the deviation of the rated voltage value is not more than 1% of 0%. The sensor, power line and load output interface are strictly distinguished during installation.\u003c\/span\u003e\u003c\/li\u003e\n\u003cli\u003e\u003cspan style=\"font-family: times new roman, times;\"\u003eThe thermostat main unit cannot be installed in places where dripping water, old people, and children are within easy reach.\u003c\/span\u003e\u003c\/li\u003e\n\u003cli\u003e\u003cspan style=\"font-family: times new roman, times;\"\u003eAfter wiring, check whether the line is correct and then energize, so as to avoid accidentally burning the temperature controller and load equipment. After installation, apply the protective cover to cover. Installation wiring diagram\u003c\/span\u003e\u003c\/li\u003e\n\u003c\/ol\u003e\n\u003cp\u003e\u003cspan style=\"font-family: times new roman, times;\"\u003e When installing the wiring, please make sure that the working voltage of the load itself and the voltage marked by the thermostat are the same voltage value, otherwise you cannot connect according to this figure.\u003c\/span\u003e\u003c\/p\u003e\n\u003cp\u003e\u003cspan style=\"font-size: 18px;\"\u003e\u003cspan style=\"font-size: 18px; font-family: times new roman, times;\"\u003e\u003cstrong\u003ePackage Included:\u003c\/strong\u003e\u003cstrong\u003e\u003c\/strong\u003e\u003c\/span\u003e\u003c\/span\u003e\u003c\/p\u003e\n\u003cp\u003e\u003cspan style=\"font-size: 18px;\"\u003e\u003cspan style=\"font-size: 18px; font-family: times new roman, times;\"\u003e1PCS*Digital MH1210W Temperature Humidity Hygrometer Thermostat Controller 10A Sensor\u003c\/span\u003e\u003c\/span\u003e\u003c\/p\u003e\n\u003cp\u003e \u003c\/p\u003e"}
 -
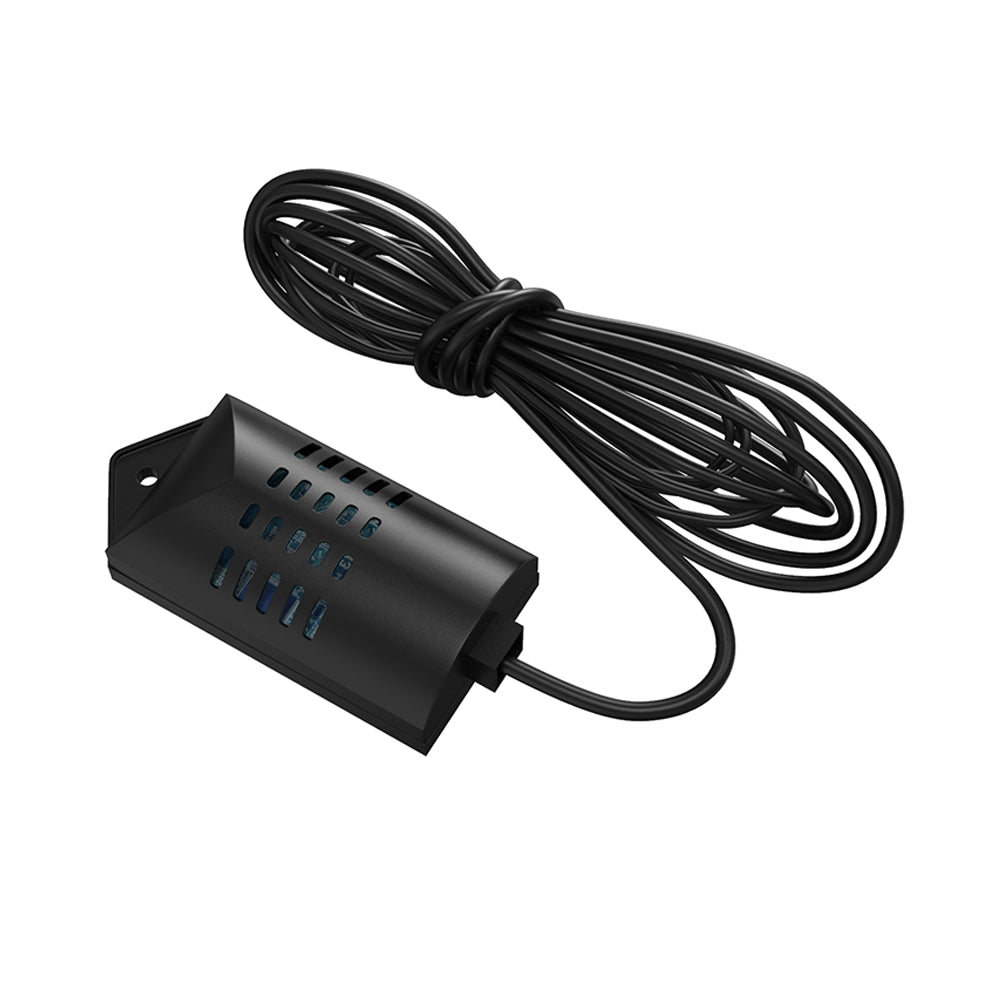
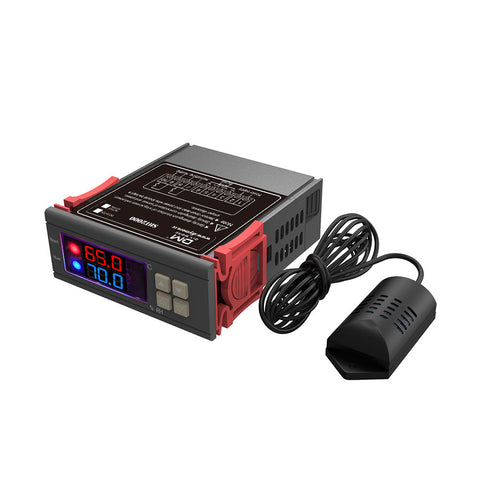 Translation missing: en.products.product.regular_price $15.99{"id":2326224502842,"title":"Digital MH1210W Temperature Humidity Hygrometer Thermostat Controller 10A Sensor","handle":"digital-mh1210w-temperature-humidity-hygrometer-thermostat-controller-10a-sensor-dc-9-72v","description":"\u003cp\u003e\u003cspan style=\"font-size: 18px; font-family: times new roman, times;\"\u003e\u003cstrong\u003e\u003cb\u003eTechnical Parameters:\u003c\/b\u003e\u003c\/strong\u003e\u003c\/span\u003e\u003c\/p\u003e\n\u003col\u003e\n\u003cli\u003e\u003cspan style=\"font-family: times new roman, times; font-size: 18px;\"\u003e The working voltage is referenced on the product casing;\u003c\/span\u003e\u003c\/li\u003e\n\u003cli\u003e\u003cspan style=\"font-family: times new roman, times; font-size: 18px;\"\u003e -40°C ~120°C: Measurement error ± 0. 5 ° C\u003c\/span\u003e\u003c\/li\u003e\n\u003cli\u003e\u003cspan style=\"font-family: times new roman, times; font-size: 18px;\"\u003e -40°C~120°C: Temperature control accuracy: 1C display accuracy 0. 1°C\u003c\/span\u003e\u003c\/li\u003e\n\u003cli\u003e\u003cspan style=\"font-family: times new roman, times; font-size: 18px;\"\u003e NTC25°C=10K B3435\u003cspan style=\"font-size: 18px;\"\u003e± \u003c\/span\u003e 1% (1 meter long, regardless of positive or negative)\u003c\/span\u003e\u003c\/li\u003e\n\u003cli\u003e\u003cspan style=\"font-family: times new roman, times; font-size: 18px;\"\u003e Power supply voltage: DC version is DC12~72V\u003cbr\u003e\u003c\/span\u003e\u003c\/li\u003e\n\u003cli\u003e\u003cspan style=\"font-family: times new roman, times; font-size: 18px;\"\u003e Working environment: Temperature: -20 ° C ~ 70 ° C, humidity: 90% RH no condensation\u003c\/span\u003e\u003c\/li\u003e\n\u003cli\u003e\u003cspan style=\"font-family: times new roman, times; font-size: 18px;\"\u003e Product size: 75*85*35 (width, depth, height) mm\u003c\/span\u003e\u003c\/li\u003e\n\u003c\/ol\u003e\n\u003cp\u003e\u003cspan style=\"font-family: times new roman, times; font-size: 18px;\"\u003e\u003cstrong\u003e\u003cb\u003eInstructions:\u003c\/b\u003e\u003c\/strong\u003e\u003c\/span\u003e\u003c\/p\u003e\n\u003cp\u003e\u003cspan style=\"font-family: times new roman, times; font-size: 18px;\"\u003ePress the S key for 3 seconds to enter the program menu code mode, which displays the code HC. Press the △ or ▽ key to cycle through the HC-CP-LA-PU-CA parameters. To enter a code, press the S key, press the △ or ▽ key to change the desired value and press SET to save and exit. . Control temperature setting: Short press S key (not more than 2 seconds) to display the factory default control temperature. Press △ or ▽ key to change the value well to save automatically. (Press and hold the △ or ▽ key for 2 seconds to quickly adjust the value.)\u003c\/span\u003e\u003c\/p\u003e\n\u003cp\u003e\u003cspan style=\"font-size: 18px; font-family: times new roman, times;\"\u003e\u003cstrong\u003eHeating control:\u003c\/strong\u003e\u003c\/span\u003e\u003c\/p\u003e\n\u003cp\u003e\u003cspan style=\"font-family: times new roman, times; font-size: 18px;\"\u003eWhen the temperature control method (code HC) is set to H, for example, the set control temperature value is 28 ° C, and the temperature difference is 2 ° C. When the ambient temperature value ≥ the set temperature value (28 °C), the relay opens and closes the output load; when the ambient temperature value ≤ the set temperature value (28 ° C) - the return temperature (2 ° C) and the \"delay\" is set After the start time, the relay pulls up to start the output load; (if the delay function is not needed, the delay start (code PU) can be set to 0).\u003c\/span\u003e\u003c\/p\u003e\n\u003cp\u003e\u003cspan style=\"font-family: times new roman, times; font-size: 18px;\"\u003e\u003cstrong\u003e\u003cb\u003eCooling mode:\u003c\/b\u003e\u003c\/strong\u003e\u003c\/span\u003e\u003c\/p\u003e\n\u003cp\u003e\u003cspan style=\"font-family: times new roman, times; font-size: 18px;\"\u003eWhen the temperature control method (code HC) is set to C, for example, the set control temperature value is 28 ° C, and the temperature difference is 2 ° C.\u003c\/span\u003e\u003c\/p\u003e\n\u003cp\u003e \u003c\/p\u003e\n\u003cp\u003e\u003cspan style=\"font-family: times new roman, times;\"\u003eWhen the ambient temperature value ≤ set temperature value (28 °C), the relay opens and closes the output load; when the ambient temperature value ≥ set temperature value (28 °C) + hysteresis temperature (2 ° C) and the \"delay start\" is set After the time, the relay is sucked and the output load is started: (It is recommended that the delay start time is the default time to protect the compressor. If no delay is required, the code (PU) is set to 0)\u003c\/span\u003e\u003c\/p\u003e\n\u003cp\u003e \u003c\/p\u003e\n\u003cp\u003e\u003cspan style=\"font-family: times new roman, times;\"\u003e\u003cstrong\u003e\u003cb\u003eNote:\u003c\/b\u003e\u003c\/strong\u003e LA minimum lower limit and HA upper limit non-control temperature parameter adjustment, if changed, reduce control temperature range\u003c\/span\u003e\u003c\/p\u003e\n\u003cp\u003e\u003cspan style=\"font-family: times new roman, times;\"\u003e\u003cstrong\u003ePower button instructions:\u003c\/strong\u003e\u003c\/span\u003e\u003c\/p\u003e\n\u003cp\u003e\u003cspan style=\"font-family: times new roman, times;\"\u003e1 long press the power button for 5 seconds to shut down, short press the power button to boot\u003c\/span\u003e\u003c\/p\u003e\n\u003cp\u003e\u003cspan style=\"font-family: times new roman, times;\"\u003e2 In the temperature setting interface and mode setting interface, short press the power button to quickly save the settings and exit the setting interface.\u003c\/span\u003e\u003c\/p\u003e\n\u003cp\u003e\u003cspan style=\"font-family: times new roman, times;\"\u003eRestore the factory default value: After pressing the “▲” button for 5 seconds, all the set parameters of the user will be restored to the factory default values.\u003c\/span\u003e\u003c\/p\u003e\n\u003cp\u003e\u003cspan style=\"font-family: times new roman, times;\"\u003eParameter lock: Press the ▼ key for 3 seconds to flash “0FF” to indicate that the user has set the parameter to be locked. In this way, the same operation flashes “ON” to indicate that the user has set the parameter lock to be released. (The user can only view and cannot modify after the parameter is locked, but the control degree adjustment is still valid)\u003c\/span\u003e\u003c\/p\u003e\n\u003cp\u003e\u003cspan style=\"font-family: times new roman, times;\"\u003e\u003cstrong\u003eFault prompt:\u003c\/strong\u003e\u003c\/span\u003e\u003c\/p\u003e\n\u003cp\u003e\u003cspan style=\"font-family: times new roman, times;\"\u003eWhen the sensor is short-circuited or when the ambient temperature is detected above the upper temperature limit of 120 degrees, the flashing indicates that the HHH well closes the output load. When the sensor is open or detects that the ambient temperature is below the lower temperature limit of -40 degrees, the LLL is flashed and the output load is turned off.\u003c\/span\u003e\u003c\/p\u003e\n\u003cp\u003e\u003cspan style=\"font-family: times new roman, times;\"\u003e\u003cstrong\u003e\u003cb\u003ePrecautions:\u003c\/b\u003e\u003c\/strong\u003e\u003c\/span\u003e\u003c\/p\u003e\n\u003col\u003e\n\u003cli\u003e\u003cspan style=\"font-family: times new roman, times;\"\u003eIn order to prevent high-frequency interference, the sensing time line during installation cannot be bundled with the power supply line and the negative-voltage equipment line, and separate wiring is required.\u003c\/span\u003e\u003c\/li\u003e\n\u003cli\u003e\u003cspan style=\"font-family: times new roman, times;\"\u003eThe power supply and the host shall indicate the voltage--cause, the deviation of the rated voltage value is not more than 1% of 0%. The sensor, power line and load output interface are strictly distinguished during installation.\u003c\/span\u003e\u003c\/li\u003e\n\u003cli\u003e\u003cspan style=\"font-family: times new roman, times;\"\u003eThe thermostat main unit cannot be installed in places where dripping water, old people, and children are within easy reach.\u003c\/span\u003e\u003c\/li\u003e\n\u003cli\u003e\u003cspan style=\"font-family: times new roman, times;\"\u003eAfter wiring, check whether the line is correct and then energize, so as to avoid accidentally burning the temperature controller and load equipment. After installation, apply the protective cover to cover. Installation wiring diagram\u003c\/span\u003e\u003c\/li\u003e\n\u003c\/ol\u003e\n\u003cp\u003e\u003cspan style=\"font-family: times new roman, times;\"\u003e When installing the wiring, please make sure that the working voltage of the load itself and the voltage marked by the thermostat are the same voltage value, otherwise you cannot connect according to this figure.\u003c\/span\u003e\u003c\/p\u003e\n\u003cp\u003e\u003cspan style=\"font-size: 18px;\"\u003e\u003cspan style=\"font-size: 18px; font-family: times new roman, times;\"\u003e\u003cstrong\u003ePackage Included:\u003c\/strong\u003e\u003cstrong\u003e\u003c\/strong\u003e\u003c\/span\u003e\u003c\/span\u003e\u003c\/p\u003e\n\u003cp\u003e\u003cspan style=\"font-size: 18px;\"\u003e\u003cspan style=\"font-size: 18px; font-family: times new roman, times;\"\u003e1PCS*Digital MH1210W Temperature Humidity Hygrometer Thermostat Controller 10A Sensor\u003c\/span\u003e\u003c\/span\u003e\u003c\/p\u003e\n\u003cp\u003e \u003c\/p\u003e","published_at":"2019-03-04T16:12:08+08:00","created_at":"2019-03-04T16:28:29+08:00","vendor":"diymore","type":"Thermostat","tags":["Display","Relay","STC 1000","STC1000"],"price":1099,"price_min":1099,"price_max":1099,"available":true,"price_varies":false,"compare_at_price":null,"compare_at_price_min":0,"compare_at_price_max":0,"compare_at_price_varies":false,"variants":[{"id":22773885304890,"title":"Default Title","option1":"Default Title","option2":null,"option3":null,"sku":"X13067","requires_shipping":true,"taxable":false,"featured_image":null,"available":true,"name":"Digital MH1210W Temperature Humidity Hygrometer Thermostat Controller 10A Sensor","public_title":null,"options":["Default Title"],"price":1099,"weight":94,"compare_at_price":null,"inventory_management":null,"barcode":"","requires_selling_plan":false,"selling_plan_allocations":[]}],"images":["\/\/www.diymore.cc\/cdn\/shop\/products\/X13067_1_860.jpg?v=1588659475","\/\/www.diymore.cc\/cdn\/shop\/products\/X13067_12_794.jpg?v=1588659475","\/\/www.diymore.cc\/cdn\/shop\/products\/X13067_2_377.jpg?v=1588659475","\/\/www.diymore.cc\/cdn\/shop\/products\/X13067_3_847.jpg?v=1588659475","\/\/www.diymore.cc\/cdn\/shop\/products\/X13067_4_335.jpg?v=1588659475","\/\/www.diymore.cc\/cdn\/shop\/products\/X13067_5_155.jpg?v=1588659475","\/\/www.diymore.cc\/cdn\/shop\/products\/X13067_6_121.jpg?v=1588659475","\/\/www.diymore.cc\/cdn\/shop\/products\/X13067_7_553.jpg?v=1588659475","\/\/www.diymore.cc\/cdn\/shop\/products\/X13067_8_484.jpg?v=1588659475"],"featured_image":"\/\/www.diymore.cc\/cdn\/shop\/products\/X13067_1_860.jpg?v=1588659475","options":["Title"],"media":[{"alt":"Digital Mh1210W Temperature Humidity Hygrometer Thermostat Controller 10A Sensor Dc 9-72V","id":6678959947847,"position":1,"preview_image":{"aspect_ratio":1.0,"height":1000,"width":1000,"src":"\/\/www.diymore.cc\/cdn\/shop\/products\/X13067_1_860.jpg?v=1588659475"},"aspect_ratio":1.0,"height":1000,"media_type":"image","src":"\/\/www.diymore.cc\/cdn\/shop\/products\/X13067_1_860.jpg?v=1588659475","width":1000},{"alt":"Digital Mh1210W Temperature Humidity Hygrometer Thermostat Controller 10A Sensor Dc 9-72V","id":6678960078919,"position":2,"preview_image":{"aspect_ratio":1.0,"height":1000,"width":1000,"src":"\/\/www.diymore.cc\/cdn\/shop\/products\/X13067_12_794.jpg?v=1588659475"},"aspect_ratio":1.0,"height":1000,"media_type":"image","src":"\/\/www.diymore.cc\/cdn\/shop\/products\/X13067_12_794.jpg?v=1588659475","width":1000},{"alt":"Digital Mh1210W Temperature Humidity Hygrometer Thermostat Controller 10A Sensor Dc 9-72V","id":6678960111687,"position":3,"preview_image":{"aspect_ratio":1.0,"height":1000,"width":1000,"src":"\/\/www.diymore.cc\/cdn\/shop\/products\/X13067_2_377.jpg?v=1588659475"},"aspect_ratio":1.0,"height":1000,"media_type":"image","src":"\/\/www.diymore.cc\/cdn\/shop\/products\/X13067_2_377.jpg?v=1588659475","width":1000},{"alt":"Digital Mh1210W Temperature Humidity Hygrometer Thermostat Controller 10A Sensor Dc 9-72V","id":6678960144455,"position":4,"preview_image":{"aspect_ratio":1.0,"height":1000,"width":1000,"src":"\/\/www.diymore.cc\/cdn\/shop\/products\/X13067_3_847.jpg?v=1588659475"},"aspect_ratio":1.0,"height":1000,"media_type":"image","src":"\/\/www.diymore.cc\/cdn\/shop\/products\/X13067_3_847.jpg?v=1588659475","width":1000},{"alt":"Digital Mh1210W Temperature Humidity Hygrometer Thermostat Controller 10A Sensor Dc 9-72V","id":6678960177223,"position":5,"preview_image":{"aspect_ratio":1.0,"height":1000,"width":1000,"src":"\/\/www.diymore.cc\/cdn\/shop\/products\/X13067_4_335.jpg?v=1588659475"},"aspect_ratio":1.0,"height":1000,"media_type":"image","src":"\/\/www.diymore.cc\/cdn\/shop\/products\/X13067_4_335.jpg?v=1588659475","width":1000},{"alt":"Digital Mh1210W Temperature Humidity Hygrometer Thermostat Controller 10A Sensor Dc 9-72V","id":6678960341063,"position":6,"preview_image":{"aspect_ratio":1.0,"height":1000,"width":1000,"src":"\/\/www.diymore.cc\/cdn\/shop\/products\/X13067_5_155.jpg?v=1588659475"},"aspect_ratio":1.0,"height":1000,"media_type":"image","src":"\/\/www.diymore.cc\/cdn\/shop\/products\/X13067_5_155.jpg?v=1588659475","width":1000},{"alt":"Digital Mh1210W Temperature Humidity Hygrometer Thermostat Controller 10A Sensor Dc 9-72V","id":6678960373831,"position":7,"preview_image":{"aspect_ratio":1.0,"height":1000,"width":1000,"src":"\/\/www.diymore.cc\/cdn\/shop\/products\/X13067_6_121.jpg?v=1588659475"},"aspect_ratio":1.0,"height":1000,"media_type":"image","src":"\/\/www.diymore.cc\/cdn\/shop\/products\/X13067_6_121.jpg?v=1588659475","width":1000},{"alt":"Digital Mh1210W Temperature Humidity Hygrometer Thermostat Controller 10A Sensor Dc 9-72V","id":6678960406599,"position":8,"preview_image":{"aspect_ratio":1.0,"height":1000,"width":1000,"src":"\/\/www.diymore.cc\/cdn\/shop\/products\/X13067_7_553.jpg?v=1588659475"},"aspect_ratio":1.0,"height":1000,"media_type":"image","src":"\/\/www.diymore.cc\/cdn\/shop\/products\/X13067_7_553.jpg?v=1588659475","width":1000},{"alt":"Digital Mh1210W Temperature Humidity Hygrometer Thermostat Controller 10A Sensor Dc 9-72V","id":6678960504903,"position":9,"preview_image":{"aspect_ratio":1.0,"height":1000,"width":1000,"src":"\/\/www.diymore.cc\/cdn\/shop\/products\/X13067_8_484.jpg?v=1588659475"},"aspect_ratio":1.0,"height":1000,"media_type":"image","src":"\/\/www.diymore.cc\/cdn\/shop\/products\/X13067_8_484.jpg?v=1588659475","width":1000}],"requires_selling_plan":false,"selling_plan_groups":[],"content":"\u003cp\u003e\u003cspan style=\"font-size: 18px; font-family: times new roman, times;\"\u003e\u003cstrong\u003e\u003cb\u003eTechnical Parameters:\u003c\/b\u003e\u003c\/strong\u003e\u003c\/span\u003e\u003c\/p\u003e\n\u003col\u003e\n\u003cli\u003e\u003cspan style=\"font-family: times new roman, times; font-size: 18px;\"\u003e The working voltage is referenced on the product casing;\u003c\/span\u003e\u003c\/li\u003e\n\u003cli\u003e\u003cspan style=\"font-family: times new roman, times; font-size: 18px;\"\u003e -40°C ~120°C: Measurement error ± 0. 5 ° C\u003c\/span\u003e\u003c\/li\u003e\n\u003cli\u003e\u003cspan style=\"font-family: times new roman, times; font-size: 18px;\"\u003e -40°C~120°C: Temperature control accuracy: 1C display accuracy 0. 1°C\u003c\/span\u003e\u003c\/li\u003e\n\u003cli\u003e\u003cspan style=\"font-family: times new roman, times; font-size: 18px;\"\u003e NTC25°C=10K B3435\u003cspan style=\"font-size: 18px;\"\u003e± \u003c\/span\u003e 1% (1 meter long, regardless of positive or negative)\u003c\/span\u003e\u003c\/li\u003e\n\u003cli\u003e\u003cspan style=\"font-family: times new roman, times; font-size: 18px;\"\u003e Power supply voltage: DC version is DC12~72V\u003cbr\u003e\u003c\/span\u003e\u003c\/li\u003e\n\u003cli\u003e\u003cspan style=\"font-family: times new roman, times; font-size: 18px;\"\u003e Working environment: Temperature: -20 ° C ~ 70 ° C, humidity: 90% RH no condensation\u003c\/span\u003e\u003c\/li\u003e\n\u003cli\u003e\u003cspan style=\"font-family: times new roman, times; font-size: 18px;\"\u003e Product size: 75*85*35 (width, depth, height) mm\u003c\/span\u003e\u003c\/li\u003e\n\u003c\/ol\u003e\n\u003cp\u003e\u003cspan style=\"font-family: times new roman, times; font-size: 18px;\"\u003e\u003cstrong\u003e\u003cb\u003eInstructions:\u003c\/b\u003e\u003c\/strong\u003e\u003c\/span\u003e\u003c\/p\u003e\n\u003cp\u003e\u003cspan style=\"font-family: times new roman, times; font-size: 18px;\"\u003ePress the S key for 3 seconds to enter the program menu code mode, which displays the code HC. Press the △ or ▽ key to cycle through the HC-CP-LA-PU-CA parameters. To enter a code, press the S key, press the △ or ▽ key to change the desired value and press SET to save and exit. . Control temperature setting: Short press S key (not more than 2 seconds) to display the factory default control temperature. Press △ or ▽ key to change the value well to save automatically. (Press and hold the △ or ▽ key for 2 seconds to quickly adjust the value.)\u003c\/span\u003e\u003c\/p\u003e\n\u003cp\u003e\u003cspan style=\"font-size: 18px; font-family: times new roman, times;\"\u003e\u003cstrong\u003eHeating control:\u003c\/strong\u003e\u003c\/span\u003e\u003c\/p\u003e\n\u003cp\u003e\u003cspan style=\"font-family: times new roman, times; font-size: 18px;\"\u003eWhen the temperature control method (code HC) is set to H, for example, the set control temperature value is 28 ° C, and the temperature difference is 2 ° C. When the ambient temperature value ≥ the set temperature value (28 °C), the relay opens and closes the output load; when the ambient temperature value ≤ the set temperature value (28 ° C) - the return temperature (2 ° C) and the \"delay\" is set After the start time, the relay pulls up to start the output load; (if the delay function is not needed, the delay start (code PU) can be set to 0).\u003c\/span\u003e\u003c\/p\u003e\n\u003cp\u003e\u003cspan style=\"font-family: times new roman, times; font-size: 18px;\"\u003e\u003cstrong\u003e\u003cb\u003eCooling mode:\u003c\/b\u003e\u003c\/strong\u003e\u003c\/span\u003e\u003c\/p\u003e\n\u003cp\u003e\u003cspan style=\"font-family: times new roman, times; font-size: 18px;\"\u003eWhen the temperature control method (code HC) is set to C, for example, the set control temperature value is 28 ° C, and the temperature difference is 2 ° C.\u003c\/span\u003e\u003c\/p\u003e\n\u003cp\u003e \u003c\/p\u003e\n\u003cp\u003e\u003cspan style=\"font-family: times new roman, times;\"\u003eWhen the ambient temperature value ≤ set temperature value (28 °C), the relay opens and closes the output load; when the ambient temperature value ≥ set temperature value (28 °C) + hysteresis temperature (2 ° C) and the \"delay start\" is set After the time, the relay is sucked and the output load is started: (It is recommended that the delay start time is the default time to protect the compressor. If no delay is required, the code (PU) is set to 0)\u003c\/span\u003e\u003c\/p\u003e\n\u003cp\u003e \u003c\/p\u003e\n\u003cp\u003e\u003cspan style=\"font-family: times new roman, times;\"\u003e\u003cstrong\u003e\u003cb\u003eNote:\u003c\/b\u003e\u003c\/strong\u003e LA minimum lower limit and HA upper limit non-control temperature parameter adjustment, if changed, reduce control temperature range\u003c\/span\u003e\u003c\/p\u003e\n\u003cp\u003e\u003cspan style=\"font-family: times new roman, times;\"\u003e\u003cstrong\u003ePower button instructions:\u003c\/strong\u003e\u003c\/span\u003e\u003c\/p\u003e\n\u003cp\u003e\u003cspan style=\"font-family: times new roman, times;\"\u003e1 long press the power button for 5 seconds to shut down, short press the power button to boot\u003c\/span\u003e\u003c\/p\u003e\n\u003cp\u003e\u003cspan style=\"font-family: times new roman, times;\"\u003e2 In the temperature setting interface and mode setting interface, short press the power button to quickly save the settings and exit the setting interface.\u003c\/span\u003e\u003c\/p\u003e\n\u003cp\u003e\u003cspan style=\"font-family: times new roman, times;\"\u003eRestore the factory default value: After pressing the “▲” button for 5 seconds, all the set parameters of the user will be restored to the factory default values.\u003c\/span\u003e\u003c\/p\u003e\n\u003cp\u003e\u003cspan style=\"font-family: times new roman, times;\"\u003eParameter lock: Press the ▼ key for 3 seconds to flash “0FF” to indicate that the user has set the parameter to be locked. In this way, the same operation flashes “ON” to indicate that the user has set the parameter lock to be released. (The user can only view and cannot modify after the parameter is locked, but the control degree adjustment is still valid)\u003c\/span\u003e\u003c\/p\u003e\n\u003cp\u003e\u003cspan style=\"font-family: times new roman, times;\"\u003e\u003cstrong\u003eFault prompt:\u003c\/strong\u003e\u003c\/span\u003e\u003c\/p\u003e\n\u003cp\u003e\u003cspan style=\"font-family: times new roman, times;\"\u003eWhen the sensor is short-circuited or when the ambient temperature is detected above the upper temperature limit of 120 degrees, the flashing indicates that the HHH well closes the output load. When the sensor is open or detects that the ambient temperature is below the lower temperature limit of -40 degrees, the LLL is flashed and the output load is turned off.\u003c\/span\u003e\u003c\/p\u003e\n\u003cp\u003e\u003cspan style=\"font-family: times new roman, times;\"\u003e\u003cstrong\u003e\u003cb\u003ePrecautions:\u003c\/b\u003e\u003c\/strong\u003e\u003c\/span\u003e\u003c\/p\u003e\n\u003col\u003e\n\u003cli\u003e\u003cspan style=\"font-family: times new roman, times;\"\u003eIn order to prevent high-frequency interference, the sensing time line during installation cannot be bundled with the power supply line and the negative-voltage equipment line, and separate wiring is required.\u003c\/span\u003e\u003c\/li\u003e\n\u003cli\u003e\u003cspan style=\"font-family: times new roman, times;\"\u003eThe power supply and the host shall indicate the voltage--cause, the deviation of the rated voltage value is not more than 1% of 0%. The sensor, power line and load output interface are strictly distinguished during installation.\u003c\/span\u003e\u003c\/li\u003e\n\u003cli\u003e\u003cspan style=\"font-family: times new roman, times;\"\u003eThe thermostat main unit cannot be installed in places where dripping water, old people, and children are within easy reach.\u003c\/span\u003e\u003c\/li\u003e\n\u003cli\u003e\u003cspan style=\"font-family: times new roman, times;\"\u003eAfter wiring, check whether the line is correct and then energize, so as to avoid accidentally burning the temperature controller and load equipment. After installation, apply the protective cover to cover. Installation wiring diagram\u003c\/span\u003e\u003c\/li\u003e\n\u003c\/ol\u003e\n\u003cp\u003e\u003cspan style=\"font-family: times new roman, times;\"\u003e When installing the wiring, please make sure that the working voltage of the load itself and the voltage marked by the thermostat are the same voltage value, otherwise you cannot connect according to this figure.\u003c\/span\u003e\u003c\/p\u003e\n\u003cp\u003e\u003cspan style=\"font-size: 18px;\"\u003e\u003cspan style=\"font-size: 18px; font-family: times new roman, times;\"\u003e\u003cstrong\u003ePackage Included:\u003c\/strong\u003e\u003cstrong\u003e\u003c\/strong\u003e\u003c\/span\u003e\u003c\/span\u003e\u003c\/p\u003e\n\u003cp\u003e\u003cspan style=\"font-size: 18px;\"\u003e\u003cspan style=\"font-size: 18px; font-family: times new roman, times;\"\u003e1PCS*Digital MH1210W Temperature Humidity Hygrometer Thermostat Controller 10A Sensor\u003c\/span\u003e\u003c\/span\u003e\u003c\/p\u003e\n\u003cp\u003e \u003c\/p\u003e"}
 -
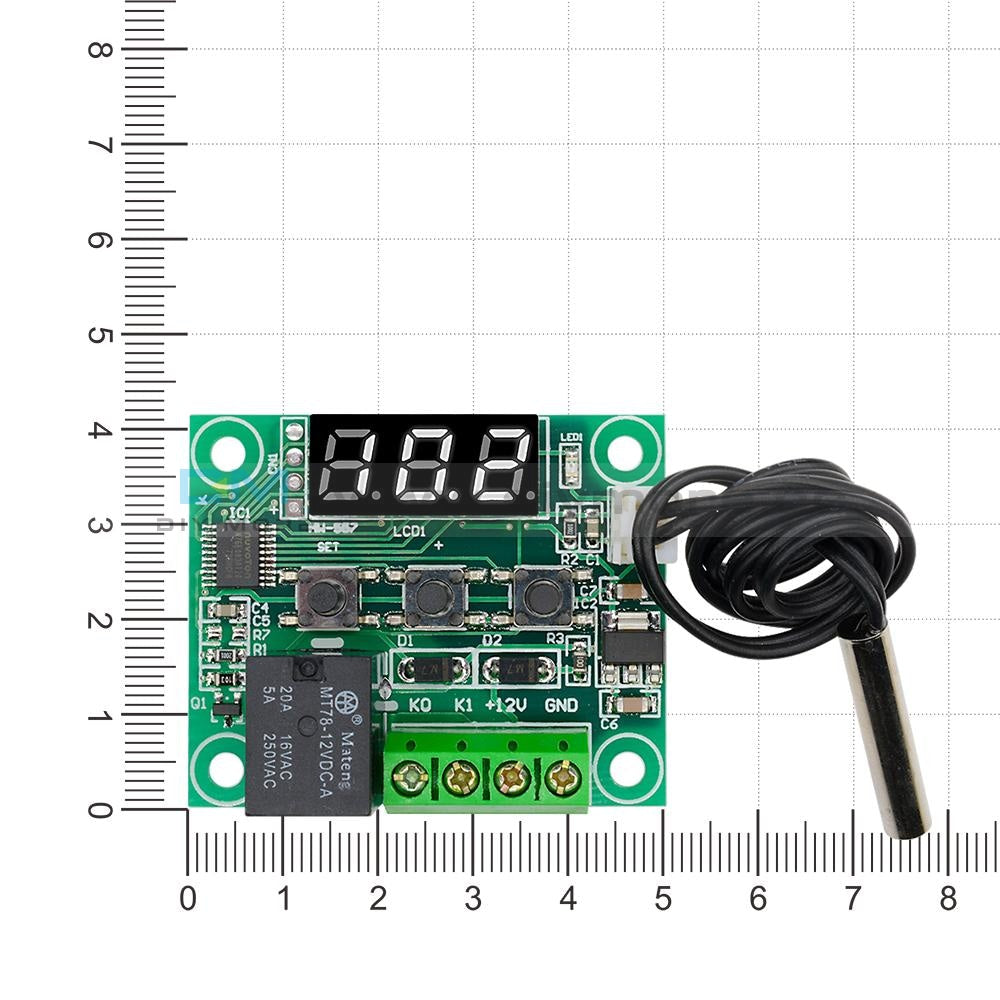
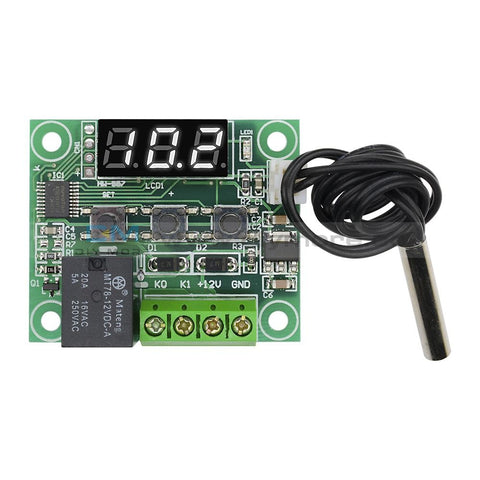 Translation missing: en.products.product.regular_price $6.99{"id":2326224502842,"title":"Digital MH1210W Temperature Humidity Hygrometer Thermostat Controller 10A Sensor","handle":"digital-mh1210w-temperature-humidity-hygrometer-thermostat-controller-10a-sensor-dc-9-72v","description":"\u003cp\u003e\u003cspan style=\"font-size: 18px; font-family: times new roman, times;\"\u003e\u003cstrong\u003e\u003cb\u003eTechnical Parameters:\u003c\/b\u003e\u003c\/strong\u003e\u003c\/span\u003e\u003c\/p\u003e\n\u003col\u003e\n\u003cli\u003e\u003cspan style=\"font-family: times new roman, times; font-size: 18px;\"\u003e The working voltage is referenced on the product casing;\u003c\/span\u003e\u003c\/li\u003e\n\u003cli\u003e\u003cspan style=\"font-family: times new roman, times; font-size: 18px;\"\u003e -40°C ~120°C: Measurement error ± 0. 5 ° C\u003c\/span\u003e\u003c\/li\u003e\n\u003cli\u003e\u003cspan style=\"font-family: times new roman, times; font-size: 18px;\"\u003e -40°C~120°C: Temperature control accuracy: 1C display accuracy 0. 1°C\u003c\/span\u003e\u003c\/li\u003e\n\u003cli\u003e\u003cspan style=\"font-family: times new roman, times; font-size: 18px;\"\u003e NTC25°C=10K B3435\u003cspan style=\"font-size: 18px;\"\u003e± \u003c\/span\u003e 1% (1 meter long, regardless of positive or negative)\u003c\/span\u003e\u003c\/li\u003e\n\u003cli\u003e\u003cspan style=\"font-family: times new roman, times; font-size: 18px;\"\u003e Power supply voltage: DC version is DC12~72V\u003cbr\u003e\u003c\/span\u003e\u003c\/li\u003e\n\u003cli\u003e\u003cspan style=\"font-family: times new roman, times; font-size: 18px;\"\u003e Working environment: Temperature: -20 ° C ~ 70 ° C, humidity: 90% RH no condensation\u003c\/span\u003e\u003c\/li\u003e\n\u003cli\u003e\u003cspan style=\"font-family: times new roman, times; font-size: 18px;\"\u003e Product size: 75*85*35 (width, depth, height) mm\u003c\/span\u003e\u003c\/li\u003e\n\u003c\/ol\u003e\n\u003cp\u003e\u003cspan style=\"font-family: times new roman, times; font-size: 18px;\"\u003e\u003cstrong\u003e\u003cb\u003eInstructions:\u003c\/b\u003e\u003c\/strong\u003e\u003c\/span\u003e\u003c\/p\u003e\n\u003cp\u003e\u003cspan style=\"font-family: times new roman, times; font-size: 18px;\"\u003ePress the S key for 3 seconds to enter the program menu code mode, which displays the code HC. Press the △ or ▽ key to cycle through the HC-CP-LA-PU-CA parameters. To enter a code, press the S key, press the △ or ▽ key to change the desired value and press SET to save and exit. . Control temperature setting: Short press S key (not more than 2 seconds) to display the factory default control temperature. Press △ or ▽ key to change the value well to save automatically. (Press and hold the △ or ▽ key for 2 seconds to quickly adjust the value.)\u003c\/span\u003e\u003c\/p\u003e\n\u003cp\u003e\u003cspan style=\"font-size: 18px; font-family: times new roman, times;\"\u003e\u003cstrong\u003eHeating control:\u003c\/strong\u003e\u003c\/span\u003e\u003c\/p\u003e\n\u003cp\u003e\u003cspan style=\"font-family: times new roman, times; font-size: 18px;\"\u003eWhen the temperature control method (code HC) is set to H, for example, the set control temperature value is 28 ° C, and the temperature difference is 2 ° C. When the ambient temperature value ≥ the set temperature value (28 °C), the relay opens and closes the output load; when the ambient temperature value ≤ the set temperature value (28 ° C) - the return temperature (2 ° C) and the \"delay\" is set After the start time, the relay pulls up to start the output load; (if the delay function is not needed, the delay start (code PU) can be set to 0).\u003c\/span\u003e\u003c\/p\u003e\n\u003cp\u003e\u003cspan style=\"font-family: times new roman, times; font-size: 18px;\"\u003e\u003cstrong\u003e\u003cb\u003eCooling mode:\u003c\/b\u003e\u003c\/strong\u003e\u003c\/span\u003e\u003c\/p\u003e\n\u003cp\u003e\u003cspan style=\"font-family: times new roman, times; font-size: 18px;\"\u003eWhen the temperature control method (code HC) is set to C, for example, the set control temperature value is 28 ° C, and the temperature difference is 2 ° C.\u003c\/span\u003e\u003c\/p\u003e\n\u003cp\u003e \u003c\/p\u003e\n\u003cp\u003e\u003cspan style=\"font-family: times new roman, times;\"\u003eWhen the ambient temperature value ≤ set temperature value (28 °C), the relay opens and closes the output load; when the ambient temperature value ≥ set temperature value (28 °C) + hysteresis temperature (2 ° C) and the \"delay start\" is set After the time, the relay is sucked and the output load is started: (It is recommended that the delay start time is the default time to protect the compressor. If no delay is required, the code (PU) is set to 0)\u003c\/span\u003e\u003c\/p\u003e\n\u003cp\u003e \u003c\/p\u003e\n\u003cp\u003e\u003cspan style=\"font-family: times new roman, times;\"\u003e\u003cstrong\u003e\u003cb\u003eNote:\u003c\/b\u003e\u003c\/strong\u003e LA minimum lower limit and HA upper limit non-control temperature parameter adjustment, if changed, reduce control temperature range\u003c\/span\u003e\u003c\/p\u003e\n\u003cp\u003e\u003cspan style=\"font-family: times new roman, times;\"\u003e\u003cstrong\u003ePower button instructions:\u003c\/strong\u003e\u003c\/span\u003e\u003c\/p\u003e\n\u003cp\u003e\u003cspan style=\"font-family: times new roman, times;\"\u003e1 long press the power button for 5 seconds to shut down, short press the power button to boot\u003c\/span\u003e\u003c\/p\u003e\n\u003cp\u003e\u003cspan style=\"font-family: times new roman, times;\"\u003e2 In the temperature setting interface and mode setting interface, short press the power button to quickly save the settings and exit the setting interface.\u003c\/span\u003e\u003c\/p\u003e\n\u003cp\u003e\u003cspan style=\"font-family: times new roman, times;\"\u003eRestore the factory default value: After pressing the “▲” button for 5 seconds, all the set parameters of the user will be restored to the factory default values.\u003c\/span\u003e\u003c\/p\u003e\n\u003cp\u003e\u003cspan style=\"font-family: times new roman, times;\"\u003eParameter lock: Press the ▼ key for 3 seconds to flash “0FF” to indicate that the user has set the parameter to be locked. In this way, the same operation flashes “ON” to indicate that the user has set the parameter lock to be released. (The user can only view and cannot modify after the parameter is locked, but the control degree adjustment is still valid)\u003c\/span\u003e\u003c\/p\u003e\n\u003cp\u003e\u003cspan style=\"font-family: times new roman, times;\"\u003e\u003cstrong\u003eFault prompt:\u003c\/strong\u003e\u003c\/span\u003e\u003c\/p\u003e\n\u003cp\u003e\u003cspan style=\"font-family: times new roman, times;\"\u003eWhen the sensor is short-circuited or when the ambient temperature is detected above the upper temperature limit of 120 degrees, the flashing indicates that the HHH well closes the output load. When the sensor is open or detects that the ambient temperature is below the lower temperature limit of -40 degrees, the LLL is flashed and the output load is turned off.\u003c\/span\u003e\u003c\/p\u003e\n\u003cp\u003e\u003cspan style=\"font-family: times new roman, times;\"\u003e\u003cstrong\u003e\u003cb\u003ePrecautions:\u003c\/b\u003e\u003c\/strong\u003e\u003c\/span\u003e\u003c\/p\u003e\n\u003col\u003e\n\u003cli\u003e\u003cspan style=\"font-family: times new roman, times;\"\u003eIn order to prevent high-frequency interference, the sensing time line during installation cannot be bundled with the power supply line and the negative-voltage equipment line, and separate wiring is required.\u003c\/span\u003e\u003c\/li\u003e\n\u003cli\u003e\u003cspan style=\"font-family: times new roman, times;\"\u003eThe power supply and the host shall indicate the voltage--cause, the deviation of the rated voltage value is not more than 1% of 0%. The sensor, power line and load output interface are strictly distinguished during installation.\u003c\/span\u003e\u003c\/li\u003e\n\u003cli\u003e\u003cspan style=\"font-family: times new roman, times;\"\u003eThe thermostat main unit cannot be installed in places where dripping water, old people, and children are within easy reach.\u003c\/span\u003e\u003c\/li\u003e\n\u003cli\u003e\u003cspan style=\"font-family: times new roman, times;\"\u003eAfter wiring, check whether the line is correct and then energize, so as to avoid accidentally burning the temperature controller and load equipment. After installation, apply the protective cover to cover. Installation wiring diagram\u003c\/span\u003e\u003c\/li\u003e\n\u003c\/ol\u003e\n\u003cp\u003e\u003cspan style=\"font-family: times new roman, times;\"\u003e When installing the wiring, please make sure that the working voltage of the load itself and the voltage marked by the thermostat are the same voltage value, otherwise you cannot connect according to this figure.\u003c\/span\u003e\u003c\/p\u003e\n\u003cp\u003e\u003cspan style=\"font-size: 18px;\"\u003e\u003cspan style=\"font-size: 18px; font-family: times new roman, times;\"\u003e\u003cstrong\u003ePackage Included:\u003c\/strong\u003e\u003cstrong\u003e\u003c\/strong\u003e\u003c\/span\u003e\u003c\/span\u003e\u003c\/p\u003e\n\u003cp\u003e\u003cspan style=\"font-size: 18px;\"\u003e\u003cspan style=\"font-size: 18px; font-family: times new roman, times;\"\u003e1PCS*Digital MH1210W Temperature Humidity Hygrometer Thermostat Controller 10A Sensor\u003c\/span\u003e\u003c\/span\u003e\u003c\/p\u003e\n\u003cp\u003e \u003c\/p\u003e","published_at":"2019-03-04T16:12:08+08:00","created_at":"2019-03-04T16:28:29+08:00","vendor":"diymore","type":"Thermostat","tags":["Display","Relay","STC 1000","STC1000"],"price":1099,"price_min":1099,"price_max":1099,"available":true,"price_varies":false,"compare_at_price":null,"compare_at_price_min":0,"compare_at_price_max":0,"compare_at_price_varies":false,"variants":[{"id":22773885304890,"title":"Default Title","option1":"Default Title","option2":null,"option3":null,"sku":"X13067","requires_shipping":true,"taxable":false,"featured_image":null,"available":true,"name":"Digital MH1210W Temperature Humidity Hygrometer Thermostat Controller 10A Sensor","public_title":null,"options":["Default Title"],"price":1099,"weight":94,"compare_at_price":null,"inventory_management":null,"barcode":"","requires_selling_plan":false,"selling_plan_allocations":[]}],"images":["\/\/www.diymore.cc\/cdn\/shop\/products\/X13067_1_860.jpg?v=1588659475","\/\/www.diymore.cc\/cdn\/shop\/products\/X13067_12_794.jpg?v=1588659475","\/\/www.diymore.cc\/cdn\/shop\/products\/X13067_2_377.jpg?v=1588659475","\/\/www.diymore.cc\/cdn\/shop\/products\/X13067_3_847.jpg?v=1588659475","\/\/www.diymore.cc\/cdn\/shop\/products\/X13067_4_335.jpg?v=1588659475","\/\/www.diymore.cc\/cdn\/shop\/products\/X13067_5_155.jpg?v=1588659475","\/\/www.diymore.cc\/cdn\/shop\/products\/X13067_6_121.jpg?v=1588659475","\/\/www.diymore.cc\/cdn\/shop\/products\/X13067_7_553.jpg?v=1588659475","\/\/www.diymore.cc\/cdn\/shop\/products\/X13067_8_484.jpg?v=1588659475"],"featured_image":"\/\/www.diymore.cc\/cdn\/shop\/products\/X13067_1_860.jpg?v=1588659475","options":["Title"],"media":[{"alt":"Digital Mh1210W Temperature Humidity Hygrometer Thermostat Controller 10A Sensor Dc 9-72V","id":6678959947847,"position":1,"preview_image":{"aspect_ratio":1.0,"height":1000,"width":1000,"src":"\/\/www.diymore.cc\/cdn\/shop\/products\/X13067_1_860.jpg?v=1588659475"},"aspect_ratio":1.0,"height":1000,"media_type":"image","src":"\/\/www.diymore.cc\/cdn\/shop\/products\/X13067_1_860.jpg?v=1588659475","width":1000},{"alt":"Digital Mh1210W Temperature Humidity Hygrometer Thermostat Controller 10A Sensor Dc 9-72V","id":6678960078919,"position":2,"preview_image":{"aspect_ratio":1.0,"height":1000,"width":1000,"src":"\/\/www.diymore.cc\/cdn\/shop\/products\/X13067_12_794.jpg?v=1588659475"},"aspect_ratio":1.0,"height":1000,"media_type":"image","src":"\/\/www.diymore.cc\/cdn\/shop\/products\/X13067_12_794.jpg?v=1588659475","width":1000},{"alt":"Digital Mh1210W Temperature Humidity Hygrometer Thermostat Controller 10A Sensor Dc 9-72V","id":6678960111687,"position":3,"preview_image":{"aspect_ratio":1.0,"height":1000,"width":1000,"src":"\/\/www.diymore.cc\/cdn\/shop\/products\/X13067_2_377.jpg?v=1588659475"},"aspect_ratio":1.0,"height":1000,"media_type":"image","src":"\/\/www.diymore.cc\/cdn\/shop\/products\/X13067_2_377.jpg?v=1588659475","width":1000},{"alt":"Digital Mh1210W Temperature Humidity Hygrometer Thermostat Controller 10A Sensor Dc 9-72V","id":6678960144455,"position":4,"preview_image":{"aspect_ratio":1.0,"height":1000,"width":1000,"src":"\/\/www.diymore.cc\/cdn\/shop\/products\/X13067_3_847.jpg?v=1588659475"},"aspect_ratio":1.0,"height":1000,"media_type":"image","src":"\/\/www.diymore.cc\/cdn\/shop\/products\/X13067_3_847.jpg?v=1588659475","width":1000},{"alt":"Digital Mh1210W Temperature Humidity Hygrometer Thermostat Controller 10A Sensor Dc 9-72V","id":6678960177223,"position":5,"preview_image":{"aspect_ratio":1.0,"height":1000,"width":1000,"src":"\/\/www.diymore.cc\/cdn\/shop\/products\/X13067_4_335.jpg?v=1588659475"},"aspect_ratio":1.0,"height":1000,"media_type":"image","src":"\/\/www.diymore.cc\/cdn\/shop\/products\/X13067_4_335.jpg?v=1588659475","width":1000},{"alt":"Digital Mh1210W Temperature Humidity Hygrometer Thermostat Controller 10A Sensor Dc 9-72V","id":6678960341063,"position":6,"preview_image":{"aspect_ratio":1.0,"height":1000,"width":1000,"src":"\/\/www.diymore.cc\/cdn\/shop\/products\/X13067_5_155.jpg?v=1588659475"},"aspect_ratio":1.0,"height":1000,"media_type":"image","src":"\/\/www.diymore.cc\/cdn\/shop\/products\/X13067_5_155.jpg?v=1588659475","width":1000},{"alt":"Digital Mh1210W Temperature Humidity Hygrometer Thermostat Controller 10A Sensor Dc 9-72V","id":6678960373831,"position":7,"preview_image":{"aspect_ratio":1.0,"height":1000,"width":1000,"src":"\/\/www.diymore.cc\/cdn\/shop\/products\/X13067_6_121.jpg?v=1588659475"},"aspect_ratio":1.0,"height":1000,"media_type":"image","src":"\/\/www.diymore.cc\/cdn\/shop\/products\/X13067_6_121.jpg?v=1588659475","width":1000},{"alt":"Digital Mh1210W Temperature Humidity Hygrometer Thermostat Controller 10A Sensor Dc 9-72V","id":6678960406599,"position":8,"preview_image":{"aspect_ratio":1.0,"height":1000,"width":1000,"src":"\/\/www.diymore.cc\/cdn\/shop\/products\/X13067_7_553.jpg?v=1588659475"},"aspect_ratio":1.0,"height":1000,"media_type":"image","src":"\/\/www.diymore.cc\/cdn\/shop\/products\/X13067_7_553.jpg?v=1588659475","width":1000},{"alt":"Digital Mh1210W Temperature Humidity Hygrometer Thermostat Controller 10A Sensor Dc 9-72V","id":6678960504903,"position":9,"preview_image":{"aspect_ratio":1.0,"height":1000,"width":1000,"src":"\/\/www.diymore.cc\/cdn\/shop\/products\/X13067_8_484.jpg?v=1588659475"},"aspect_ratio":1.0,"height":1000,"media_type":"image","src":"\/\/www.diymore.cc\/cdn\/shop\/products\/X13067_8_484.jpg?v=1588659475","width":1000}],"requires_selling_plan":false,"selling_plan_groups":[],"content":"\u003cp\u003e\u003cspan style=\"font-size: 18px; font-family: times new roman, times;\"\u003e\u003cstrong\u003e\u003cb\u003eTechnical Parameters:\u003c\/b\u003e\u003c\/strong\u003e\u003c\/span\u003e\u003c\/p\u003e\n\u003col\u003e\n\u003cli\u003e\u003cspan style=\"font-family: times new roman, times; font-size: 18px;\"\u003e The working voltage is referenced on the product casing;\u003c\/span\u003e\u003c\/li\u003e\n\u003cli\u003e\u003cspan style=\"font-family: times new roman, times; font-size: 18px;\"\u003e -40°C ~120°C: Measurement error ± 0. 5 ° C\u003c\/span\u003e\u003c\/li\u003e\n\u003cli\u003e\u003cspan style=\"font-family: times new roman, times; font-size: 18px;\"\u003e -40°C~120°C: Temperature control accuracy: 1C display accuracy 0. 1°C\u003c\/span\u003e\u003c\/li\u003e\n\u003cli\u003e\u003cspan style=\"font-family: times new roman, times; font-size: 18px;\"\u003e NTC25°C=10K B3435\u003cspan style=\"font-size: 18px;\"\u003e± \u003c\/span\u003e 1% (1 meter long, regardless of positive or negative)\u003c\/span\u003e\u003c\/li\u003e\n\u003cli\u003e\u003cspan style=\"font-family: times new roman, times; font-size: 18px;\"\u003e Power supply voltage: DC version is DC12~72V\u003cbr\u003e\u003c\/span\u003e\u003c\/li\u003e\n\u003cli\u003e\u003cspan style=\"font-family: times new roman, times; font-size: 18px;\"\u003e Working environment: Temperature: -20 ° C ~ 70 ° C, humidity: 90% RH no condensation\u003c\/span\u003e\u003c\/li\u003e\n\u003cli\u003e\u003cspan style=\"font-family: times new roman, times; font-size: 18px;\"\u003e Product size: 75*85*35 (width, depth, height) mm\u003c\/span\u003e\u003c\/li\u003e\n\u003c\/ol\u003e\n\u003cp\u003e\u003cspan style=\"font-family: times new roman, times; font-size: 18px;\"\u003e\u003cstrong\u003e\u003cb\u003eInstructions:\u003c\/b\u003e\u003c\/strong\u003e\u003c\/span\u003e\u003c\/p\u003e\n\u003cp\u003e\u003cspan style=\"font-family: times new roman, times; font-size: 18px;\"\u003ePress the S key for 3 seconds to enter the program menu code mode, which displays the code HC. Press the △ or ▽ key to cycle through the HC-CP-LA-PU-CA parameters. To enter a code, press the S key, press the △ or ▽ key to change the desired value and press SET to save and exit. . Control temperature setting: Short press S key (not more than 2 seconds) to display the factory default control temperature. Press △ or ▽ key to change the value well to save automatically. (Press and hold the △ or ▽ key for 2 seconds to quickly adjust the value.)\u003c\/span\u003e\u003c\/p\u003e\n\u003cp\u003e\u003cspan style=\"font-size: 18px; font-family: times new roman, times;\"\u003e\u003cstrong\u003eHeating control:\u003c\/strong\u003e\u003c\/span\u003e\u003c\/p\u003e\n\u003cp\u003e\u003cspan style=\"font-family: times new roman, times; font-size: 18px;\"\u003eWhen the temperature control method (code HC) is set to H, for example, the set control temperature value is 28 ° C, and the temperature difference is 2 ° C. When the ambient temperature value ≥ the set temperature value (28 °C), the relay opens and closes the output load; when the ambient temperature value ≤ the set temperature value (28 ° C) - the return temperature (2 ° C) and the \"delay\" is set After the start time, the relay pulls up to start the output load; (if the delay function is not needed, the delay start (code PU) can be set to 0).\u003c\/span\u003e\u003c\/p\u003e\n\u003cp\u003e\u003cspan style=\"font-family: times new roman, times; font-size: 18px;\"\u003e\u003cstrong\u003e\u003cb\u003eCooling mode:\u003c\/b\u003e\u003c\/strong\u003e\u003c\/span\u003e\u003c\/p\u003e\n\u003cp\u003e\u003cspan style=\"font-family: times new roman, times; font-size: 18px;\"\u003eWhen the temperature control method (code HC) is set to C, for example, the set control temperature value is 28 ° C, and the temperature difference is 2 ° C.\u003c\/span\u003e\u003c\/p\u003e\n\u003cp\u003e \u003c\/p\u003e\n\u003cp\u003e\u003cspan style=\"font-family: times new roman, times;\"\u003eWhen the ambient temperature value ≤ set temperature value (28 °C), the relay opens and closes the output load; when the ambient temperature value ≥ set temperature value (28 °C) + hysteresis temperature (2 ° C) and the \"delay start\" is set After the time, the relay is sucked and the output load is started: (It is recommended that the delay start time is the default time to protect the compressor. If no delay is required, the code (PU) is set to 0)\u003c\/span\u003e\u003c\/p\u003e\n\u003cp\u003e \u003c\/p\u003e\n\u003cp\u003e\u003cspan style=\"font-family: times new roman, times;\"\u003e\u003cstrong\u003e\u003cb\u003eNote:\u003c\/b\u003e\u003c\/strong\u003e LA minimum lower limit and HA upper limit non-control temperature parameter adjustment, if changed, reduce control temperature range\u003c\/span\u003e\u003c\/p\u003e\n\u003cp\u003e\u003cspan style=\"font-family: times new roman, times;\"\u003e\u003cstrong\u003ePower button instructions:\u003c\/strong\u003e\u003c\/span\u003e\u003c\/p\u003e\n\u003cp\u003e\u003cspan style=\"font-family: times new roman, times;\"\u003e1 long press the power button for 5 seconds to shut down, short press the power button to boot\u003c\/span\u003e\u003c\/p\u003e\n\u003cp\u003e\u003cspan style=\"font-family: times new roman, times;\"\u003e2 In the temperature setting interface and mode setting interface, short press the power button to quickly save the settings and exit the setting interface.\u003c\/span\u003e\u003c\/p\u003e\n\u003cp\u003e\u003cspan style=\"font-family: times new roman, times;\"\u003eRestore the factory default value: After pressing the “▲” button for 5 seconds, all the set parameters of the user will be restored to the factory default values.\u003c\/span\u003e\u003c\/p\u003e\n\u003cp\u003e\u003cspan style=\"font-family: times new roman, times;\"\u003eParameter lock: Press the ▼ key for 3 seconds to flash “0FF” to indicate that the user has set the parameter to be locked. In this way, the same operation flashes “ON” to indicate that the user has set the parameter lock to be released. (The user can only view and cannot modify after the parameter is locked, but the control degree adjustment is still valid)\u003c\/span\u003e\u003c\/p\u003e\n\u003cp\u003e\u003cspan style=\"font-family: times new roman, times;\"\u003e\u003cstrong\u003eFault prompt:\u003c\/strong\u003e\u003c\/span\u003e\u003c\/p\u003e\n\u003cp\u003e\u003cspan style=\"font-family: times new roman, times;\"\u003eWhen the sensor is short-circuited or when the ambient temperature is detected above the upper temperature limit of 120 degrees, the flashing indicates that the HHH well closes the output load. When the sensor is open or detects that the ambient temperature is below the lower temperature limit of -40 degrees, the LLL is flashed and the output load is turned off.\u003c\/span\u003e\u003c\/p\u003e\n\u003cp\u003e\u003cspan style=\"font-family: times new roman, times;\"\u003e\u003cstrong\u003e\u003cb\u003ePrecautions:\u003c\/b\u003e\u003c\/strong\u003e\u003c\/span\u003e\u003c\/p\u003e\n\u003col\u003e\n\u003cli\u003e\u003cspan style=\"font-family: times new roman, times;\"\u003eIn order to prevent high-frequency interference, the sensing time line during installation cannot be bundled with the power supply line and the negative-voltage equipment line, and separate wiring is required.\u003c\/span\u003e\u003c\/li\u003e\n\u003cli\u003e\u003cspan style=\"font-family: times new roman, times;\"\u003eThe power supply and the host shall indicate the voltage--cause, the deviation of the rated voltage value is not more than 1% of 0%. The sensor, power line and load output interface are strictly distinguished during installation.\u003c\/span\u003e\u003c\/li\u003e\n\u003cli\u003e\u003cspan style=\"font-family: times new roman, times;\"\u003eThe thermostat main unit cannot be installed in places where dripping water, old people, and children are within easy reach.\u003c\/span\u003e\u003c\/li\u003e\n\u003cli\u003e\u003cspan style=\"font-family: times new roman, times;\"\u003eAfter wiring, check whether the line is correct and then energize, so as to avoid accidentally burning the temperature controller and load equipment. After installation, apply the protective cover to cover. Installation wiring diagram\u003c\/span\u003e\u003c\/li\u003e\n\u003c\/ol\u003e\n\u003cp\u003e\u003cspan style=\"font-family: times new roman, times;\"\u003e When installing the wiring, please make sure that the working voltage of the load itself and the voltage marked by the thermostat are the same voltage value, otherwise you cannot connect according to this figure.\u003c\/span\u003e\u003c\/p\u003e\n\u003cp\u003e\u003cspan style=\"font-size: 18px;\"\u003e\u003cspan style=\"font-size: 18px; font-family: times new roman, times;\"\u003e\u003cstrong\u003ePackage Included:\u003c\/strong\u003e\u003cstrong\u003e\u003c\/strong\u003e\u003c\/span\u003e\u003c\/span\u003e\u003c\/p\u003e\n\u003cp\u003e\u003cspan style=\"font-size: 18px;\"\u003e\u003cspan style=\"font-size: 18px; font-family: times new roman, times;\"\u003e1PCS*Digital MH1210W Temperature Humidity Hygrometer Thermostat Controller 10A Sensor\u003c\/span\u003e\u003c\/span\u003e\u003c\/p\u003e\n\u003cp\u003e \u003c\/p\u003e"}