DC DC Step Down Power Supply Module LM2596 Constant Current Adjustable Voltage Board
DC DC Step Down Power Supply Module LM2596 Constant Current Adjustable Voltage Board
SKU:010058- guaranteeQuality checked
- Special gift cardsSpecial gift cards
- Free return Within 60 days
- Consultancy86-0755-85201155
Update content:
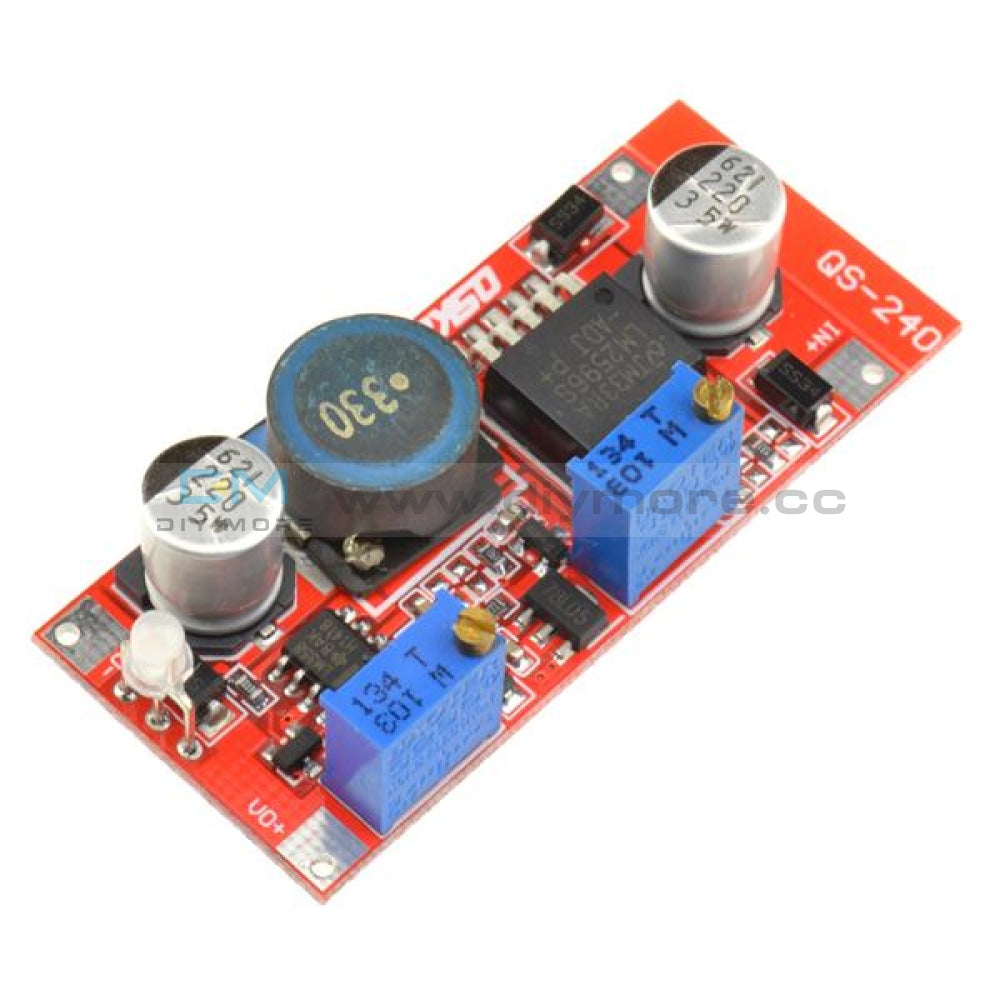
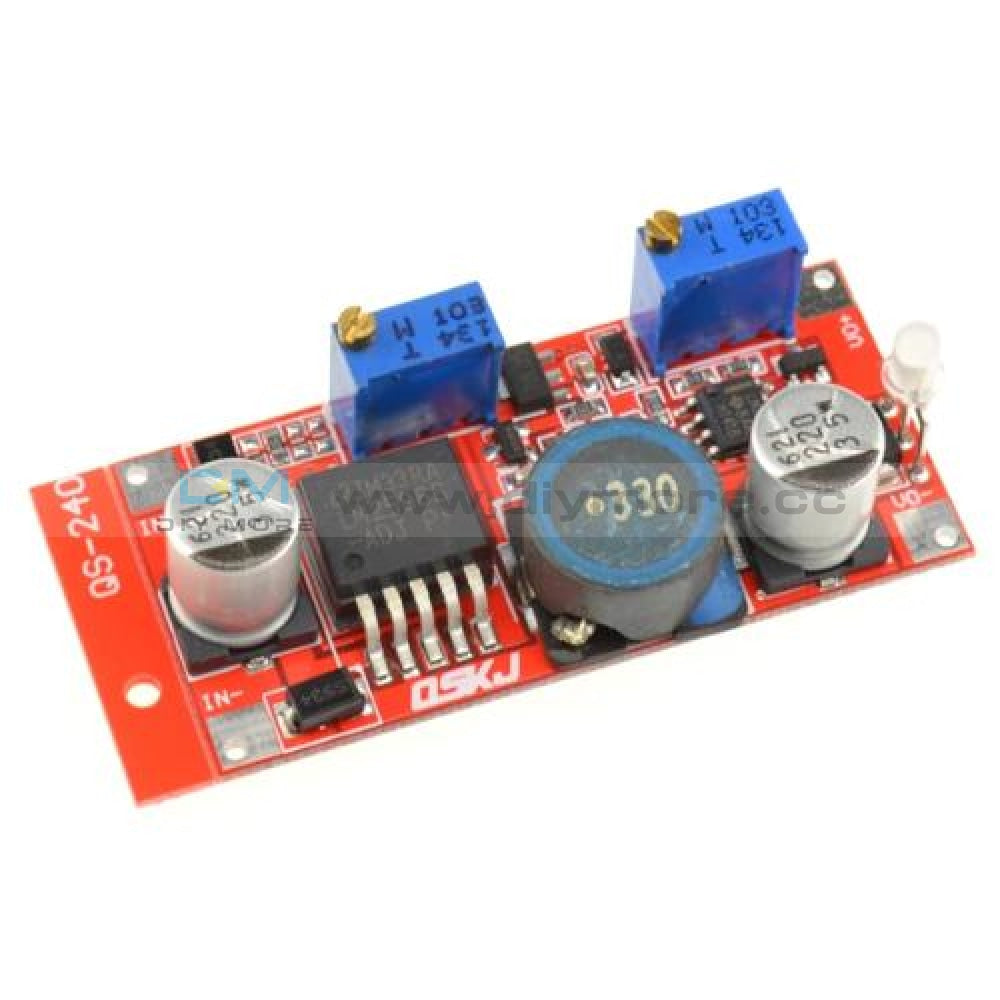
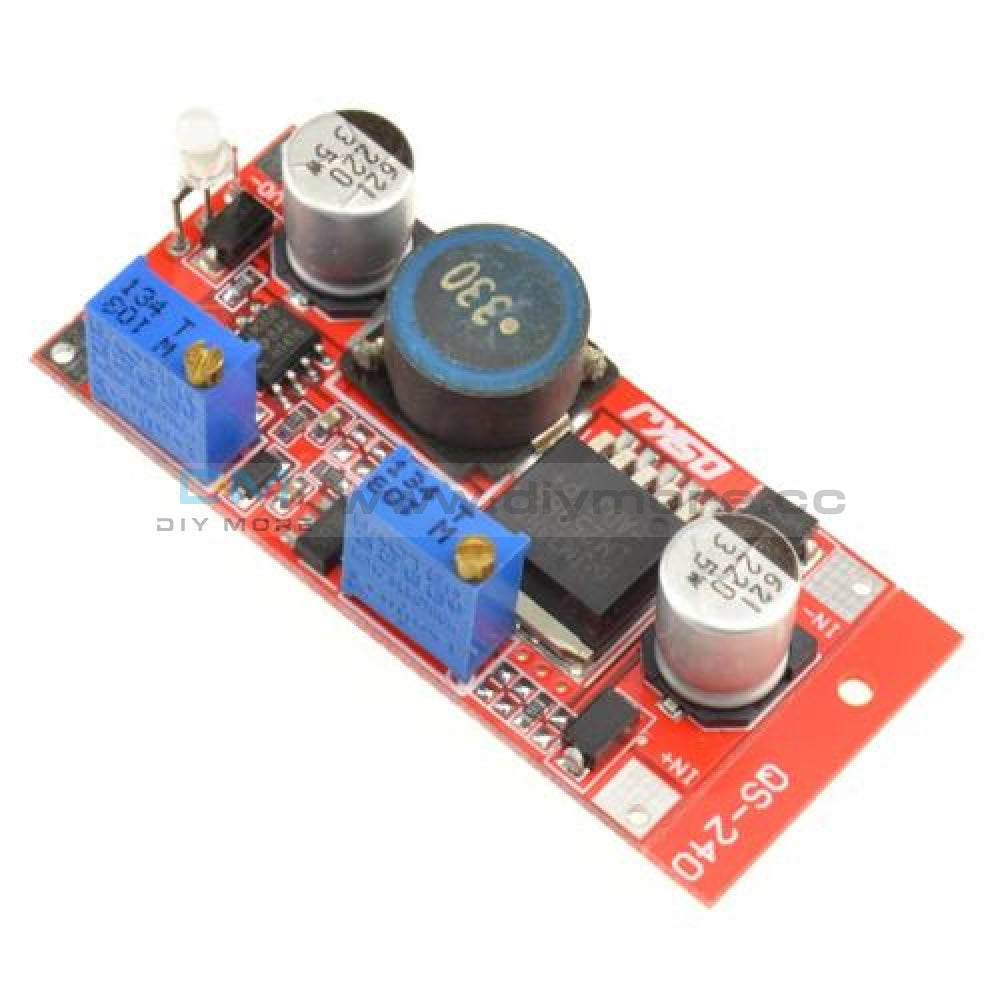
1.Fixed turn the lamp current to 0.1 times the value of the constant current (charge when used to identify whether the battery is full);
2. Increased input reverse polarity protection diode;
3. Increase the output of a backflow preventing diode to prevent when the electricity to charge the battery back in;
4. Using dedicated reference IC, and high-precision sampling resistor, so that the constant current is more stable, (20 degrees to 100 degrees, the constant current 1A, when the temperature drift of less than 1%).
Particularly suitable for LED driver
High-power LED constant current drive
Lithium battery charger (including ferroelectric)
4V, 6V, 12V, 14V, 24V battery charger
Nickel cadmium, nickel metal hydride battery pack charger
Solar panels and wind turbines
Specifications:
Input Voltage: 5-35V
Output Voltage: Continuously adjustable from 1.25 V to 30V
Rated Output Current: 3A
Max. Output Current:4A(more than 15W, preferably with a heat sink)
Size (L x W x H): Approx. 1.9 x 0.95 x 0.5 inch / 4.8 x 2.4 x1.3cm
Indicator Light
Constant current indicator(red)
Charging indicator(red)
Charged full (green)
Battery use:
l Make sure of the voltage and current of the battery you need to charge
l Adjust the constant voltage potentiometer to make the output voltage same to the charge voltage
l Potentiometer Adjustment Direction: Clockwise (increase), counterclockwise (decrease)
Use the multimeter in 10A current scale to measure output short-circuit current, and adjust the current potentiometer to make sure the output current to the expected charging current value
l The charge current of transfer lamp is default 0.1 times of the charging current (constant current value)
l Connected to the battery and try to charging (for previous 5 steps, module input terminal is connected to power source, output load is NOT connected to batteries)
LED Constant Current Driver Use:
l Make sure operating current and Max operating Voltage of the LED you need to drive
l Adjust the constant voltage potentiometer to make sure the output Voltage is up to LED Max operating Voltage
Use the multimeter in 10A current scale to measure output short-circuit current, and adjust the current potentiometer
l to make sure the output current to the expected LED operating current
l Join LED, test (For the above 3 steps, module input terminal is connected to power source, output load is NOT connected to LED)
Package included:
1 x Adjustable Power Supply Module
Purchasing & Delivery
Before you make your purchase, it’s helpful to know the measurements of the area you plan to place the furniture. You should also measure any doorways and hallways through which the furniture will pass to get to its final destination.Picking up at the store
Shopify Shop requires that all products are properly inspected BEFORE you take it home to insure there are no surprises. Our team is happy to open all packages and will assist in the inspection process. We will then reseal packages for safe transport. We encourage all customers to bring furniture pads or blankets to protect the items during transport as well as rope or tie downs. Shopify Shop will not be responsible for damage that occurs after leaving the store or during transit. It is the purchaser’s responsibility to make sure the correct items are picked up and in good condition.Delivery
Customers are able to pick the next available delivery day that best fits their schedule. However, to route stops as efficiently as possible, Shopify Shop will provide the time frame. Customers will not be able to choose a time. You will be notified in advance of your scheduled time frame. Please make sure that a responsible adult (18 years or older) will be home at that time.In preparation for your delivery, please remove existing furniture, pictures, mirrors, accessories, etc. to prevent damages. Also insure that the area where you would like your furniture placed is clear of any old furniture and any other items that may obstruct the passageway of the delivery team. Shopify Shop will deliver, assemble, and set-up your new furniture purchase and remove all packing materials from your home. Our delivery crews are not permitted to move your existing furniture or other household items. Delivery personnel will attempt to deliver the purchased items in a safe and controlled manner but will not attempt to place furniture if they feel it will result in damage to the product or your home. Delivery personnel are unable to remove doors, hoist furniture or carry furniture up more than 3 flights of stairs. An elevator must be available for deliveries to the 4th floor and above.
Other Customers also buy:
-
Translation missing: en.products.product.regular_price $5.99 USD{"id":2513526194234,"title":"DC DC Step Down Power Supply Module LM2596 Constant Current Adjustable Voltage Board","handle":"dc-dc-5-35v-to-1-25-30v-3a-step-down-buck-power-supply-module-lm2596-constant-current-adjustable-voltage-regulator-board","description":"\u003cwidget data-widget-type=\"customText\" id=\"33684419\" title=\"Head\" type=\"custom\"\u003e\u003c\/widget\u003e\n\u003cp\u003e\u003cstrong style=\"font-family: 'trebuchet ms'; font-size: 20px;\"\u003eUpdate content: \u003c\/strong\u003e\u003c\/p\u003e\n\u003cp\u003e\u003cspan style=\"font-size: 16.0px; font-family: trebuchet ms;\"\u003e1.Fixed turn the lamp current to 0.1 times the value of the constant current (charge when used to identify whether the battery is full); \u003c\/span\u003e\u003cbr\u003e\u003cspan style=\"font-size: 16.0px; font-family: trebuchet ms;\"\u003e2. Increased input reverse polarity protection diode; \u003c\/span\u003e\u003cbr\u003e\u003cspan style=\"font-size: 16.0px; font-family: trebuchet ms;\"\u003e3. Increase the output of a backflow preventing diode to prevent when the electricity to charge the battery back in; \u003c\/span\u003e\u003cbr\u003e\u003cspan style=\"font-size: 16.0px; font-family: trebuchet ms;\"\u003e4. Using dedicated reference IC, and high-precision sampling resistor, so that the constant current is more stable, (20 degrees to 100 degrees, the constant current 1A, when the temperature drift of less than 1%). \u003c\/span\u003e\u003cbr\u003e\u003cspan style=\"font-size: 16.0px; font-family: trebuchet ms;\"\u003e \u003c\/span\u003e\u003cbr\u003e\u003cspan style=\"font-size: 16.0px; font-family: trebuchet ms;\"\u003eParticularly suitable for LED driver \u003c\/span\u003e\u003cbr\u003e\u003cspan style=\"font-size: 16.0px; font-family: trebuchet ms;\"\u003eHigh-power LED constant current drive \u003c\/span\u003e\u003cbr\u003e\u003cspan style=\"font-size: 16.0px; font-family: trebuchet ms;\"\u003eLithium battery charger (including ferroelectric) \u003c\/span\u003e\u003cbr\u003e\u003cspan style=\"font-size: 16.0px; font-family: trebuchet ms;\"\u003e4V, 6V, 12V, 14V, 24V battery charger \u003c\/span\u003e\u003cbr\u003e\u003cspan style=\"font-size: 16.0px; font-family: trebuchet ms;\"\u003eNickel cadmium, nickel metal hydride battery pack charger \u003c\/span\u003e\u003cbr\u003e\u003cspan style=\"font-size: 16.0px; font-family: trebuchet ms;\"\u003eSolar panels and wind turbines \u003c\/span\u003e\u003cbr\u003e\u003cspan style=\"font-size: 16.0px; font-family: trebuchet ms;\"\u003e \u003c\/span\u003e\u003cbr\u003e\u003cspan style=\"font-size: 20.0px; font-family: trebuchet ms;\"\u003e\u003cstrong\u003eSpecifications: \u003c\/strong\u003e\u003c\/span\u003e\u003cbr\u003e\u003cspan style=\"font-size: 16.0px; font-family: trebuchet ms;\"\u003eInput Voltage: 5-35V \u003c\/span\u003e\u003cbr\u003e\u003cspan style=\"font-size: 16.0px; font-family: trebuchet ms;\"\u003eOutput Voltage: Continuously adjustable from 1.25 V to 30V \u003c\/span\u003e\u003cbr\u003e\u003cspan style=\"font-size: 16.0px; font-family: trebuchet ms;\"\u003eRated Output Current: 3A \u003c\/span\u003e\u003cbr\u003e\u003cspan style=\"font-size: 16.0px; font-family: trebuchet ms;\"\u003eMax. Output Current:4A(more than 15W, preferably with a heat sink) \u003c\/span\u003e\u003cbr\u003e\u003cspan style=\"font-size: 16.0px; font-family: trebuchet ms;\"\u003eSize (L x W x H): Approx. 1.9 x 0.95 x 0.5 inch \/ 4.8 x 2.4 x1.3cm \u003c\/span\u003e\u003cbr\u003e\u003cspan style=\"font-size: 16.0px; font-family: trebuchet ms;\"\u003eIndicator Light \u003c\/span\u003e\u003cbr\u003e\u003cspan style=\"font-size: 16.0px; font-family: trebuchet ms;\"\u003eConstant current indicator(red) \u003c\/span\u003e\u003cbr\u003e\u003cspan style=\"font-size: 16.0px; font-family: trebuchet ms;\"\u003eCharging indicator(red) \u003c\/span\u003e\u003cbr\u003e\u003cspan style=\"font-size: 16.0px; font-family: trebuchet ms;\"\u003eCharged full (green) \u003c\/span\u003e\u003cbr\u003e\u003cspan style=\"font-size: 16.0px; font-family: trebuchet ms;\"\u003eBattery use: \u003c\/span\u003e\u003cbr\u003e\u003cspan style=\"font-size: 16.0px; font-family: trebuchet ms;\"\u003e \u003c\/span\u003e\u003cbr\u003e\u003cspan style=\"font-size: 16.0px; font-family: trebuchet ms;\"\u003el Make sure of the voltage and current of the battery you need to charge \u003c\/span\u003e\u003cbr\u003e\u003cspan style=\"font-size: 16.0px; font-family: trebuchet ms;\"\u003el Adjust the constant voltage potentiometer to make the output voltage same to the charge voltage \u003c\/span\u003e\u003cbr\u003e\u003cspan style=\"font-size: 16.0px; font-family: trebuchet ms;\"\u003el Potentiometer Adjustment Direction: Clockwise (increase), counterclockwise (decrease) \u003c\/span\u003e\u003cbr\u003e\u003cspan style=\"font-size: 16.0px; font-family: trebuchet ms;\"\u003eUse the multimeter in 10A current scale to measure output short-circuit current, and adjust the current potentiometer to make sure the output current to the expected charging current value \u003c\/span\u003e\u003cbr\u003e\u003cspan style=\"font-size: 16.0px; font-family: trebuchet ms;\"\u003el The charge current of transfer lamp is default 0.1 times of the charging current (constant current value) \u003c\/span\u003e\u003cbr\u003e\u003cspan style=\"font-size: 16.0px; font-family: trebuchet ms;\"\u003el Connected to the battery and try to charging (for previous 5 steps, module input terminal is connected to power source, output load is NOT connected to batteries) \u003c\/span\u003e\u003cbr\u003e\u003cspan style=\"font-size: 16.0px; font-family: trebuchet ms;\"\u003e \u003c\/span\u003e\u003cbr\u003e\u003cspan style=\"font-size: 16.0px; font-family: trebuchet ms;\"\u003eLED Constant Current Driver Use: \u003c\/span\u003e\u003cbr\u003e\u003cspan style=\"font-size: 16.0px; font-family: trebuchet ms;\"\u003el Make sure operating current and Max operating Voltage of the LED you need to drive \u003c\/span\u003e\u003cbr\u003e\u003cspan style=\"font-size: 16.0px; font-family: trebuchet ms;\"\u003el Adjust the constant voltage potentiometer to make sure the output Voltage is up to LED Max operating Voltage \u003c\/span\u003e\u003cbr\u003e\u003cspan style=\"font-size: 16.0px; font-family: trebuchet ms;\"\u003eUse the multimeter in 10A current scale to measure output short-circuit current, and adjust the current potentiometer \u003c\/span\u003e\u003cbr\u003e\u003cspan style=\"font-size: 16.0px; font-family: trebuchet ms;\"\u003el to make sure the output current to the expected LED operating current \u003c\/span\u003e\u003cbr\u003e\u003cspan style=\"font-size: 16.0px; font-family: trebuchet ms;\"\u003el Join LED, test (For the above 3 steps, module input terminal is connected to power source, output load is NOT connected to LED) \u003c\/span\u003e\u003cbr\u003e\u003cspan style=\"font-size: 16.0px; font-family: trebuchet ms;\"\u003e \u003c\/span\u003e\u003cbr\u003e\u003cspan style=\"font-size: 20.0px; font-family: trebuchet ms;\"\u003e\u003cstrong\u003ePackage included: \u003c\/strong\u003e\u003c\/span\u003e\u003cbr\u003e\u003cspan style=\"font-size: 16.0px; font-family: trebuchet ms;\"\u003e1 x Adjustable Power Supply Module\u003c\/span\u003e\u003c\/p\u003e\n\u003cp\u003e \u003c\/p\u003e\n\u003cp\u003e \u003c\/p\u003e","published_at":"2019-09-11T14:58:00+08:00","created_at":"2019-09-11T14:58:01+08:00","vendor":"diymore","type":"Step Down Module","tags":[],"price":499,"price_min":499,"price_max":499,"available":true,"price_varies":false,"compare_at_price":null,"compare_at_price_min":0,"compare_at_price_max":0,"compare_at_price_varies":false,"variants":[{"id":23704873369658,"title":"Default Title","option1":"Default Title","option2":null,"option3":null,"sku":"010058","requires_shipping":true,"taxable":false,"featured_image":null,"available":true,"name":"DC DC Step Down Power Supply Module LM2596 Constant Current Adjustable Voltage Board","public_title":null,"options":["Default Title"],"price":499,"weight":0,"compare_at_price":null,"inventory_management":null,"barcode":"","requires_selling_plan":false,"selling_plan_allocations":[]}],"images":["\/\/www.diymore.cc\/cdn\/shop\/products\/010058_10c_992.jpg?v=1588661240","\/\/www.diymore.cc\/cdn\/shop\/products\/010058_10a_476.jpg?v=1588661240","\/\/www.diymore.cc\/cdn\/shop\/products\/010058_10w_200.jpg?v=1588661240"],"featured_image":"\/\/www.diymore.cc\/cdn\/shop\/products\/010058_10c_992.jpg?v=1588661240","options":["Title"],"media":[{"alt":"Dc Step Down Power Supply Module Lm2596 Constant Current Adjustable Voltage Board","id":6679075061831,"position":1,"preview_image":{"aspect_ratio":1.0,"height":1000,"width":1000,"src":"\/\/www.diymore.cc\/cdn\/shop\/products\/010058_10c_992.jpg?v=1588661240"},"aspect_ratio":1.0,"height":1000,"media_type":"image","src":"\/\/www.diymore.cc\/cdn\/shop\/products\/010058_10c_992.jpg?v=1588661240","width":1000},{"alt":"Dc Step Down Power Supply Module Lm2596 Constant Current Adjustable Voltage Board","id":6679075094599,"position":2,"preview_image":{"aspect_ratio":1.0,"height":1000,"width":1000,"src":"\/\/www.diymore.cc\/cdn\/shop\/products\/010058_10a_476.jpg?v=1588661240"},"aspect_ratio":1.0,"height":1000,"media_type":"image","src":"\/\/www.diymore.cc\/cdn\/shop\/products\/010058_10a_476.jpg?v=1588661240","width":1000},{"alt":"Dc Step Down Power Supply Module Lm2596 Constant Current Adjustable Voltage Board","id":6679075225671,"position":3,"preview_image":{"aspect_ratio":1.0,"height":1000,"width":1000,"src":"\/\/www.diymore.cc\/cdn\/shop\/products\/010058_10w_200.jpg?v=1588661240"},"aspect_ratio":1.0,"height":1000,"media_type":"image","src":"\/\/www.diymore.cc\/cdn\/shop\/products\/010058_10w_200.jpg?v=1588661240","width":1000}],"requires_selling_plan":false,"selling_plan_groups":[],"content":"\u003cwidget data-widget-type=\"customText\" id=\"33684419\" title=\"Head\" type=\"custom\"\u003e\u003c\/widget\u003e\n\u003cp\u003e\u003cstrong style=\"font-family: 'trebuchet ms'; font-size: 20px;\"\u003eUpdate content: \u003c\/strong\u003e\u003c\/p\u003e\n\u003cp\u003e\u003cspan style=\"font-size: 16.0px; font-family: trebuchet ms;\"\u003e1.Fixed turn the lamp current to 0.1 times the value of the constant current (charge when used to identify whether the battery is full); \u003c\/span\u003e\u003cbr\u003e\u003cspan style=\"font-size: 16.0px; font-family: trebuchet ms;\"\u003e2. Increased input reverse polarity protection diode; \u003c\/span\u003e\u003cbr\u003e\u003cspan style=\"font-size: 16.0px; font-family: trebuchet ms;\"\u003e3. Increase the output of a backflow preventing diode to prevent when the electricity to charge the battery back in; \u003c\/span\u003e\u003cbr\u003e\u003cspan style=\"font-size: 16.0px; font-family: trebuchet ms;\"\u003e4. Using dedicated reference IC, and high-precision sampling resistor, so that the constant current is more stable, (20 degrees to 100 degrees, the constant current 1A, when the temperature drift of less than 1%). \u003c\/span\u003e\u003cbr\u003e\u003cspan style=\"font-size: 16.0px; font-family: trebuchet ms;\"\u003e \u003c\/span\u003e\u003cbr\u003e\u003cspan style=\"font-size: 16.0px; font-family: trebuchet ms;\"\u003eParticularly suitable for LED driver \u003c\/span\u003e\u003cbr\u003e\u003cspan style=\"font-size: 16.0px; font-family: trebuchet ms;\"\u003eHigh-power LED constant current drive \u003c\/span\u003e\u003cbr\u003e\u003cspan style=\"font-size: 16.0px; font-family: trebuchet ms;\"\u003eLithium battery charger (including ferroelectric) \u003c\/span\u003e\u003cbr\u003e\u003cspan style=\"font-size: 16.0px; font-family: trebuchet ms;\"\u003e4V, 6V, 12V, 14V, 24V battery charger \u003c\/span\u003e\u003cbr\u003e\u003cspan style=\"font-size: 16.0px; font-family: trebuchet ms;\"\u003eNickel cadmium, nickel metal hydride battery pack charger \u003c\/span\u003e\u003cbr\u003e\u003cspan style=\"font-size: 16.0px; font-family: trebuchet ms;\"\u003eSolar panels and wind turbines \u003c\/span\u003e\u003cbr\u003e\u003cspan style=\"font-size: 16.0px; font-family: trebuchet ms;\"\u003e \u003c\/span\u003e\u003cbr\u003e\u003cspan style=\"font-size: 20.0px; font-family: trebuchet ms;\"\u003e\u003cstrong\u003eSpecifications: \u003c\/strong\u003e\u003c\/span\u003e\u003cbr\u003e\u003cspan style=\"font-size: 16.0px; font-family: trebuchet ms;\"\u003eInput Voltage: 5-35V \u003c\/span\u003e\u003cbr\u003e\u003cspan style=\"font-size: 16.0px; font-family: trebuchet ms;\"\u003eOutput Voltage: Continuously adjustable from 1.25 V to 30V \u003c\/span\u003e\u003cbr\u003e\u003cspan style=\"font-size: 16.0px; font-family: trebuchet ms;\"\u003eRated Output Current: 3A \u003c\/span\u003e\u003cbr\u003e\u003cspan style=\"font-size: 16.0px; font-family: trebuchet ms;\"\u003eMax. Output Current:4A(more than 15W, preferably with a heat sink) \u003c\/span\u003e\u003cbr\u003e\u003cspan style=\"font-size: 16.0px; font-family: trebuchet ms;\"\u003eSize (L x W x H): Approx. 1.9 x 0.95 x 0.5 inch \/ 4.8 x 2.4 x1.3cm \u003c\/span\u003e\u003cbr\u003e\u003cspan style=\"font-size: 16.0px; font-family: trebuchet ms;\"\u003eIndicator Light \u003c\/span\u003e\u003cbr\u003e\u003cspan style=\"font-size: 16.0px; font-family: trebuchet ms;\"\u003eConstant current indicator(red) \u003c\/span\u003e\u003cbr\u003e\u003cspan style=\"font-size: 16.0px; font-family: trebuchet ms;\"\u003eCharging indicator(red) \u003c\/span\u003e\u003cbr\u003e\u003cspan style=\"font-size: 16.0px; font-family: trebuchet ms;\"\u003eCharged full (green) \u003c\/span\u003e\u003cbr\u003e\u003cspan style=\"font-size: 16.0px; font-family: trebuchet ms;\"\u003eBattery use: \u003c\/span\u003e\u003cbr\u003e\u003cspan style=\"font-size: 16.0px; font-family: trebuchet ms;\"\u003e \u003c\/span\u003e\u003cbr\u003e\u003cspan style=\"font-size: 16.0px; font-family: trebuchet ms;\"\u003el Make sure of the voltage and current of the battery you need to charge \u003c\/span\u003e\u003cbr\u003e\u003cspan style=\"font-size: 16.0px; font-family: trebuchet ms;\"\u003el Adjust the constant voltage potentiometer to make the output voltage same to the charge voltage \u003c\/span\u003e\u003cbr\u003e\u003cspan style=\"font-size: 16.0px; font-family: trebuchet ms;\"\u003el Potentiometer Adjustment Direction: Clockwise (increase), counterclockwise (decrease) \u003c\/span\u003e\u003cbr\u003e\u003cspan style=\"font-size: 16.0px; font-family: trebuchet ms;\"\u003eUse the multimeter in 10A current scale to measure output short-circuit current, and adjust the current potentiometer to make sure the output current to the expected charging current value \u003c\/span\u003e\u003cbr\u003e\u003cspan style=\"font-size: 16.0px; font-family: trebuchet ms;\"\u003el The charge current of transfer lamp is default 0.1 times of the charging current (constant current value) \u003c\/span\u003e\u003cbr\u003e\u003cspan style=\"font-size: 16.0px; font-family: trebuchet ms;\"\u003el Connected to the battery and try to charging (for previous 5 steps, module input terminal is connected to power source, output load is NOT connected to batteries) \u003c\/span\u003e\u003cbr\u003e\u003cspan style=\"font-size: 16.0px; font-family: trebuchet ms;\"\u003e \u003c\/span\u003e\u003cbr\u003e\u003cspan style=\"font-size: 16.0px; font-family: trebuchet ms;\"\u003eLED Constant Current Driver Use: \u003c\/span\u003e\u003cbr\u003e\u003cspan style=\"font-size: 16.0px; font-family: trebuchet ms;\"\u003el Make sure operating current and Max operating Voltage of the LED you need to drive \u003c\/span\u003e\u003cbr\u003e\u003cspan style=\"font-size: 16.0px; font-family: trebuchet ms;\"\u003el Adjust the constant voltage potentiometer to make sure the output Voltage is up to LED Max operating Voltage \u003c\/span\u003e\u003cbr\u003e\u003cspan style=\"font-size: 16.0px; font-family: trebuchet ms;\"\u003eUse the multimeter in 10A current scale to measure output short-circuit current, and adjust the current potentiometer \u003c\/span\u003e\u003cbr\u003e\u003cspan style=\"font-size: 16.0px; font-family: trebuchet ms;\"\u003el to make sure the output current to the expected LED operating current \u003c\/span\u003e\u003cbr\u003e\u003cspan style=\"font-size: 16.0px; font-family: trebuchet ms;\"\u003el Join LED, test (For the above 3 steps, module input terminal is connected to power source, output load is NOT connected to LED) \u003c\/span\u003e\u003cbr\u003e\u003cspan style=\"font-size: 16.0px; font-family: trebuchet ms;\"\u003e \u003c\/span\u003e\u003cbr\u003e\u003cspan style=\"font-size: 20.0px; font-family: trebuchet ms;\"\u003e\u003cstrong\u003ePackage included: \u003c\/strong\u003e\u003c\/span\u003e\u003cbr\u003e\u003cspan style=\"font-size: 16.0px; font-family: trebuchet ms;\"\u003e1 x Adjustable Power Supply Module\u003c\/span\u003e\u003c\/p\u003e\n\u003cp\u003e \u003c\/p\u003e\n\u003cp\u003e \u003c\/p\u003e"}
-
Translation missing: en.products.product.regular_price $7.99 USD{"id":2513526194234,"title":"DC DC Step Down Power Supply Module LM2596 Constant Current Adjustable Voltage Board","handle":"dc-dc-5-35v-to-1-25-30v-3a-step-down-buck-power-supply-module-lm2596-constant-current-adjustable-voltage-regulator-board","description":"\u003cwidget data-widget-type=\"customText\" id=\"33684419\" title=\"Head\" type=\"custom\"\u003e\u003c\/widget\u003e\n\u003cp\u003e\u003cstrong style=\"font-family: 'trebuchet ms'; font-size: 20px;\"\u003eUpdate content: \u003c\/strong\u003e\u003c\/p\u003e\n\u003cp\u003e\u003cspan style=\"font-size: 16.0px; font-family: trebuchet ms;\"\u003e1.Fixed turn the lamp current to 0.1 times the value of the constant current (charge when used to identify whether the battery is full); \u003c\/span\u003e\u003cbr\u003e\u003cspan style=\"font-size: 16.0px; font-family: trebuchet ms;\"\u003e2. Increased input reverse polarity protection diode; \u003c\/span\u003e\u003cbr\u003e\u003cspan style=\"font-size: 16.0px; font-family: trebuchet ms;\"\u003e3. Increase the output of a backflow preventing diode to prevent when the electricity to charge the battery back in; \u003c\/span\u003e\u003cbr\u003e\u003cspan style=\"font-size: 16.0px; font-family: trebuchet ms;\"\u003e4. Using dedicated reference IC, and high-precision sampling resistor, so that the constant current is more stable, (20 degrees to 100 degrees, the constant current 1A, when the temperature drift of less than 1%). \u003c\/span\u003e\u003cbr\u003e\u003cspan style=\"font-size: 16.0px; font-family: trebuchet ms;\"\u003e \u003c\/span\u003e\u003cbr\u003e\u003cspan style=\"font-size: 16.0px; font-family: trebuchet ms;\"\u003eParticularly suitable for LED driver \u003c\/span\u003e\u003cbr\u003e\u003cspan style=\"font-size: 16.0px; font-family: trebuchet ms;\"\u003eHigh-power LED constant current drive \u003c\/span\u003e\u003cbr\u003e\u003cspan style=\"font-size: 16.0px; font-family: trebuchet ms;\"\u003eLithium battery charger (including ferroelectric) \u003c\/span\u003e\u003cbr\u003e\u003cspan style=\"font-size: 16.0px; font-family: trebuchet ms;\"\u003e4V, 6V, 12V, 14V, 24V battery charger \u003c\/span\u003e\u003cbr\u003e\u003cspan style=\"font-size: 16.0px; font-family: trebuchet ms;\"\u003eNickel cadmium, nickel metal hydride battery pack charger \u003c\/span\u003e\u003cbr\u003e\u003cspan style=\"font-size: 16.0px; font-family: trebuchet ms;\"\u003eSolar panels and wind turbines \u003c\/span\u003e\u003cbr\u003e\u003cspan style=\"font-size: 16.0px; font-family: trebuchet ms;\"\u003e \u003c\/span\u003e\u003cbr\u003e\u003cspan style=\"font-size: 20.0px; font-family: trebuchet ms;\"\u003e\u003cstrong\u003eSpecifications: \u003c\/strong\u003e\u003c\/span\u003e\u003cbr\u003e\u003cspan style=\"font-size: 16.0px; font-family: trebuchet ms;\"\u003eInput Voltage: 5-35V \u003c\/span\u003e\u003cbr\u003e\u003cspan style=\"font-size: 16.0px; font-family: trebuchet ms;\"\u003eOutput Voltage: Continuously adjustable from 1.25 V to 30V \u003c\/span\u003e\u003cbr\u003e\u003cspan style=\"font-size: 16.0px; font-family: trebuchet ms;\"\u003eRated Output Current: 3A \u003c\/span\u003e\u003cbr\u003e\u003cspan style=\"font-size: 16.0px; font-family: trebuchet ms;\"\u003eMax. Output Current:4A(more than 15W, preferably with a heat sink) \u003c\/span\u003e\u003cbr\u003e\u003cspan style=\"font-size: 16.0px; font-family: trebuchet ms;\"\u003eSize (L x W x H): Approx. 1.9 x 0.95 x 0.5 inch \/ 4.8 x 2.4 x1.3cm \u003c\/span\u003e\u003cbr\u003e\u003cspan style=\"font-size: 16.0px; font-family: trebuchet ms;\"\u003eIndicator Light \u003c\/span\u003e\u003cbr\u003e\u003cspan style=\"font-size: 16.0px; font-family: trebuchet ms;\"\u003eConstant current indicator(red) \u003c\/span\u003e\u003cbr\u003e\u003cspan style=\"font-size: 16.0px; font-family: trebuchet ms;\"\u003eCharging indicator(red) \u003c\/span\u003e\u003cbr\u003e\u003cspan style=\"font-size: 16.0px; font-family: trebuchet ms;\"\u003eCharged full (green) \u003c\/span\u003e\u003cbr\u003e\u003cspan style=\"font-size: 16.0px; font-family: trebuchet ms;\"\u003eBattery use: \u003c\/span\u003e\u003cbr\u003e\u003cspan style=\"font-size: 16.0px; font-family: trebuchet ms;\"\u003e \u003c\/span\u003e\u003cbr\u003e\u003cspan style=\"font-size: 16.0px; font-family: trebuchet ms;\"\u003el Make sure of the voltage and current of the battery you need to charge \u003c\/span\u003e\u003cbr\u003e\u003cspan style=\"font-size: 16.0px; font-family: trebuchet ms;\"\u003el Adjust the constant voltage potentiometer to make the output voltage same to the charge voltage \u003c\/span\u003e\u003cbr\u003e\u003cspan style=\"font-size: 16.0px; font-family: trebuchet ms;\"\u003el Potentiometer Adjustment Direction: Clockwise (increase), counterclockwise (decrease) \u003c\/span\u003e\u003cbr\u003e\u003cspan style=\"font-size: 16.0px; font-family: trebuchet ms;\"\u003eUse the multimeter in 10A current scale to measure output short-circuit current, and adjust the current potentiometer to make sure the output current to the expected charging current value \u003c\/span\u003e\u003cbr\u003e\u003cspan style=\"font-size: 16.0px; font-family: trebuchet ms;\"\u003el The charge current of transfer lamp is default 0.1 times of the charging current (constant current value) \u003c\/span\u003e\u003cbr\u003e\u003cspan style=\"font-size: 16.0px; font-family: trebuchet ms;\"\u003el Connected to the battery and try to charging (for previous 5 steps, module input terminal is connected to power source, output load is NOT connected to batteries) \u003c\/span\u003e\u003cbr\u003e\u003cspan style=\"font-size: 16.0px; font-family: trebuchet ms;\"\u003e \u003c\/span\u003e\u003cbr\u003e\u003cspan style=\"font-size: 16.0px; font-family: trebuchet ms;\"\u003eLED Constant Current Driver Use: \u003c\/span\u003e\u003cbr\u003e\u003cspan style=\"font-size: 16.0px; font-family: trebuchet ms;\"\u003el Make sure operating current and Max operating Voltage of the LED you need to drive \u003c\/span\u003e\u003cbr\u003e\u003cspan style=\"font-size: 16.0px; font-family: trebuchet ms;\"\u003el Adjust the constant voltage potentiometer to make sure the output Voltage is up to LED Max operating Voltage \u003c\/span\u003e\u003cbr\u003e\u003cspan style=\"font-size: 16.0px; font-family: trebuchet ms;\"\u003eUse the multimeter in 10A current scale to measure output short-circuit current, and adjust the current potentiometer \u003c\/span\u003e\u003cbr\u003e\u003cspan style=\"font-size: 16.0px; font-family: trebuchet ms;\"\u003el to make sure the output current to the expected LED operating current \u003c\/span\u003e\u003cbr\u003e\u003cspan style=\"font-size: 16.0px; font-family: trebuchet ms;\"\u003el Join LED, test (For the above 3 steps, module input terminal is connected to power source, output load is NOT connected to LED) \u003c\/span\u003e\u003cbr\u003e\u003cspan style=\"font-size: 16.0px; font-family: trebuchet ms;\"\u003e \u003c\/span\u003e\u003cbr\u003e\u003cspan style=\"font-size: 20.0px; font-family: trebuchet ms;\"\u003e\u003cstrong\u003ePackage included: \u003c\/strong\u003e\u003c\/span\u003e\u003cbr\u003e\u003cspan style=\"font-size: 16.0px; font-family: trebuchet ms;\"\u003e1 x Adjustable Power Supply Module\u003c\/span\u003e\u003c\/p\u003e\n\u003cp\u003e \u003c\/p\u003e\n\u003cp\u003e \u003c\/p\u003e","published_at":"2019-09-11T14:58:00+08:00","created_at":"2019-09-11T14:58:01+08:00","vendor":"diymore","type":"Step Down Module","tags":[],"price":499,"price_min":499,"price_max":499,"available":true,"price_varies":false,"compare_at_price":null,"compare_at_price_min":0,"compare_at_price_max":0,"compare_at_price_varies":false,"variants":[{"id":23704873369658,"title":"Default Title","option1":"Default Title","option2":null,"option3":null,"sku":"010058","requires_shipping":true,"taxable":false,"featured_image":null,"available":true,"name":"DC DC Step Down Power Supply Module LM2596 Constant Current Adjustable Voltage Board","public_title":null,"options":["Default Title"],"price":499,"weight":0,"compare_at_price":null,"inventory_management":null,"barcode":"","requires_selling_plan":false,"selling_plan_allocations":[]}],"images":["\/\/www.diymore.cc\/cdn\/shop\/products\/010058_10c_992.jpg?v=1588661240","\/\/www.diymore.cc\/cdn\/shop\/products\/010058_10a_476.jpg?v=1588661240","\/\/www.diymore.cc\/cdn\/shop\/products\/010058_10w_200.jpg?v=1588661240"],"featured_image":"\/\/www.diymore.cc\/cdn\/shop\/products\/010058_10c_992.jpg?v=1588661240","options":["Title"],"media":[{"alt":"Dc Step Down Power Supply Module Lm2596 Constant Current Adjustable Voltage Board","id":6679075061831,"position":1,"preview_image":{"aspect_ratio":1.0,"height":1000,"width":1000,"src":"\/\/www.diymore.cc\/cdn\/shop\/products\/010058_10c_992.jpg?v=1588661240"},"aspect_ratio":1.0,"height":1000,"media_type":"image","src":"\/\/www.diymore.cc\/cdn\/shop\/products\/010058_10c_992.jpg?v=1588661240","width":1000},{"alt":"Dc Step Down Power Supply Module Lm2596 Constant Current Adjustable Voltage Board","id":6679075094599,"position":2,"preview_image":{"aspect_ratio":1.0,"height":1000,"width":1000,"src":"\/\/www.diymore.cc\/cdn\/shop\/products\/010058_10a_476.jpg?v=1588661240"},"aspect_ratio":1.0,"height":1000,"media_type":"image","src":"\/\/www.diymore.cc\/cdn\/shop\/products\/010058_10a_476.jpg?v=1588661240","width":1000},{"alt":"Dc Step Down Power Supply Module Lm2596 Constant Current Adjustable Voltage Board","id":6679075225671,"position":3,"preview_image":{"aspect_ratio":1.0,"height":1000,"width":1000,"src":"\/\/www.diymore.cc\/cdn\/shop\/products\/010058_10w_200.jpg?v=1588661240"},"aspect_ratio":1.0,"height":1000,"media_type":"image","src":"\/\/www.diymore.cc\/cdn\/shop\/products\/010058_10w_200.jpg?v=1588661240","width":1000}],"requires_selling_plan":false,"selling_plan_groups":[],"content":"\u003cwidget data-widget-type=\"customText\" id=\"33684419\" title=\"Head\" type=\"custom\"\u003e\u003c\/widget\u003e\n\u003cp\u003e\u003cstrong style=\"font-family: 'trebuchet ms'; font-size: 20px;\"\u003eUpdate content: \u003c\/strong\u003e\u003c\/p\u003e\n\u003cp\u003e\u003cspan style=\"font-size: 16.0px; font-family: trebuchet ms;\"\u003e1.Fixed turn the lamp current to 0.1 times the value of the constant current (charge when used to identify whether the battery is full); \u003c\/span\u003e\u003cbr\u003e\u003cspan style=\"font-size: 16.0px; font-family: trebuchet ms;\"\u003e2. Increased input reverse polarity protection diode; \u003c\/span\u003e\u003cbr\u003e\u003cspan style=\"font-size: 16.0px; font-family: trebuchet ms;\"\u003e3. Increase the output of a backflow preventing diode to prevent when the electricity to charge the battery back in; \u003c\/span\u003e\u003cbr\u003e\u003cspan style=\"font-size: 16.0px; font-family: trebuchet ms;\"\u003e4. Using dedicated reference IC, and high-precision sampling resistor, so that the constant current is more stable, (20 degrees to 100 degrees, the constant current 1A, when the temperature drift of less than 1%). \u003c\/span\u003e\u003cbr\u003e\u003cspan style=\"font-size: 16.0px; font-family: trebuchet ms;\"\u003e \u003c\/span\u003e\u003cbr\u003e\u003cspan style=\"font-size: 16.0px; font-family: trebuchet ms;\"\u003eParticularly suitable for LED driver \u003c\/span\u003e\u003cbr\u003e\u003cspan style=\"font-size: 16.0px; font-family: trebuchet ms;\"\u003eHigh-power LED constant current drive \u003c\/span\u003e\u003cbr\u003e\u003cspan style=\"font-size: 16.0px; font-family: trebuchet ms;\"\u003eLithium battery charger (including ferroelectric) \u003c\/span\u003e\u003cbr\u003e\u003cspan style=\"font-size: 16.0px; font-family: trebuchet ms;\"\u003e4V, 6V, 12V, 14V, 24V battery charger \u003c\/span\u003e\u003cbr\u003e\u003cspan style=\"font-size: 16.0px; font-family: trebuchet ms;\"\u003eNickel cadmium, nickel metal hydride battery pack charger \u003c\/span\u003e\u003cbr\u003e\u003cspan style=\"font-size: 16.0px; font-family: trebuchet ms;\"\u003eSolar panels and wind turbines \u003c\/span\u003e\u003cbr\u003e\u003cspan style=\"font-size: 16.0px; font-family: trebuchet ms;\"\u003e \u003c\/span\u003e\u003cbr\u003e\u003cspan style=\"font-size: 20.0px; font-family: trebuchet ms;\"\u003e\u003cstrong\u003eSpecifications: \u003c\/strong\u003e\u003c\/span\u003e\u003cbr\u003e\u003cspan style=\"font-size: 16.0px; font-family: trebuchet ms;\"\u003eInput Voltage: 5-35V \u003c\/span\u003e\u003cbr\u003e\u003cspan style=\"font-size: 16.0px; font-family: trebuchet ms;\"\u003eOutput Voltage: Continuously adjustable from 1.25 V to 30V \u003c\/span\u003e\u003cbr\u003e\u003cspan style=\"font-size: 16.0px; font-family: trebuchet ms;\"\u003eRated Output Current: 3A \u003c\/span\u003e\u003cbr\u003e\u003cspan style=\"font-size: 16.0px; font-family: trebuchet ms;\"\u003eMax. Output Current:4A(more than 15W, preferably with a heat sink) \u003c\/span\u003e\u003cbr\u003e\u003cspan style=\"font-size: 16.0px; font-family: trebuchet ms;\"\u003eSize (L x W x H): Approx. 1.9 x 0.95 x 0.5 inch \/ 4.8 x 2.4 x1.3cm \u003c\/span\u003e\u003cbr\u003e\u003cspan style=\"font-size: 16.0px; font-family: trebuchet ms;\"\u003eIndicator Light \u003c\/span\u003e\u003cbr\u003e\u003cspan style=\"font-size: 16.0px; font-family: trebuchet ms;\"\u003eConstant current indicator(red) \u003c\/span\u003e\u003cbr\u003e\u003cspan style=\"font-size: 16.0px; font-family: trebuchet ms;\"\u003eCharging indicator(red) \u003c\/span\u003e\u003cbr\u003e\u003cspan style=\"font-size: 16.0px; font-family: trebuchet ms;\"\u003eCharged full (green) \u003c\/span\u003e\u003cbr\u003e\u003cspan style=\"font-size: 16.0px; font-family: trebuchet ms;\"\u003eBattery use: \u003c\/span\u003e\u003cbr\u003e\u003cspan style=\"font-size: 16.0px; font-family: trebuchet ms;\"\u003e \u003c\/span\u003e\u003cbr\u003e\u003cspan style=\"font-size: 16.0px; font-family: trebuchet ms;\"\u003el Make sure of the voltage and current of the battery you need to charge \u003c\/span\u003e\u003cbr\u003e\u003cspan style=\"font-size: 16.0px; font-family: trebuchet ms;\"\u003el Adjust the constant voltage potentiometer to make the output voltage same to the charge voltage \u003c\/span\u003e\u003cbr\u003e\u003cspan style=\"font-size: 16.0px; font-family: trebuchet ms;\"\u003el Potentiometer Adjustment Direction: Clockwise (increase), counterclockwise (decrease) \u003c\/span\u003e\u003cbr\u003e\u003cspan style=\"font-size: 16.0px; font-family: trebuchet ms;\"\u003eUse the multimeter in 10A current scale to measure output short-circuit current, and adjust the current potentiometer to make sure the output current to the expected charging current value \u003c\/span\u003e\u003cbr\u003e\u003cspan style=\"font-size: 16.0px; font-family: trebuchet ms;\"\u003el The charge current of transfer lamp is default 0.1 times of the charging current (constant current value) \u003c\/span\u003e\u003cbr\u003e\u003cspan style=\"font-size: 16.0px; font-family: trebuchet ms;\"\u003el Connected to the battery and try to charging (for previous 5 steps, module input terminal is connected to power source, output load is NOT connected to batteries) \u003c\/span\u003e\u003cbr\u003e\u003cspan style=\"font-size: 16.0px; font-family: trebuchet ms;\"\u003e \u003c\/span\u003e\u003cbr\u003e\u003cspan style=\"font-size: 16.0px; font-family: trebuchet ms;\"\u003eLED Constant Current Driver Use: \u003c\/span\u003e\u003cbr\u003e\u003cspan style=\"font-size: 16.0px; font-family: trebuchet ms;\"\u003el Make sure operating current and Max operating Voltage of the LED you need to drive \u003c\/span\u003e\u003cbr\u003e\u003cspan style=\"font-size: 16.0px; font-family: trebuchet ms;\"\u003el Adjust the constant voltage potentiometer to make sure the output Voltage is up to LED Max operating Voltage \u003c\/span\u003e\u003cbr\u003e\u003cspan style=\"font-size: 16.0px; font-family: trebuchet ms;\"\u003eUse the multimeter in 10A current scale to measure output short-circuit current, and adjust the current potentiometer \u003c\/span\u003e\u003cbr\u003e\u003cspan style=\"font-size: 16.0px; font-family: trebuchet ms;\"\u003el to make sure the output current to the expected LED operating current \u003c\/span\u003e\u003cbr\u003e\u003cspan style=\"font-size: 16.0px; font-family: trebuchet ms;\"\u003el Join LED, test (For the above 3 steps, module input terminal is connected to power source, output load is NOT connected to LED) \u003c\/span\u003e\u003cbr\u003e\u003cspan style=\"font-size: 16.0px; font-family: trebuchet ms;\"\u003e \u003c\/span\u003e\u003cbr\u003e\u003cspan style=\"font-size: 20.0px; font-family: trebuchet ms;\"\u003e\u003cstrong\u003ePackage included: \u003c\/strong\u003e\u003c\/span\u003e\u003cbr\u003e\u003cspan style=\"font-size: 16.0px; font-family: trebuchet ms;\"\u003e1 x Adjustable Power Supply Module\u003c\/span\u003e\u003c\/p\u003e\n\u003cp\u003e \u003c\/p\u003e\n\u003cp\u003e \u003c\/p\u003e"}
-
Translation missing: en.products.product.regular_price $5.99 USD{"id":2513526194234,"title":"DC DC Step Down Power Supply Module LM2596 Constant Current Adjustable Voltage Board","handle":"dc-dc-5-35v-to-1-25-30v-3a-step-down-buck-power-supply-module-lm2596-constant-current-adjustable-voltage-regulator-board","description":"\u003cwidget data-widget-type=\"customText\" id=\"33684419\" title=\"Head\" type=\"custom\"\u003e\u003c\/widget\u003e\n\u003cp\u003e\u003cstrong style=\"font-family: 'trebuchet ms'; font-size: 20px;\"\u003eUpdate content: \u003c\/strong\u003e\u003c\/p\u003e\n\u003cp\u003e\u003cspan style=\"font-size: 16.0px; font-family: trebuchet ms;\"\u003e1.Fixed turn the lamp current to 0.1 times the value of the constant current (charge when used to identify whether the battery is full); \u003c\/span\u003e\u003cbr\u003e\u003cspan style=\"font-size: 16.0px; font-family: trebuchet ms;\"\u003e2. Increased input reverse polarity protection diode; \u003c\/span\u003e\u003cbr\u003e\u003cspan style=\"font-size: 16.0px; font-family: trebuchet ms;\"\u003e3. Increase the output of a backflow preventing diode to prevent when the electricity to charge the battery back in; \u003c\/span\u003e\u003cbr\u003e\u003cspan style=\"font-size: 16.0px; font-family: trebuchet ms;\"\u003e4. Using dedicated reference IC, and high-precision sampling resistor, so that the constant current is more stable, (20 degrees to 100 degrees, the constant current 1A, when the temperature drift of less than 1%). \u003c\/span\u003e\u003cbr\u003e\u003cspan style=\"font-size: 16.0px; font-family: trebuchet ms;\"\u003e \u003c\/span\u003e\u003cbr\u003e\u003cspan style=\"font-size: 16.0px; font-family: trebuchet ms;\"\u003eParticularly suitable for LED driver \u003c\/span\u003e\u003cbr\u003e\u003cspan style=\"font-size: 16.0px; font-family: trebuchet ms;\"\u003eHigh-power LED constant current drive \u003c\/span\u003e\u003cbr\u003e\u003cspan style=\"font-size: 16.0px; font-family: trebuchet ms;\"\u003eLithium battery charger (including ferroelectric) \u003c\/span\u003e\u003cbr\u003e\u003cspan style=\"font-size: 16.0px; font-family: trebuchet ms;\"\u003e4V, 6V, 12V, 14V, 24V battery charger \u003c\/span\u003e\u003cbr\u003e\u003cspan style=\"font-size: 16.0px; font-family: trebuchet ms;\"\u003eNickel cadmium, nickel metal hydride battery pack charger \u003c\/span\u003e\u003cbr\u003e\u003cspan style=\"font-size: 16.0px; font-family: trebuchet ms;\"\u003eSolar panels and wind turbines \u003c\/span\u003e\u003cbr\u003e\u003cspan style=\"font-size: 16.0px; font-family: trebuchet ms;\"\u003e \u003c\/span\u003e\u003cbr\u003e\u003cspan style=\"font-size: 20.0px; font-family: trebuchet ms;\"\u003e\u003cstrong\u003eSpecifications: \u003c\/strong\u003e\u003c\/span\u003e\u003cbr\u003e\u003cspan style=\"font-size: 16.0px; font-family: trebuchet ms;\"\u003eInput Voltage: 5-35V \u003c\/span\u003e\u003cbr\u003e\u003cspan style=\"font-size: 16.0px; font-family: trebuchet ms;\"\u003eOutput Voltage: Continuously adjustable from 1.25 V to 30V \u003c\/span\u003e\u003cbr\u003e\u003cspan style=\"font-size: 16.0px; font-family: trebuchet ms;\"\u003eRated Output Current: 3A \u003c\/span\u003e\u003cbr\u003e\u003cspan style=\"font-size: 16.0px; font-family: trebuchet ms;\"\u003eMax. Output Current:4A(more than 15W, preferably with a heat sink) \u003c\/span\u003e\u003cbr\u003e\u003cspan style=\"font-size: 16.0px; font-family: trebuchet ms;\"\u003eSize (L x W x H): Approx. 1.9 x 0.95 x 0.5 inch \/ 4.8 x 2.4 x1.3cm \u003c\/span\u003e\u003cbr\u003e\u003cspan style=\"font-size: 16.0px; font-family: trebuchet ms;\"\u003eIndicator Light \u003c\/span\u003e\u003cbr\u003e\u003cspan style=\"font-size: 16.0px; font-family: trebuchet ms;\"\u003eConstant current indicator(red) \u003c\/span\u003e\u003cbr\u003e\u003cspan style=\"font-size: 16.0px; font-family: trebuchet ms;\"\u003eCharging indicator(red) \u003c\/span\u003e\u003cbr\u003e\u003cspan style=\"font-size: 16.0px; font-family: trebuchet ms;\"\u003eCharged full (green) \u003c\/span\u003e\u003cbr\u003e\u003cspan style=\"font-size: 16.0px; font-family: trebuchet ms;\"\u003eBattery use: \u003c\/span\u003e\u003cbr\u003e\u003cspan style=\"font-size: 16.0px; font-family: trebuchet ms;\"\u003e \u003c\/span\u003e\u003cbr\u003e\u003cspan style=\"font-size: 16.0px; font-family: trebuchet ms;\"\u003el Make sure of the voltage and current of the battery you need to charge \u003c\/span\u003e\u003cbr\u003e\u003cspan style=\"font-size: 16.0px; font-family: trebuchet ms;\"\u003el Adjust the constant voltage potentiometer to make the output voltage same to the charge voltage \u003c\/span\u003e\u003cbr\u003e\u003cspan style=\"font-size: 16.0px; font-family: trebuchet ms;\"\u003el Potentiometer Adjustment Direction: Clockwise (increase), counterclockwise (decrease) \u003c\/span\u003e\u003cbr\u003e\u003cspan style=\"font-size: 16.0px; font-family: trebuchet ms;\"\u003eUse the multimeter in 10A current scale to measure output short-circuit current, and adjust the current potentiometer to make sure the output current to the expected charging current value \u003c\/span\u003e\u003cbr\u003e\u003cspan style=\"font-size: 16.0px; font-family: trebuchet ms;\"\u003el The charge current of transfer lamp is default 0.1 times of the charging current (constant current value) \u003c\/span\u003e\u003cbr\u003e\u003cspan style=\"font-size: 16.0px; font-family: trebuchet ms;\"\u003el Connected to the battery and try to charging (for previous 5 steps, module input terminal is connected to power source, output load is NOT connected to batteries) \u003c\/span\u003e\u003cbr\u003e\u003cspan style=\"font-size: 16.0px; font-family: trebuchet ms;\"\u003e \u003c\/span\u003e\u003cbr\u003e\u003cspan style=\"font-size: 16.0px; font-family: trebuchet ms;\"\u003eLED Constant Current Driver Use: \u003c\/span\u003e\u003cbr\u003e\u003cspan style=\"font-size: 16.0px; font-family: trebuchet ms;\"\u003el Make sure operating current and Max operating Voltage of the LED you need to drive \u003c\/span\u003e\u003cbr\u003e\u003cspan style=\"font-size: 16.0px; font-family: trebuchet ms;\"\u003el Adjust the constant voltage potentiometer to make sure the output Voltage is up to LED Max operating Voltage \u003c\/span\u003e\u003cbr\u003e\u003cspan style=\"font-size: 16.0px; font-family: trebuchet ms;\"\u003eUse the multimeter in 10A current scale to measure output short-circuit current, and adjust the current potentiometer \u003c\/span\u003e\u003cbr\u003e\u003cspan style=\"font-size: 16.0px; font-family: trebuchet ms;\"\u003el to make sure the output current to the expected LED operating current \u003c\/span\u003e\u003cbr\u003e\u003cspan style=\"font-size: 16.0px; font-family: trebuchet ms;\"\u003el Join LED, test (For the above 3 steps, module input terminal is connected to power source, output load is NOT connected to LED) \u003c\/span\u003e\u003cbr\u003e\u003cspan style=\"font-size: 16.0px; font-family: trebuchet ms;\"\u003e \u003c\/span\u003e\u003cbr\u003e\u003cspan style=\"font-size: 20.0px; font-family: trebuchet ms;\"\u003e\u003cstrong\u003ePackage included: \u003c\/strong\u003e\u003c\/span\u003e\u003cbr\u003e\u003cspan style=\"font-size: 16.0px; font-family: trebuchet ms;\"\u003e1 x Adjustable Power Supply Module\u003c\/span\u003e\u003c\/p\u003e\n\u003cp\u003e \u003c\/p\u003e\n\u003cp\u003e \u003c\/p\u003e","published_at":"2019-09-11T14:58:00+08:00","created_at":"2019-09-11T14:58:01+08:00","vendor":"diymore","type":"Step Down Module","tags":[],"price":499,"price_min":499,"price_max":499,"available":true,"price_varies":false,"compare_at_price":null,"compare_at_price_min":0,"compare_at_price_max":0,"compare_at_price_varies":false,"variants":[{"id":23704873369658,"title":"Default Title","option1":"Default Title","option2":null,"option3":null,"sku":"010058","requires_shipping":true,"taxable":false,"featured_image":null,"available":true,"name":"DC DC Step Down Power Supply Module LM2596 Constant Current Adjustable Voltage Board","public_title":null,"options":["Default Title"],"price":499,"weight":0,"compare_at_price":null,"inventory_management":null,"barcode":"","requires_selling_plan":false,"selling_plan_allocations":[]}],"images":["\/\/www.diymore.cc\/cdn\/shop\/products\/010058_10c_992.jpg?v=1588661240","\/\/www.diymore.cc\/cdn\/shop\/products\/010058_10a_476.jpg?v=1588661240","\/\/www.diymore.cc\/cdn\/shop\/products\/010058_10w_200.jpg?v=1588661240"],"featured_image":"\/\/www.diymore.cc\/cdn\/shop\/products\/010058_10c_992.jpg?v=1588661240","options":["Title"],"media":[{"alt":"Dc Step Down Power Supply Module Lm2596 Constant Current Adjustable Voltage Board","id":6679075061831,"position":1,"preview_image":{"aspect_ratio":1.0,"height":1000,"width":1000,"src":"\/\/www.diymore.cc\/cdn\/shop\/products\/010058_10c_992.jpg?v=1588661240"},"aspect_ratio":1.0,"height":1000,"media_type":"image","src":"\/\/www.diymore.cc\/cdn\/shop\/products\/010058_10c_992.jpg?v=1588661240","width":1000},{"alt":"Dc Step Down Power Supply Module Lm2596 Constant Current Adjustable Voltage Board","id":6679075094599,"position":2,"preview_image":{"aspect_ratio":1.0,"height":1000,"width":1000,"src":"\/\/www.diymore.cc\/cdn\/shop\/products\/010058_10a_476.jpg?v=1588661240"},"aspect_ratio":1.0,"height":1000,"media_type":"image","src":"\/\/www.diymore.cc\/cdn\/shop\/products\/010058_10a_476.jpg?v=1588661240","width":1000},{"alt":"Dc Step Down Power Supply Module Lm2596 Constant Current Adjustable Voltage Board","id":6679075225671,"position":3,"preview_image":{"aspect_ratio":1.0,"height":1000,"width":1000,"src":"\/\/www.diymore.cc\/cdn\/shop\/products\/010058_10w_200.jpg?v=1588661240"},"aspect_ratio":1.0,"height":1000,"media_type":"image","src":"\/\/www.diymore.cc\/cdn\/shop\/products\/010058_10w_200.jpg?v=1588661240","width":1000}],"requires_selling_plan":false,"selling_plan_groups":[],"content":"\u003cwidget data-widget-type=\"customText\" id=\"33684419\" title=\"Head\" type=\"custom\"\u003e\u003c\/widget\u003e\n\u003cp\u003e\u003cstrong style=\"font-family: 'trebuchet ms'; font-size: 20px;\"\u003eUpdate content: \u003c\/strong\u003e\u003c\/p\u003e\n\u003cp\u003e\u003cspan style=\"font-size: 16.0px; font-family: trebuchet ms;\"\u003e1.Fixed turn the lamp current to 0.1 times the value of the constant current (charge when used to identify whether the battery is full); \u003c\/span\u003e\u003cbr\u003e\u003cspan style=\"font-size: 16.0px; font-family: trebuchet ms;\"\u003e2. Increased input reverse polarity protection diode; \u003c\/span\u003e\u003cbr\u003e\u003cspan style=\"font-size: 16.0px; font-family: trebuchet ms;\"\u003e3. Increase the output of a backflow preventing diode to prevent when the electricity to charge the battery back in; \u003c\/span\u003e\u003cbr\u003e\u003cspan style=\"font-size: 16.0px; font-family: trebuchet ms;\"\u003e4. Using dedicated reference IC, and high-precision sampling resistor, so that the constant current is more stable, (20 degrees to 100 degrees, the constant current 1A, when the temperature drift of less than 1%). \u003c\/span\u003e\u003cbr\u003e\u003cspan style=\"font-size: 16.0px; font-family: trebuchet ms;\"\u003e \u003c\/span\u003e\u003cbr\u003e\u003cspan style=\"font-size: 16.0px; font-family: trebuchet ms;\"\u003eParticularly suitable for LED driver \u003c\/span\u003e\u003cbr\u003e\u003cspan style=\"font-size: 16.0px; font-family: trebuchet ms;\"\u003eHigh-power LED constant current drive \u003c\/span\u003e\u003cbr\u003e\u003cspan style=\"font-size: 16.0px; font-family: trebuchet ms;\"\u003eLithium battery charger (including ferroelectric) \u003c\/span\u003e\u003cbr\u003e\u003cspan style=\"font-size: 16.0px; font-family: trebuchet ms;\"\u003e4V, 6V, 12V, 14V, 24V battery charger \u003c\/span\u003e\u003cbr\u003e\u003cspan style=\"font-size: 16.0px; font-family: trebuchet ms;\"\u003eNickel cadmium, nickel metal hydride battery pack charger \u003c\/span\u003e\u003cbr\u003e\u003cspan style=\"font-size: 16.0px; font-family: trebuchet ms;\"\u003eSolar panels and wind turbines \u003c\/span\u003e\u003cbr\u003e\u003cspan style=\"font-size: 16.0px; font-family: trebuchet ms;\"\u003e \u003c\/span\u003e\u003cbr\u003e\u003cspan style=\"font-size: 20.0px; font-family: trebuchet ms;\"\u003e\u003cstrong\u003eSpecifications: \u003c\/strong\u003e\u003c\/span\u003e\u003cbr\u003e\u003cspan style=\"font-size: 16.0px; font-family: trebuchet ms;\"\u003eInput Voltage: 5-35V \u003c\/span\u003e\u003cbr\u003e\u003cspan style=\"font-size: 16.0px; font-family: trebuchet ms;\"\u003eOutput Voltage: Continuously adjustable from 1.25 V to 30V \u003c\/span\u003e\u003cbr\u003e\u003cspan style=\"font-size: 16.0px; font-family: trebuchet ms;\"\u003eRated Output Current: 3A \u003c\/span\u003e\u003cbr\u003e\u003cspan style=\"font-size: 16.0px; font-family: trebuchet ms;\"\u003eMax. Output Current:4A(more than 15W, preferably with a heat sink) \u003c\/span\u003e\u003cbr\u003e\u003cspan style=\"font-size: 16.0px; font-family: trebuchet ms;\"\u003eSize (L x W x H): Approx. 1.9 x 0.95 x 0.5 inch \/ 4.8 x 2.4 x1.3cm \u003c\/span\u003e\u003cbr\u003e\u003cspan style=\"font-size: 16.0px; font-family: trebuchet ms;\"\u003eIndicator Light \u003c\/span\u003e\u003cbr\u003e\u003cspan style=\"font-size: 16.0px; font-family: trebuchet ms;\"\u003eConstant current indicator(red) \u003c\/span\u003e\u003cbr\u003e\u003cspan style=\"font-size: 16.0px; font-family: trebuchet ms;\"\u003eCharging indicator(red) \u003c\/span\u003e\u003cbr\u003e\u003cspan style=\"font-size: 16.0px; font-family: trebuchet ms;\"\u003eCharged full (green) \u003c\/span\u003e\u003cbr\u003e\u003cspan style=\"font-size: 16.0px; font-family: trebuchet ms;\"\u003eBattery use: \u003c\/span\u003e\u003cbr\u003e\u003cspan style=\"font-size: 16.0px; font-family: trebuchet ms;\"\u003e \u003c\/span\u003e\u003cbr\u003e\u003cspan style=\"font-size: 16.0px; font-family: trebuchet ms;\"\u003el Make sure of the voltage and current of the battery you need to charge \u003c\/span\u003e\u003cbr\u003e\u003cspan style=\"font-size: 16.0px; font-family: trebuchet ms;\"\u003el Adjust the constant voltage potentiometer to make the output voltage same to the charge voltage \u003c\/span\u003e\u003cbr\u003e\u003cspan style=\"font-size: 16.0px; font-family: trebuchet ms;\"\u003el Potentiometer Adjustment Direction: Clockwise (increase), counterclockwise (decrease) \u003c\/span\u003e\u003cbr\u003e\u003cspan style=\"font-size: 16.0px; font-family: trebuchet ms;\"\u003eUse the multimeter in 10A current scale to measure output short-circuit current, and adjust the current potentiometer to make sure the output current to the expected charging current value \u003c\/span\u003e\u003cbr\u003e\u003cspan style=\"font-size: 16.0px; font-family: trebuchet ms;\"\u003el The charge current of transfer lamp is default 0.1 times of the charging current (constant current value) \u003c\/span\u003e\u003cbr\u003e\u003cspan style=\"font-size: 16.0px; font-family: trebuchet ms;\"\u003el Connected to the battery and try to charging (for previous 5 steps, module input terminal is connected to power source, output load is NOT connected to batteries) \u003c\/span\u003e\u003cbr\u003e\u003cspan style=\"font-size: 16.0px; font-family: trebuchet ms;\"\u003e \u003c\/span\u003e\u003cbr\u003e\u003cspan style=\"font-size: 16.0px; font-family: trebuchet ms;\"\u003eLED Constant Current Driver Use: \u003c\/span\u003e\u003cbr\u003e\u003cspan style=\"font-size: 16.0px; font-family: trebuchet ms;\"\u003el Make sure operating current and Max operating Voltage of the LED you need to drive \u003c\/span\u003e\u003cbr\u003e\u003cspan style=\"font-size: 16.0px; font-family: trebuchet ms;\"\u003el Adjust the constant voltage potentiometer to make sure the output Voltage is up to LED Max operating Voltage \u003c\/span\u003e\u003cbr\u003e\u003cspan style=\"font-size: 16.0px; font-family: trebuchet ms;\"\u003eUse the multimeter in 10A current scale to measure output short-circuit current, and adjust the current potentiometer \u003c\/span\u003e\u003cbr\u003e\u003cspan style=\"font-size: 16.0px; font-family: trebuchet ms;\"\u003el to make sure the output current to the expected LED operating current \u003c\/span\u003e\u003cbr\u003e\u003cspan style=\"font-size: 16.0px; font-family: trebuchet ms;\"\u003el Join LED, test (For the above 3 steps, module input terminal is connected to power source, output load is NOT connected to LED) \u003c\/span\u003e\u003cbr\u003e\u003cspan style=\"font-size: 16.0px; font-family: trebuchet ms;\"\u003e \u003c\/span\u003e\u003cbr\u003e\u003cspan style=\"font-size: 20.0px; font-family: trebuchet ms;\"\u003e\u003cstrong\u003ePackage included: \u003c\/strong\u003e\u003c\/span\u003e\u003cbr\u003e\u003cspan style=\"font-size: 16.0px; font-family: trebuchet ms;\"\u003e1 x Adjustable Power Supply Module\u003c\/span\u003e\u003c\/p\u003e\n\u003cp\u003e \u003c\/p\u003e\n\u003cp\u003e \u003c\/p\u003e"}
-
Translation missing: en.products.product.regular_price $8.99 USD{"id":2513526194234,"title":"DC DC Step Down Power Supply Module LM2596 Constant Current Adjustable Voltage Board","handle":"dc-dc-5-35v-to-1-25-30v-3a-step-down-buck-power-supply-module-lm2596-constant-current-adjustable-voltage-regulator-board","description":"\u003cwidget data-widget-type=\"customText\" id=\"33684419\" title=\"Head\" type=\"custom\"\u003e\u003c\/widget\u003e\n\u003cp\u003e\u003cstrong style=\"font-family: 'trebuchet ms'; font-size: 20px;\"\u003eUpdate content: \u003c\/strong\u003e\u003c\/p\u003e\n\u003cp\u003e\u003cspan style=\"font-size: 16.0px; font-family: trebuchet ms;\"\u003e1.Fixed turn the lamp current to 0.1 times the value of the constant current (charge when used to identify whether the battery is full); \u003c\/span\u003e\u003cbr\u003e\u003cspan style=\"font-size: 16.0px; font-family: trebuchet ms;\"\u003e2. Increased input reverse polarity protection diode; \u003c\/span\u003e\u003cbr\u003e\u003cspan style=\"font-size: 16.0px; font-family: trebuchet ms;\"\u003e3. Increase the output of a backflow preventing diode to prevent when the electricity to charge the battery back in; \u003c\/span\u003e\u003cbr\u003e\u003cspan style=\"font-size: 16.0px; font-family: trebuchet ms;\"\u003e4. Using dedicated reference IC, and high-precision sampling resistor, so that the constant current is more stable, (20 degrees to 100 degrees, the constant current 1A, when the temperature drift of less than 1%). \u003c\/span\u003e\u003cbr\u003e\u003cspan style=\"font-size: 16.0px; font-family: trebuchet ms;\"\u003e \u003c\/span\u003e\u003cbr\u003e\u003cspan style=\"font-size: 16.0px; font-family: trebuchet ms;\"\u003eParticularly suitable for LED driver \u003c\/span\u003e\u003cbr\u003e\u003cspan style=\"font-size: 16.0px; font-family: trebuchet ms;\"\u003eHigh-power LED constant current drive \u003c\/span\u003e\u003cbr\u003e\u003cspan style=\"font-size: 16.0px; font-family: trebuchet ms;\"\u003eLithium battery charger (including ferroelectric) \u003c\/span\u003e\u003cbr\u003e\u003cspan style=\"font-size: 16.0px; font-family: trebuchet ms;\"\u003e4V, 6V, 12V, 14V, 24V battery charger \u003c\/span\u003e\u003cbr\u003e\u003cspan style=\"font-size: 16.0px; font-family: trebuchet ms;\"\u003eNickel cadmium, nickel metal hydride battery pack charger \u003c\/span\u003e\u003cbr\u003e\u003cspan style=\"font-size: 16.0px; font-family: trebuchet ms;\"\u003eSolar panels and wind turbines \u003c\/span\u003e\u003cbr\u003e\u003cspan style=\"font-size: 16.0px; font-family: trebuchet ms;\"\u003e \u003c\/span\u003e\u003cbr\u003e\u003cspan style=\"font-size: 20.0px; font-family: trebuchet ms;\"\u003e\u003cstrong\u003eSpecifications: \u003c\/strong\u003e\u003c\/span\u003e\u003cbr\u003e\u003cspan style=\"font-size: 16.0px; font-family: trebuchet ms;\"\u003eInput Voltage: 5-35V \u003c\/span\u003e\u003cbr\u003e\u003cspan style=\"font-size: 16.0px; font-family: trebuchet ms;\"\u003eOutput Voltage: Continuously adjustable from 1.25 V to 30V \u003c\/span\u003e\u003cbr\u003e\u003cspan style=\"font-size: 16.0px; font-family: trebuchet ms;\"\u003eRated Output Current: 3A \u003c\/span\u003e\u003cbr\u003e\u003cspan style=\"font-size: 16.0px; font-family: trebuchet ms;\"\u003eMax. Output Current:4A(more than 15W, preferably with a heat sink) \u003c\/span\u003e\u003cbr\u003e\u003cspan style=\"font-size: 16.0px; font-family: trebuchet ms;\"\u003eSize (L x W x H): Approx. 1.9 x 0.95 x 0.5 inch \/ 4.8 x 2.4 x1.3cm \u003c\/span\u003e\u003cbr\u003e\u003cspan style=\"font-size: 16.0px; font-family: trebuchet ms;\"\u003eIndicator Light \u003c\/span\u003e\u003cbr\u003e\u003cspan style=\"font-size: 16.0px; font-family: trebuchet ms;\"\u003eConstant current indicator(red) \u003c\/span\u003e\u003cbr\u003e\u003cspan style=\"font-size: 16.0px; font-family: trebuchet ms;\"\u003eCharging indicator(red) \u003c\/span\u003e\u003cbr\u003e\u003cspan style=\"font-size: 16.0px; font-family: trebuchet ms;\"\u003eCharged full (green) \u003c\/span\u003e\u003cbr\u003e\u003cspan style=\"font-size: 16.0px; font-family: trebuchet ms;\"\u003eBattery use: \u003c\/span\u003e\u003cbr\u003e\u003cspan style=\"font-size: 16.0px; font-family: trebuchet ms;\"\u003e \u003c\/span\u003e\u003cbr\u003e\u003cspan style=\"font-size: 16.0px; font-family: trebuchet ms;\"\u003el Make sure of the voltage and current of the battery you need to charge \u003c\/span\u003e\u003cbr\u003e\u003cspan style=\"font-size: 16.0px; font-family: trebuchet ms;\"\u003el Adjust the constant voltage potentiometer to make the output voltage same to the charge voltage \u003c\/span\u003e\u003cbr\u003e\u003cspan style=\"font-size: 16.0px; font-family: trebuchet ms;\"\u003el Potentiometer Adjustment Direction: Clockwise (increase), counterclockwise (decrease) \u003c\/span\u003e\u003cbr\u003e\u003cspan style=\"font-size: 16.0px; font-family: trebuchet ms;\"\u003eUse the multimeter in 10A current scale to measure output short-circuit current, and adjust the current potentiometer to make sure the output current to the expected charging current value \u003c\/span\u003e\u003cbr\u003e\u003cspan style=\"font-size: 16.0px; font-family: trebuchet ms;\"\u003el The charge current of transfer lamp is default 0.1 times of the charging current (constant current value) \u003c\/span\u003e\u003cbr\u003e\u003cspan style=\"font-size: 16.0px; font-family: trebuchet ms;\"\u003el Connected to the battery and try to charging (for previous 5 steps, module input terminal is connected to power source, output load is NOT connected to batteries) \u003c\/span\u003e\u003cbr\u003e\u003cspan style=\"font-size: 16.0px; font-family: trebuchet ms;\"\u003e \u003c\/span\u003e\u003cbr\u003e\u003cspan style=\"font-size: 16.0px; font-family: trebuchet ms;\"\u003eLED Constant Current Driver Use: \u003c\/span\u003e\u003cbr\u003e\u003cspan style=\"font-size: 16.0px; font-family: trebuchet ms;\"\u003el Make sure operating current and Max operating Voltage of the LED you need to drive \u003c\/span\u003e\u003cbr\u003e\u003cspan style=\"font-size: 16.0px; font-family: trebuchet ms;\"\u003el Adjust the constant voltage potentiometer to make sure the output Voltage is up to LED Max operating Voltage \u003c\/span\u003e\u003cbr\u003e\u003cspan style=\"font-size: 16.0px; font-family: trebuchet ms;\"\u003eUse the multimeter in 10A current scale to measure output short-circuit current, and adjust the current potentiometer \u003c\/span\u003e\u003cbr\u003e\u003cspan style=\"font-size: 16.0px; font-family: trebuchet ms;\"\u003el to make sure the output current to the expected LED operating current \u003c\/span\u003e\u003cbr\u003e\u003cspan style=\"font-size: 16.0px; font-family: trebuchet ms;\"\u003el Join LED, test (For the above 3 steps, module input terminal is connected to power source, output load is NOT connected to LED) \u003c\/span\u003e\u003cbr\u003e\u003cspan style=\"font-size: 16.0px; font-family: trebuchet ms;\"\u003e \u003c\/span\u003e\u003cbr\u003e\u003cspan style=\"font-size: 20.0px; font-family: trebuchet ms;\"\u003e\u003cstrong\u003ePackage included: \u003c\/strong\u003e\u003c\/span\u003e\u003cbr\u003e\u003cspan style=\"font-size: 16.0px; font-family: trebuchet ms;\"\u003e1 x Adjustable Power Supply Module\u003c\/span\u003e\u003c\/p\u003e\n\u003cp\u003e \u003c\/p\u003e\n\u003cp\u003e \u003c\/p\u003e","published_at":"2019-09-11T14:58:00+08:00","created_at":"2019-09-11T14:58:01+08:00","vendor":"diymore","type":"Step Down Module","tags":[],"price":499,"price_min":499,"price_max":499,"available":true,"price_varies":false,"compare_at_price":null,"compare_at_price_min":0,"compare_at_price_max":0,"compare_at_price_varies":false,"variants":[{"id":23704873369658,"title":"Default Title","option1":"Default Title","option2":null,"option3":null,"sku":"010058","requires_shipping":true,"taxable":false,"featured_image":null,"available":true,"name":"DC DC Step Down Power Supply Module LM2596 Constant Current Adjustable Voltage Board","public_title":null,"options":["Default Title"],"price":499,"weight":0,"compare_at_price":null,"inventory_management":null,"barcode":"","requires_selling_plan":false,"selling_plan_allocations":[]}],"images":["\/\/www.diymore.cc\/cdn\/shop\/products\/010058_10c_992.jpg?v=1588661240","\/\/www.diymore.cc\/cdn\/shop\/products\/010058_10a_476.jpg?v=1588661240","\/\/www.diymore.cc\/cdn\/shop\/products\/010058_10w_200.jpg?v=1588661240"],"featured_image":"\/\/www.diymore.cc\/cdn\/shop\/products\/010058_10c_992.jpg?v=1588661240","options":["Title"],"media":[{"alt":"Dc Step Down Power Supply Module Lm2596 Constant Current Adjustable Voltage Board","id":6679075061831,"position":1,"preview_image":{"aspect_ratio":1.0,"height":1000,"width":1000,"src":"\/\/www.diymore.cc\/cdn\/shop\/products\/010058_10c_992.jpg?v=1588661240"},"aspect_ratio":1.0,"height":1000,"media_type":"image","src":"\/\/www.diymore.cc\/cdn\/shop\/products\/010058_10c_992.jpg?v=1588661240","width":1000},{"alt":"Dc Step Down Power Supply Module Lm2596 Constant Current Adjustable Voltage Board","id":6679075094599,"position":2,"preview_image":{"aspect_ratio":1.0,"height":1000,"width":1000,"src":"\/\/www.diymore.cc\/cdn\/shop\/products\/010058_10a_476.jpg?v=1588661240"},"aspect_ratio":1.0,"height":1000,"media_type":"image","src":"\/\/www.diymore.cc\/cdn\/shop\/products\/010058_10a_476.jpg?v=1588661240","width":1000},{"alt":"Dc Step Down Power Supply Module Lm2596 Constant Current Adjustable Voltage Board","id":6679075225671,"position":3,"preview_image":{"aspect_ratio":1.0,"height":1000,"width":1000,"src":"\/\/www.diymore.cc\/cdn\/shop\/products\/010058_10w_200.jpg?v=1588661240"},"aspect_ratio":1.0,"height":1000,"media_type":"image","src":"\/\/www.diymore.cc\/cdn\/shop\/products\/010058_10w_200.jpg?v=1588661240","width":1000}],"requires_selling_plan":false,"selling_plan_groups":[],"content":"\u003cwidget data-widget-type=\"customText\" id=\"33684419\" title=\"Head\" type=\"custom\"\u003e\u003c\/widget\u003e\n\u003cp\u003e\u003cstrong style=\"font-family: 'trebuchet ms'; font-size: 20px;\"\u003eUpdate content: \u003c\/strong\u003e\u003c\/p\u003e\n\u003cp\u003e\u003cspan style=\"font-size: 16.0px; font-family: trebuchet ms;\"\u003e1.Fixed turn the lamp current to 0.1 times the value of the constant current (charge when used to identify whether the battery is full); \u003c\/span\u003e\u003cbr\u003e\u003cspan style=\"font-size: 16.0px; font-family: trebuchet ms;\"\u003e2. Increased input reverse polarity protection diode; \u003c\/span\u003e\u003cbr\u003e\u003cspan style=\"font-size: 16.0px; font-family: trebuchet ms;\"\u003e3. Increase the output of a backflow preventing diode to prevent when the electricity to charge the battery back in; \u003c\/span\u003e\u003cbr\u003e\u003cspan style=\"font-size: 16.0px; font-family: trebuchet ms;\"\u003e4. Using dedicated reference IC, and high-precision sampling resistor, so that the constant current is more stable, (20 degrees to 100 degrees, the constant current 1A, when the temperature drift of less than 1%). \u003c\/span\u003e\u003cbr\u003e\u003cspan style=\"font-size: 16.0px; font-family: trebuchet ms;\"\u003e \u003c\/span\u003e\u003cbr\u003e\u003cspan style=\"font-size: 16.0px; font-family: trebuchet ms;\"\u003eParticularly suitable for LED driver \u003c\/span\u003e\u003cbr\u003e\u003cspan style=\"font-size: 16.0px; font-family: trebuchet ms;\"\u003eHigh-power LED constant current drive \u003c\/span\u003e\u003cbr\u003e\u003cspan style=\"font-size: 16.0px; font-family: trebuchet ms;\"\u003eLithium battery charger (including ferroelectric) \u003c\/span\u003e\u003cbr\u003e\u003cspan style=\"font-size: 16.0px; font-family: trebuchet ms;\"\u003e4V, 6V, 12V, 14V, 24V battery charger \u003c\/span\u003e\u003cbr\u003e\u003cspan style=\"font-size: 16.0px; font-family: trebuchet ms;\"\u003eNickel cadmium, nickel metal hydride battery pack charger \u003c\/span\u003e\u003cbr\u003e\u003cspan style=\"font-size: 16.0px; font-family: trebuchet ms;\"\u003eSolar panels and wind turbines \u003c\/span\u003e\u003cbr\u003e\u003cspan style=\"font-size: 16.0px; font-family: trebuchet ms;\"\u003e \u003c\/span\u003e\u003cbr\u003e\u003cspan style=\"font-size: 20.0px; font-family: trebuchet ms;\"\u003e\u003cstrong\u003eSpecifications: \u003c\/strong\u003e\u003c\/span\u003e\u003cbr\u003e\u003cspan style=\"font-size: 16.0px; font-family: trebuchet ms;\"\u003eInput Voltage: 5-35V \u003c\/span\u003e\u003cbr\u003e\u003cspan style=\"font-size: 16.0px; font-family: trebuchet ms;\"\u003eOutput Voltage: Continuously adjustable from 1.25 V to 30V \u003c\/span\u003e\u003cbr\u003e\u003cspan style=\"font-size: 16.0px; font-family: trebuchet ms;\"\u003eRated Output Current: 3A \u003c\/span\u003e\u003cbr\u003e\u003cspan style=\"font-size: 16.0px; font-family: trebuchet ms;\"\u003eMax. Output Current:4A(more than 15W, preferably with a heat sink) \u003c\/span\u003e\u003cbr\u003e\u003cspan style=\"font-size: 16.0px; font-family: trebuchet ms;\"\u003eSize (L x W x H): Approx. 1.9 x 0.95 x 0.5 inch \/ 4.8 x 2.4 x1.3cm \u003c\/span\u003e\u003cbr\u003e\u003cspan style=\"font-size: 16.0px; font-family: trebuchet ms;\"\u003eIndicator Light \u003c\/span\u003e\u003cbr\u003e\u003cspan style=\"font-size: 16.0px; font-family: trebuchet ms;\"\u003eConstant current indicator(red) \u003c\/span\u003e\u003cbr\u003e\u003cspan style=\"font-size: 16.0px; font-family: trebuchet ms;\"\u003eCharging indicator(red) \u003c\/span\u003e\u003cbr\u003e\u003cspan style=\"font-size: 16.0px; font-family: trebuchet ms;\"\u003eCharged full (green) \u003c\/span\u003e\u003cbr\u003e\u003cspan style=\"font-size: 16.0px; font-family: trebuchet ms;\"\u003eBattery use: \u003c\/span\u003e\u003cbr\u003e\u003cspan style=\"font-size: 16.0px; font-family: trebuchet ms;\"\u003e \u003c\/span\u003e\u003cbr\u003e\u003cspan style=\"font-size: 16.0px; font-family: trebuchet ms;\"\u003el Make sure of the voltage and current of the battery you need to charge \u003c\/span\u003e\u003cbr\u003e\u003cspan style=\"font-size: 16.0px; font-family: trebuchet ms;\"\u003el Adjust the constant voltage potentiometer to make the output voltage same to the charge voltage \u003c\/span\u003e\u003cbr\u003e\u003cspan style=\"font-size: 16.0px; font-family: trebuchet ms;\"\u003el Potentiometer Adjustment Direction: Clockwise (increase), counterclockwise (decrease) \u003c\/span\u003e\u003cbr\u003e\u003cspan style=\"font-size: 16.0px; font-family: trebuchet ms;\"\u003eUse the multimeter in 10A current scale to measure output short-circuit current, and adjust the current potentiometer to make sure the output current to the expected charging current value \u003c\/span\u003e\u003cbr\u003e\u003cspan style=\"font-size: 16.0px; font-family: trebuchet ms;\"\u003el The charge current of transfer lamp is default 0.1 times of the charging current (constant current value) \u003c\/span\u003e\u003cbr\u003e\u003cspan style=\"font-size: 16.0px; font-family: trebuchet ms;\"\u003el Connected to the battery and try to charging (for previous 5 steps, module input terminal is connected to power source, output load is NOT connected to batteries) \u003c\/span\u003e\u003cbr\u003e\u003cspan style=\"font-size: 16.0px; font-family: trebuchet ms;\"\u003e \u003c\/span\u003e\u003cbr\u003e\u003cspan style=\"font-size: 16.0px; font-family: trebuchet ms;\"\u003eLED Constant Current Driver Use: \u003c\/span\u003e\u003cbr\u003e\u003cspan style=\"font-size: 16.0px; font-family: trebuchet ms;\"\u003el Make sure operating current and Max operating Voltage of the LED you need to drive \u003c\/span\u003e\u003cbr\u003e\u003cspan style=\"font-size: 16.0px; font-family: trebuchet ms;\"\u003el Adjust the constant voltage potentiometer to make sure the output Voltage is up to LED Max operating Voltage \u003c\/span\u003e\u003cbr\u003e\u003cspan style=\"font-size: 16.0px; font-family: trebuchet ms;\"\u003eUse the multimeter in 10A current scale to measure output short-circuit current, and adjust the current potentiometer \u003c\/span\u003e\u003cbr\u003e\u003cspan style=\"font-size: 16.0px; font-family: trebuchet ms;\"\u003el to make sure the output current to the expected LED operating current \u003c\/span\u003e\u003cbr\u003e\u003cspan style=\"font-size: 16.0px; font-family: trebuchet ms;\"\u003el Join LED, test (For the above 3 steps, module input terminal is connected to power source, output load is NOT connected to LED) \u003c\/span\u003e\u003cbr\u003e\u003cspan style=\"font-size: 16.0px; font-family: trebuchet ms;\"\u003e \u003c\/span\u003e\u003cbr\u003e\u003cspan style=\"font-size: 20.0px; font-family: trebuchet ms;\"\u003e\u003cstrong\u003ePackage included: \u003c\/strong\u003e\u003c\/span\u003e\u003cbr\u003e\u003cspan style=\"font-size: 16.0px; font-family: trebuchet ms;\"\u003e1 x Adjustable Power Supply Module\u003c\/span\u003e\u003c\/p\u003e\n\u003cp\u003e \u003c\/p\u003e\n\u003cp\u003e \u003c\/p\u003e"}
-
Translation missing: en.products.product.regular_price $7.99 USD{"id":2513526194234,"title":"DC DC Step Down Power Supply Module LM2596 Constant Current Adjustable Voltage Board","handle":"dc-dc-5-35v-to-1-25-30v-3a-step-down-buck-power-supply-module-lm2596-constant-current-adjustable-voltage-regulator-board","description":"\u003cwidget data-widget-type=\"customText\" id=\"33684419\" title=\"Head\" type=\"custom\"\u003e\u003c\/widget\u003e\n\u003cp\u003e\u003cstrong style=\"font-family: 'trebuchet ms'; font-size: 20px;\"\u003eUpdate content: \u003c\/strong\u003e\u003c\/p\u003e\n\u003cp\u003e\u003cspan style=\"font-size: 16.0px; font-family: trebuchet ms;\"\u003e1.Fixed turn the lamp current to 0.1 times the value of the constant current (charge when used to identify whether the battery is full); \u003c\/span\u003e\u003cbr\u003e\u003cspan style=\"font-size: 16.0px; font-family: trebuchet ms;\"\u003e2. Increased input reverse polarity protection diode; \u003c\/span\u003e\u003cbr\u003e\u003cspan style=\"font-size: 16.0px; font-family: trebuchet ms;\"\u003e3. Increase the output of a backflow preventing diode to prevent when the electricity to charge the battery back in; \u003c\/span\u003e\u003cbr\u003e\u003cspan style=\"font-size: 16.0px; font-family: trebuchet ms;\"\u003e4. Using dedicated reference IC, and high-precision sampling resistor, so that the constant current is more stable, (20 degrees to 100 degrees, the constant current 1A, when the temperature drift of less than 1%). \u003c\/span\u003e\u003cbr\u003e\u003cspan style=\"font-size: 16.0px; font-family: trebuchet ms;\"\u003e \u003c\/span\u003e\u003cbr\u003e\u003cspan style=\"font-size: 16.0px; font-family: trebuchet ms;\"\u003eParticularly suitable for LED driver \u003c\/span\u003e\u003cbr\u003e\u003cspan style=\"font-size: 16.0px; font-family: trebuchet ms;\"\u003eHigh-power LED constant current drive \u003c\/span\u003e\u003cbr\u003e\u003cspan style=\"font-size: 16.0px; font-family: trebuchet ms;\"\u003eLithium battery charger (including ferroelectric) \u003c\/span\u003e\u003cbr\u003e\u003cspan style=\"font-size: 16.0px; font-family: trebuchet ms;\"\u003e4V, 6V, 12V, 14V, 24V battery charger \u003c\/span\u003e\u003cbr\u003e\u003cspan style=\"font-size: 16.0px; font-family: trebuchet ms;\"\u003eNickel cadmium, nickel metal hydride battery pack charger \u003c\/span\u003e\u003cbr\u003e\u003cspan style=\"font-size: 16.0px; font-family: trebuchet ms;\"\u003eSolar panels and wind turbines \u003c\/span\u003e\u003cbr\u003e\u003cspan style=\"font-size: 16.0px; font-family: trebuchet ms;\"\u003e \u003c\/span\u003e\u003cbr\u003e\u003cspan style=\"font-size: 20.0px; font-family: trebuchet ms;\"\u003e\u003cstrong\u003eSpecifications: \u003c\/strong\u003e\u003c\/span\u003e\u003cbr\u003e\u003cspan style=\"font-size: 16.0px; font-family: trebuchet ms;\"\u003eInput Voltage: 5-35V \u003c\/span\u003e\u003cbr\u003e\u003cspan style=\"font-size: 16.0px; font-family: trebuchet ms;\"\u003eOutput Voltage: Continuously adjustable from 1.25 V to 30V \u003c\/span\u003e\u003cbr\u003e\u003cspan style=\"font-size: 16.0px; font-family: trebuchet ms;\"\u003eRated Output Current: 3A \u003c\/span\u003e\u003cbr\u003e\u003cspan style=\"font-size: 16.0px; font-family: trebuchet ms;\"\u003eMax. Output Current:4A(more than 15W, preferably with a heat sink) \u003c\/span\u003e\u003cbr\u003e\u003cspan style=\"font-size: 16.0px; font-family: trebuchet ms;\"\u003eSize (L x W x H): Approx. 1.9 x 0.95 x 0.5 inch \/ 4.8 x 2.4 x1.3cm \u003c\/span\u003e\u003cbr\u003e\u003cspan style=\"font-size: 16.0px; font-family: trebuchet ms;\"\u003eIndicator Light \u003c\/span\u003e\u003cbr\u003e\u003cspan style=\"font-size: 16.0px; font-family: trebuchet ms;\"\u003eConstant current indicator(red) \u003c\/span\u003e\u003cbr\u003e\u003cspan style=\"font-size: 16.0px; font-family: trebuchet ms;\"\u003eCharging indicator(red) \u003c\/span\u003e\u003cbr\u003e\u003cspan style=\"font-size: 16.0px; font-family: trebuchet ms;\"\u003eCharged full (green) \u003c\/span\u003e\u003cbr\u003e\u003cspan style=\"font-size: 16.0px; font-family: trebuchet ms;\"\u003eBattery use: \u003c\/span\u003e\u003cbr\u003e\u003cspan style=\"font-size: 16.0px; font-family: trebuchet ms;\"\u003e \u003c\/span\u003e\u003cbr\u003e\u003cspan style=\"font-size: 16.0px; font-family: trebuchet ms;\"\u003el Make sure of the voltage and current of the battery you need to charge \u003c\/span\u003e\u003cbr\u003e\u003cspan style=\"font-size: 16.0px; font-family: trebuchet ms;\"\u003el Adjust the constant voltage potentiometer to make the output voltage same to the charge voltage \u003c\/span\u003e\u003cbr\u003e\u003cspan style=\"font-size: 16.0px; font-family: trebuchet ms;\"\u003el Potentiometer Adjustment Direction: Clockwise (increase), counterclockwise (decrease) \u003c\/span\u003e\u003cbr\u003e\u003cspan style=\"font-size: 16.0px; font-family: trebuchet ms;\"\u003eUse the multimeter in 10A current scale to measure output short-circuit current, and adjust the current potentiometer to make sure the output current to the expected charging current value \u003c\/span\u003e\u003cbr\u003e\u003cspan style=\"font-size: 16.0px; font-family: trebuchet ms;\"\u003el The charge current of transfer lamp is default 0.1 times of the charging current (constant current value) \u003c\/span\u003e\u003cbr\u003e\u003cspan style=\"font-size: 16.0px; font-family: trebuchet ms;\"\u003el Connected to the battery and try to charging (for previous 5 steps, module input terminal is connected to power source, output load is NOT connected to batteries) \u003c\/span\u003e\u003cbr\u003e\u003cspan style=\"font-size: 16.0px; font-family: trebuchet ms;\"\u003e \u003c\/span\u003e\u003cbr\u003e\u003cspan style=\"font-size: 16.0px; font-family: trebuchet ms;\"\u003eLED Constant Current Driver Use: \u003c\/span\u003e\u003cbr\u003e\u003cspan style=\"font-size: 16.0px; font-family: trebuchet ms;\"\u003el Make sure operating current and Max operating Voltage of the LED you need to drive \u003c\/span\u003e\u003cbr\u003e\u003cspan style=\"font-size: 16.0px; font-family: trebuchet ms;\"\u003el Adjust the constant voltage potentiometer to make sure the output Voltage is up to LED Max operating Voltage \u003c\/span\u003e\u003cbr\u003e\u003cspan style=\"font-size: 16.0px; font-family: trebuchet ms;\"\u003eUse the multimeter in 10A current scale to measure output short-circuit current, and adjust the current potentiometer \u003c\/span\u003e\u003cbr\u003e\u003cspan style=\"font-size: 16.0px; font-family: trebuchet ms;\"\u003el to make sure the output current to the expected LED operating current \u003c\/span\u003e\u003cbr\u003e\u003cspan style=\"font-size: 16.0px; font-family: trebuchet ms;\"\u003el Join LED, test (For the above 3 steps, module input terminal is connected to power source, output load is NOT connected to LED) \u003c\/span\u003e\u003cbr\u003e\u003cspan style=\"font-size: 16.0px; font-family: trebuchet ms;\"\u003e \u003c\/span\u003e\u003cbr\u003e\u003cspan style=\"font-size: 20.0px; font-family: trebuchet ms;\"\u003e\u003cstrong\u003ePackage included: \u003c\/strong\u003e\u003c\/span\u003e\u003cbr\u003e\u003cspan style=\"font-size: 16.0px; font-family: trebuchet ms;\"\u003e1 x Adjustable Power Supply Module\u003c\/span\u003e\u003c\/p\u003e\n\u003cp\u003e \u003c\/p\u003e\n\u003cp\u003e \u003c\/p\u003e","published_at":"2019-09-11T14:58:00+08:00","created_at":"2019-09-11T14:58:01+08:00","vendor":"diymore","type":"Step Down Module","tags":[],"price":499,"price_min":499,"price_max":499,"available":true,"price_varies":false,"compare_at_price":null,"compare_at_price_min":0,"compare_at_price_max":0,"compare_at_price_varies":false,"variants":[{"id":23704873369658,"title":"Default Title","option1":"Default Title","option2":null,"option3":null,"sku":"010058","requires_shipping":true,"taxable":false,"featured_image":null,"available":true,"name":"DC DC Step Down Power Supply Module LM2596 Constant Current Adjustable Voltage Board","public_title":null,"options":["Default Title"],"price":499,"weight":0,"compare_at_price":null,"inventory_management":null,"barcode":"","requires_selling_plan":false,"selling_plan_allocations":[]}],"images":["\/\/www.diymore.cc\/cdn\/shop\/products\/010058_10c_992.jpg?v=1588661240","\/\/www.diymore.cc\/cdn\/shop\/products\/010058_10a_476.jpg?v=1588661240","\/\/www.diymore.cc\/cdn\/shop\/products\/010058_10w_200.jpg?v=1588661240"],"featured_image":"\/\/www.diymore.cc\/cdn\/shop\/products\/010058_10c_992.jpg?v=1588661240","options":["Title"],"media":[{"alt":"Dc Step Down Power Supply Module Lm2596 Constant Current Adjustable Voltage Board","id":6679075061831,"position":1,"preview_image":{"aspect_ratio":1.0,"height":1000,"width":1000,"src":"\/\/www.diymore.cc\/cdn\/shop\/products\/010058_10c_992.jpg?v=1588661240"},"aspect_ratio":1.0,"height":1000,"media_type":"image","src":"\/\/www.diymore.cc\/cdn\/shop\/products\/010058_10c_992.jpg?v=1588661240","width":1000},{"alt":"Dc Step Down Power Supply Module Lm2596 Constant Current Adjustable Voltage Board","id":6679075094599,"position":2,"preview_image":{"aspect_ratio":1.0,"height":1000,"width":1000,"src":"\/\/www.diymore.cc\/cdn\/shop\/products\/010058_10a_476.jpg?v=1588661240"},"aspect_ratio":1.0,"height":1000,"media_type":"image","src":"\/\/www.diymore.cc\/cdn\/shop\/products\/010058_10a_476.jpg?v=1588661240","width":1000},{"alt":"Dc Step Down Power Supply Module Lm2596 Constant Current Adjustable Voltage Board","id":6679075225671,"position":3,"preview_image":{"aspect_ratio":1.0,"height":1000,"width":1000,"src":"\/\/www.diymore.cc\/cdn\/shop\/products\/010058_10w_200.jpg?v=1588661240"},"aspect_ratio":1.0,"height":1000,"media_type":"image","src":"\/\/www.diymore.cc\/cdn\/shop\/products\/010058_10w_200.jpg?v=1588661240","width":1000}],"requires_selling_plan":false,"selling_plan_groups":[],"content":"\u003cwidget data-widget-type=\"customText\" id=\"33684419\" title=\"Head\" type=\"custom\"\u003e\u003c\/widget\u003e\n\u003cp\u003e\u003cstrong style=\"font-family: 'trebuchet ms'; font-size: 20px;\"\u003eUpdate content: \u003c\/strong\u003e\u003c\/p\u003e\n\u003cp\u003e\u003cspan style=\"font-size: 16.0px; font-family: trebuchet ms;\"\u003e1.Fixed turn the lamp current to 0.1 times the value of the constant current (charge when used to identify whether the battery is full); \u003c\/span\u003e\u003cbr\u003e\u003cspan style=\"font-size: 16.0px; font-family: trebuchet ms;\"\u003e2. Increased input reverse polarity protection diode; \u003c\/span\u003e\u003cbr\u003e\u003cspan style=\"font-size: 16.0px; font-family: trebuchet ms;\"\u003e3. Increase the output of a backflow preventing diode to prevent when the electricity to charge the battery back in; \u003c\/span\u003e\u003cbr\u003e\u003cspan style=\"font-size: 16.0px; font-family: trebuchet ms;\"\u003e4. Using dedicated reference IC, and high-precision sampling resistor, so that the constant current is more stable, (20 degrees to 100 degrees, the constant current 1A, when the temperature drift of less than 1%). \u003c\/span\u003e\u003cbr\u003e\u003cspan style=\"font-size: 16.0px; font-family: trebuchet ms;\"\u003e \u003c\/span\u003e\u003cbr\u003e\u003cspan style=\"font-size: 16.0px; font-family: trebuchet ms;\"\u003eParticularly suitable for LED driver \u003c\/span\u003e\u003cbr\u003e\u003cspan style=\"font-size: 16.0px; font-family: trebuchet ms;\"\u003eHigh-power LED constant current drive \u003c\/span\u003e\u003cbr\u003e\u003cspan style=\"font-size: 16.0px; font-family: trebuchet ms;\"\u003eLithium battery charger (including ferroelectric) \u003c\/span\u003e\u003cbr\u003e\u003cspan style=\"font-size: 16.0px; font-family: trebuchet ms;\"\u003e4V, 6V, 12V, 14V, 24V battery charger \u003c\/span\u003e\u003cbr\u003e\u003cspan style=\"font-size: 16.0px; font-family: trebuchet ms;\"\u003eNickel cadmium, nickel metal hydride battery pack charger \u003c\/span\u003e\u003cbr\u003e\u003cspan style=\"font-size: 16.0px; font-family: trebuchet ms;\"\u003eSolar panels and wind turbines \u003c\/span\u003e\u003cbr\u003e\u003cspan style=\"font-size: 16.0px; font-family: trebuchet ms;\"\u003e \u003c\/span\u003e\u003cbr\u003e\u003cspan style=\"font-size: 20.0px; font-family: trebuchet ms;\"\u003e\u003cstrong\u003eSpecifications: \u003c\/strong\u003e\u003c\/span\u003e\u003cbr\u003e\u003cspan style=\"font-size: 16.0px; font-family: trebuchet ms;\"\u003eInput Voltage: 5-35V \u003c\/span\u003e\u003cbr\u003e\u003cspan style=\"font-size: 16.0px; font-family: trebuchet ms;\"\u003eOutput Voltage: Continuously adjustable from 1.25 V to 30V \u003c\/span\u003e\u003cbr\u003e\u003cspan style=\"font-size: 16.0px; font-family: trebuchet ms;\"\u003eRated Output Current: 3A \u003c\/span\u003e\u003cbr\u003e\u003cspan style=\"font-size: 16.0px; font-family: trebuchet ms;\"\u003eMax. Output Current:4A(more than 15W, preferably with a heat sink) \u003c\/span\u003e\u003cbr\u003e\u003cspan style=\"font-size: 16.0px; font-family: trebuchet ms;\"\u003eSize (L x W x H): Approx. 1.9 x 0.95 x 0.5 inch \/ 4.8 x 2.4 x1.3cm \u003c\/span\u003e\u003cbr\u003e\u003cspan style=\"font-size: 16.0px; font-family: trebuchet ms;\"\u003eIndicator Light \u003c\/span\u003e\u003cbr\u003e\u003cspan style=\"font-size: 16.0px; font-family: trebuchet ms;\"\u003eConstant current indicator(red) \u003c\/span\u003e\u003cbr\u003e\u003cspan style=\"font-size: 16.0px; font-family: trebuchet ms;\"\u003eCharging indicator(red) \u003c\/span\u003e\u003cbr\u003e\u003cspan style=\"font-size: 16.0px; font-family: trebuchet ms;\"\u003eCharged full (green) \u003c\/span\u003e\u003cbr\u003e\u003cspan style=\"font-size: 16.0px; font-family: trebuchet ms;\"\u003eBattery use: \u003c\/span\u003e\u003cbr\u003e\u003cspan style=\"font-size: 16.0px; font-family: trebuchet ms;\"\u003e \u003c\/span\u003e\u003cbr\u003e\u003cspan style=\"font-size: 16.0px; font-family: trebuchet ms;\"\u003el Make sure of the voltage and current of the battery you need to charge \u003c\/span\u003e\u003cbr\u003e\u003cspan style=\"font-size: 16.0px; font-family: trebuchet ms;\"\u003el Adjust the constant voltage potentiometer to make the output voltage same to the charge voltage \u003c\/span\u003e\u003cbr\u003e\u003cspan style=\"font-size: 16.0px; font-family: trebuchet ms;\"\u003el Potentiometer Adjustment Direction: Clockwise (increase), counterclockwise (decrease) \u003c\/span\u003e\u003cbr\u003e\u003cspan style=\"font-size: 16.0px; font-family: trebuchet ms;\"\u003eUse the multimeter in 10A current scale to measure output short-circuit current, and adjust the current potentiometer to make sure the output current to the expected charging current value \u003c\/span\u003e\u003cbr\u003e\u003cspan style=\"font-size: 16.0px; font-family: trebuchet ms;\"\u003el The charge current of transfer lamp is default 0.1 times of the charging current (constant current value) \u003c\/span\u003e\u003cbr\u003e\u003cspan style=\"font-size: 16.0px; font-family: trebuchet ms;\"\u003el Connected to the battery and try to charging (for previous 5 steps, module input terminal is connected to power source, output load is NOT connected to batteries) \u003c\/span\u003e\u003cbr\u003e\u003cspan style=\"font-size: 16.0px; font-family: trebuchet ms;\"\u003e \u003c\/span\u003e\u003cbr\u003e\u003cspan style=\"font-size: 16.0px; font-family: trebuchet ms;\"\u003eLED Constant Current Driver Use: \u003c\/span\u003e\u003cbr\u003e\u003cspan style=\"font-size: 16.0px; font-family: trebuchet ms;\"\u003el Make sure operating current and Max operating Voltage of the LED you need to drive \u003c\/span\u003e\u003cbr\u003e\u003cspan style=\"font-size: 16.0px; font-family: trebuchet ms;\"\u003el Adjust the constant voltage potentiometer to make sure the output Voltage is up to LED Max operating Voltage \u003c\/span\u003e\u003cbr\u003e\u003cspan style=\"font-size: 16.0px; font-family: trebuchet ms;\"\u003eUse the multimeter in 10A current scale to measure output short-circuit current, and adjust the current potentiometer \u003c\/span\u003e\u003cbr\u003e\u003cspan style=\"font-size: 16.0px; font-family: trebuchet ms;\"\u003el to make sure the output current to the expected LED operating current \u003c\/span\u003e\u003cbr\u003e\u003cspan style=\"font-size: 16.0px; font-family: trebuchet ms;\"\u003el Join LED, test (For the above 3 steps, module input terminal is connected to power source, output load is NOT connected to LED) \u003c\/span\u003e\u003cbr\u003e\u003cspan style=\"font-size: 16.0px; font-family: trebuchet ms;\"\u003e \u003c\/span\u003e\u003cbr\u003e\u003cspan style=\"font-size: 20.0px; font-family: trebuchet ms;\"\u003e\u003cstrong\u003ePackage included: \u003c\/strong\u003e\u003c\/span\u003e\u003cbr\u003e\u003cspan style=\"font-size: 16.0px; font-family: trebuchet ms;\"\u003e1 x Adjustable Power Supply Module\u003c\/span\u003e\u003c\/p\u003e\n\u003cp\u003e \u003c\/p\u003e\n\u003cp\u003e \u003c\/p\u003e"}


