
LED/LCD LCD Module Auxiliary Power Supply 5V-24V Repair Module 55 Inches Or Less Universal CA-515


LED/LCD LCD Module Auxiliary Power Supply 5V-24V Repair Module 55 Inches Or Less Universal CA-515
SKU:XJ0047
Regular price
$5.99
![]()
- guaranteeQuality checked
- Special gift cardsSpecial gift cards
- Free return Within 60 days
- Consultancy86-0755-85201155
Reference description:
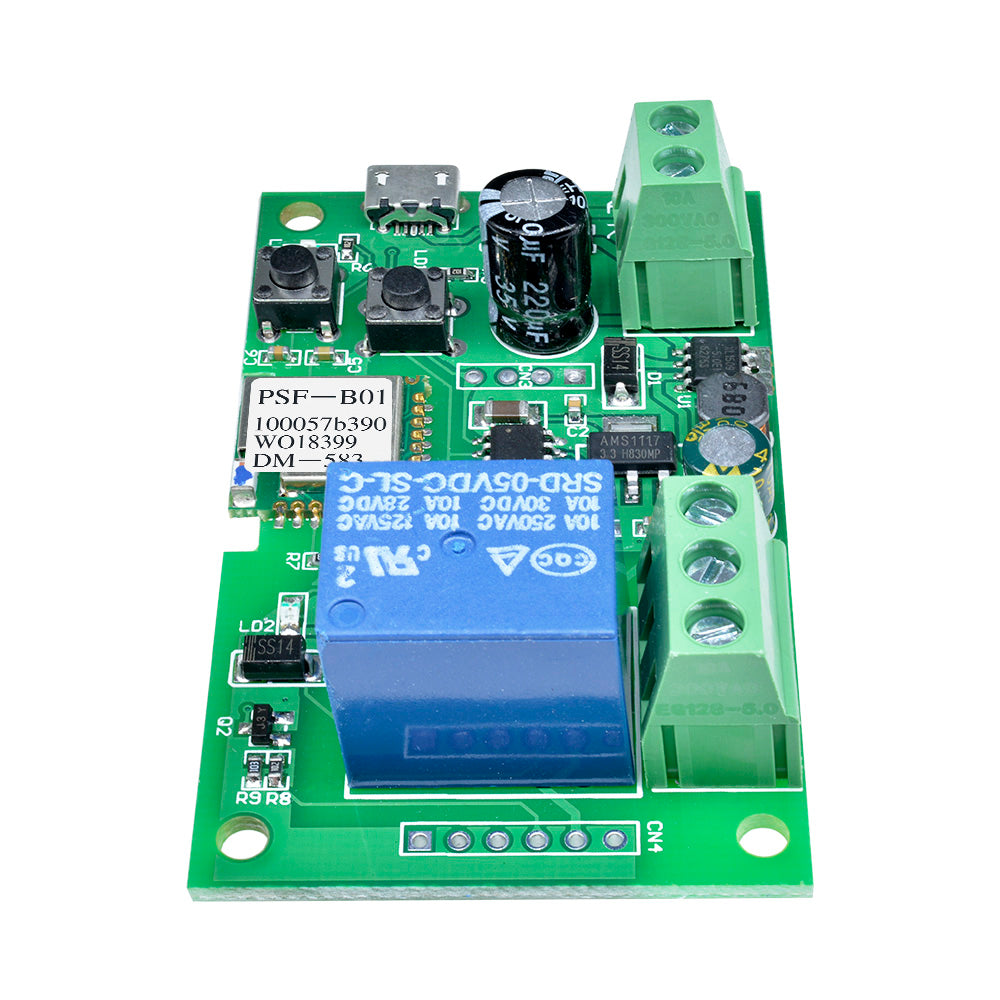
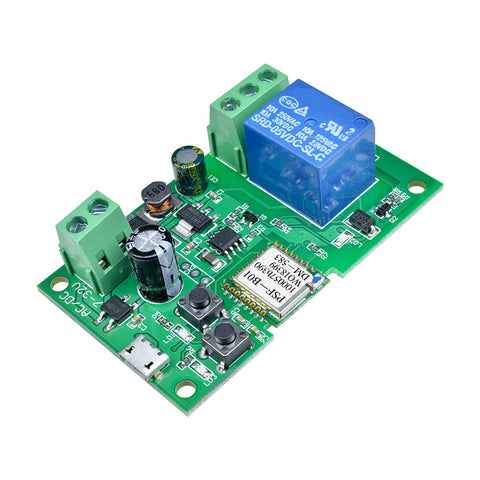
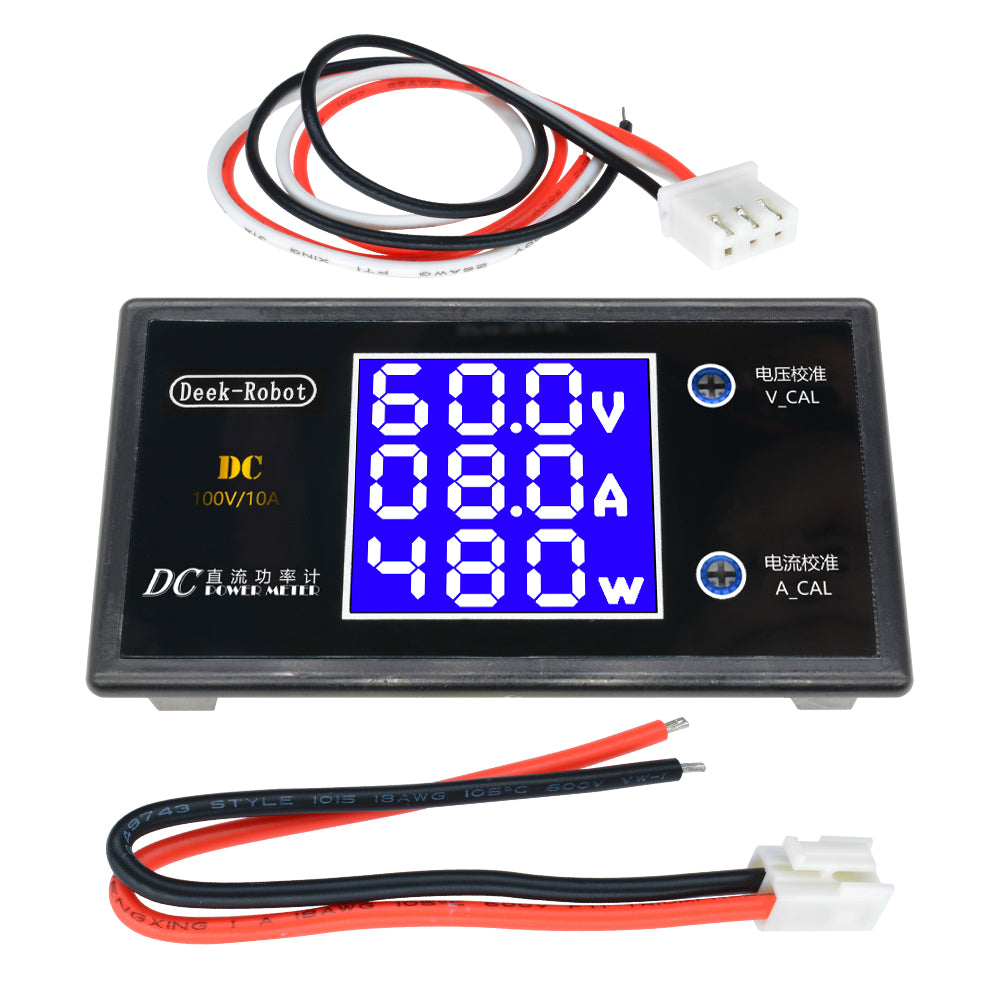
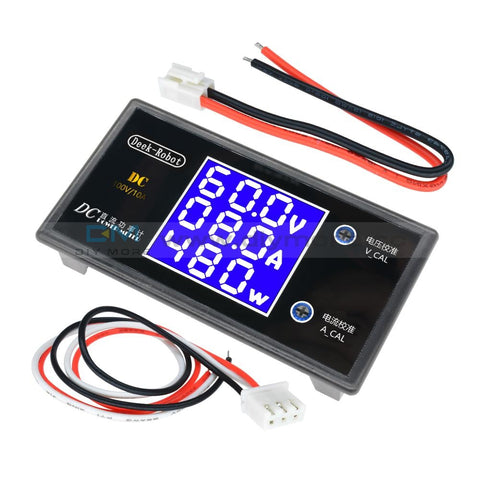
- LED/LCD LCD auxiliary power supply 5V module
- Universal 5-24V repair module under 55 inches
- The use power can reach 36W, simple installation
- After checking that the +300V DC voltage is normal, confirm that the switching transformer and secondary peripheral components are normal, then confirm that the load is not short-circuited, and then enter the following operation. .
- First remove the MOs tube or thick film C on the original machine, put the module close to the heat sink, and then fix it on the heat sink with a screw lock (the lock screw cannot be pressed too tightly, otherwise the module will be damaged).
- Disconnect the cross in the actual circuit as shown in the figure, and connect the color lines of the module as shown in the figure. It must not be wrongly connected. Only after repeated verification and no wrong connection, can the module be turned on. Remember! The lead cannot be extended under unnecessary circumstances, otherwise it will affect the normal operation.
- Red line: connect the main voltage +300V through the switching voltage device (that is, the original MOS tube D pole, thick film ICD pole).
- Black wire: connect to the negative pole, that is, the hot ground of the power tube.
- Blue line: connect to the main voltage of the original machine (3.3V or 5V) stabilized optocoupler 4 feet (some original machines have multiple optocouplers in parallel according to the original machine
- Method) 3 feet are grounded.
- White wire: connect to the rectifier diode of the feedback coil of the original switch transformer (as shown in the figure).
- green wire: connect to the main voltage of the original machine +300V
Purchasing & Delivery
Before you make your purchase, it’s helpful to know the measurements of the area you plan to place the furniture. You should also measure any doorways and hallways through which the furniture will pass to get to its final destination.Picking up at the store
Shopify Shop requires that all products are properly inspected BEFORE you take it home to insure there are no surprises. Our team is happy to open all packages and will assist in the inspection process. We will then reseal packages for safe transport. We encourage all customers to bring furniture pads or blankets to protect the items during transport as well as rope or tie downs. Shopify Shop will not be responsible for damage that occurs after leaving the store or during transit. It is the purchaser’s responsibility to make sure the correct items are picked up and in good condition.Delivery
Customers are able to pick the next available delivery day that best fits their schedule. However, to route stops as efficiently as possible, Shopify Shop will provide the time frame. Customers will not be able to choose a time. You will be notified in advance of your scheduled time frame. Please make sure that a responsible adult (18 years or older) will be home at that time.In preparation for your delivery, please remove existing furniture, pictures, mirrors, accessories, etc. to prevent damages. Also insure that the area where you would like your furniture placed is clear of any old furniture and any other items that may obstruct the passageway of the delivery team. Shopify Shop will deliver, assemble, and set-up your new furniture purchase and remove all packing materials from your home. Our delivery crews are not permitted to move your existing furniture or other household items. Delivery personnel will attempt to deliver the purchased items in a safe and controlled manner but will not attempt to place furniture if they feel it will result in damage to the product or your home. Delivery personnel are unable to remove doors, hoist furniture or carry furniture up more than 3 flights of stairs. An elevator must be available for deliveries to the 4th floor and above.
Other Customers also buy: